Xpkit.02, rev7 back, Glass shade installation guide – Besa Lighting Brella (Mini Pendants 12V) User Manual
Page 6
All electrical connections and the installation of this fixture must be in agreement with local codes,
ordinances or the NEC (National Electric Code) or CEC (Canadian Electrical Code).
Do not connect this fixture to an electrical system that does not provide a means for equipment grounding.
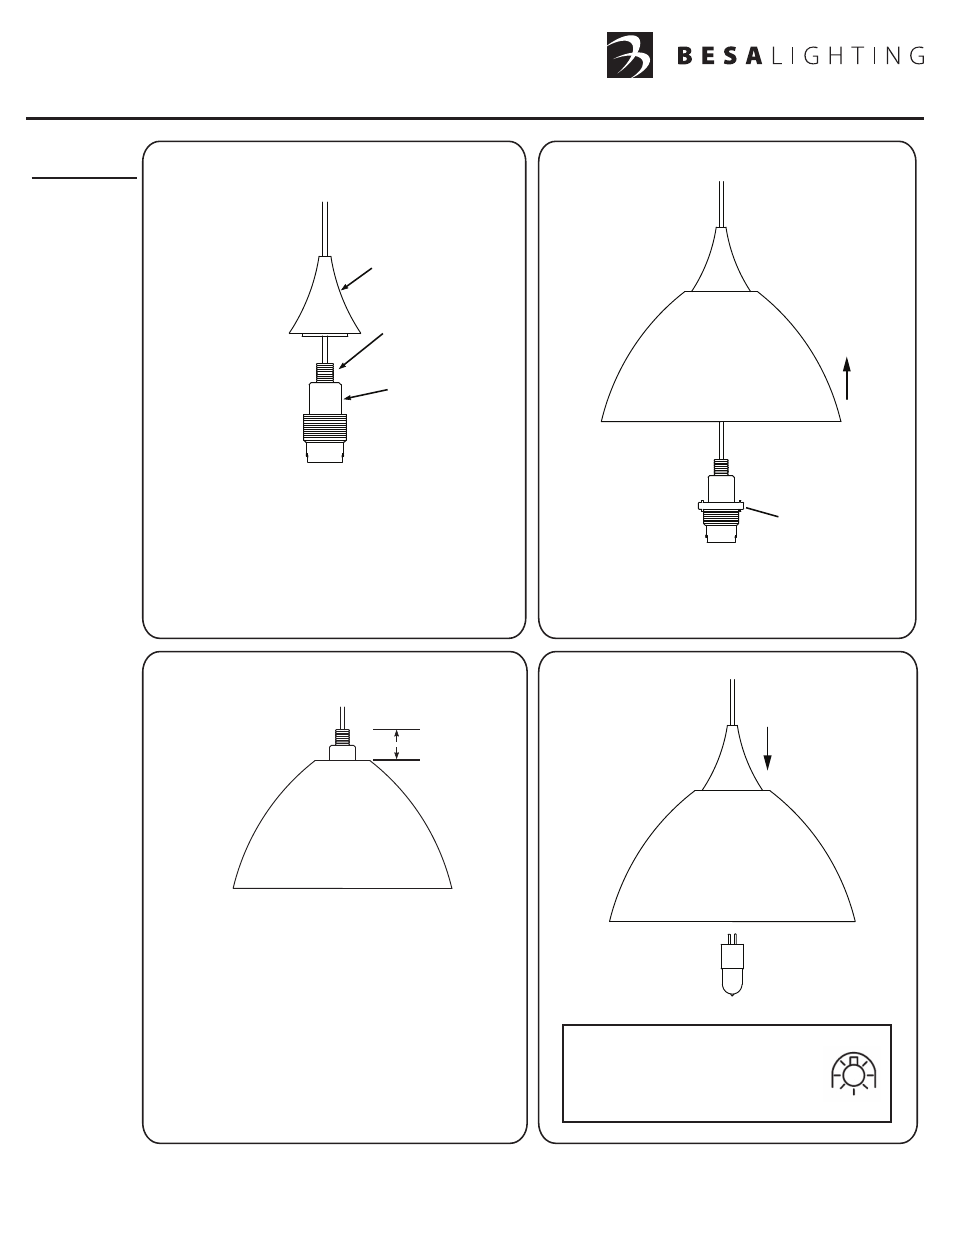
GLASS SHADE INSTALLATION GUIDE
6695 Taylor Rd. Blacklick, OH 43004
www.besalighting.com
Prior to installing Quick Connect Fitting,
the Decorative Cap and Threaded Nipple
must be installed. The Decorative Cap
and Threaded Nipple do not need to be
secured at this time.
Install the Glass Shade by positioning up over
the Lampholder and thread on the Check Ring
completely, as shown.
This Pendant Cord Set has been designed to
allow the Glass Shade to either rest freely or
to be locked in position. To lock down Glass
Shade, adjust the Threaded Nipple as shown.
Otherwise, thread completely into Lampholder.
NOTE:
If the Threaded Nipple can not extend to 11/16”,
lower the Check Ring as needed.
Decorative Cap
Lampholder
Threaded Nipple
11/16”
NOTE:
Glass Shade is for
instructional purposes.
Actual Glass Shade may
vary in size and shape.
Check
Ring
Relamp with a low-pressure type lamp,
either xenon or halogen. Packaging of
this lamp will typically indicate that it’s
“Suitable For Use in an Open Fixture”
or marked with the symbol shown.
Use With
these Models:
• Domi
(1743xx)
(1843xx)
(5743xx)
• Brella
(4679xx)
• Spazio
(6294xx)