Blackstar HT Club 50 User Manual
Page 5
10. Bass
The Bass control adjusts the amount of low-end frequencies in your tone. This amp
has an advanced tone shaping circuit which allows the tone to be varied from tight
and cutting when counter clockwise, to warm and thumping when fully clockwise.
11. Middle
The Middle control adjusts the amount of middle frequencies in your tone. The middle
frequencies are particularly important in setting the amount of ‘body’ your tone has.
With the Middle control set to its minimum position (fully counter clockwise) the
sound will be aggressive and scooped, a tone ideal for aggressive rhythm playing.
As the Middle control is increased (clockwise) the amount of ‘body’ is increased,
which is more suitable for sustained lead guitar tones.
12. Treble
The Treble control allows exact adjustment of the treble frequencies within the
sound. At low settings (counter clockwise) the sound will be warm and darker in
character. As the Treble control is increased (clockwise) the sound will become
brighter. At the maximum setting the sound will be aggressive and cutting.
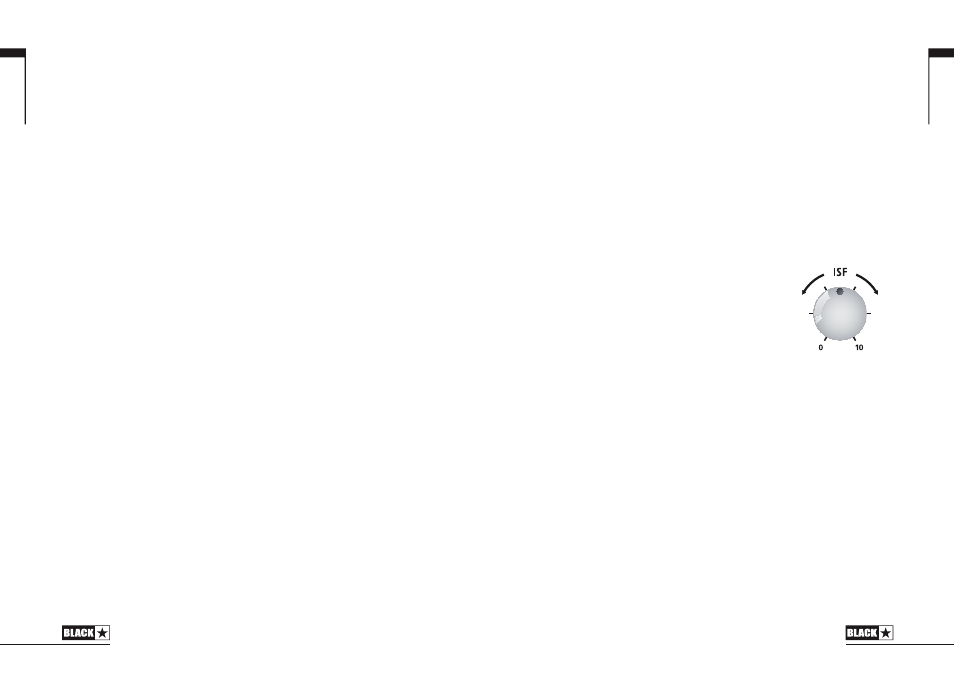
13. ISF (Infinite Shape Feature)
The patented ISF control works in conjunction with
the Bass, Middle and Treble controls. It allows you
to choose the exact tonal signature you prefer. Fully
counter clockwise has a more American characteristic
with a tight bottom-end and more aggressive middle,
and fully clockwise has a British characteristic which
is more ‘woody’ and less aggressive.
Unlike conventional ‘contour’ controls and parametric equalisation systems, the
Bass, Middle and Treble controls remain interactive with each other just like in a
traditional guitar amplifier tone stack. This leads to a very familiar, musical response.
14. Reverb
The Reverb control sets the overall level of the reverb effect. With the control fully
counter clockwise there will be no reverb. Turning the control clockwise will increase
the amount of reverb.
15. Master Volume
This controls the overall volume of your amplifier. Turning it clockwise increases the volume.
16. Power Indicator Light
The power indicator will light when the amplifier is switched on.
17. Standby
This switch enables the output stage. Always turn this switch on at least 30 seconds
after the Power switch (18). During short breaks in playing use just this switch to turn
‘off’ and ‘on’ the amplifier’s output.
18. Power
This switch is used to turn the amplifier on and off. You should always turn this
switch on before turning on the Standby switch (17).
English
9
Front Panel
1. Input
Plug your guitar in here. Always use a good quality screened guitar lead.
2. Clean Volume
This controls the volume of the Clean Channel. Turning it clockwise increases
the volume.
3. Clean Voice
In the out position the Clean Channel has a ‘boutique’ voicing, more focussed
to middle and top end, with the power amplifier damping configured like many
traditional Class A type amplifiers. This mode can produce pleasing levels of crunchy
overdrive at higher settings of the Clean Volume (2) control. With the switch in the
in position the Clean Channel has a more ‘modern’ voicing, with a greater bass
response and tighter sound from increased Class AB style power amplifier damping.
The gain structure is also altered to keep the sound clean at higher settings of the
Clean Volume (2) control.
4. Clean Tone
The Tone control allows adjustment of the balance between treble and bass
frequencies within the sound. At low settings (counter clockwise) the sound will be
warmer and darker in character. As the Tone control is rotated clockwise the sound
will become brighter.
5. Overdrive Indicator
When the red LED is on the Overdrive Channel is selected. When the LED is off the
Clean Channel is in operation.
6. Overdrive Select
Press this switch to select the Overdrive Channel.
NOTE: This switch must be ‘in’ for the footswitch to work.
7. Overdrive Gain
The Gain control adjusts the amount of overdrive or distortion on the Overdrive
Channel. Low settings (counter clockwise) will deliver a clean sound on the edge
of break-up. As the Gain control is increased clockwise the sound will become
more overdriven, moving through crunch tones until, at its maximum position, a full
distorted tone is arrived at.
8. Overdrive Voice
With the Voice switch in the out position, the Overdrive Channel has a ‘classic’
overdrive voicing, tight and crunchy. When the switch is in, more mid-band gain
is applied to give the overdrive sound more ‘body’ and a smoother overdrive
characteristic, while power amp feedback is reduced to give a livelier, looser response.
9. Overdrive Volume
This control adjusts the volume of the Overdrive Channel. Turning it clockwise
increases the volume.
English
8
USA
UK