Assemble side jacket assemblies to boiler, Rear jacket panels – Boyertown Solaia CSL6230 - CSL12590 Cast Iron Boiler User Manual
Page 13
13
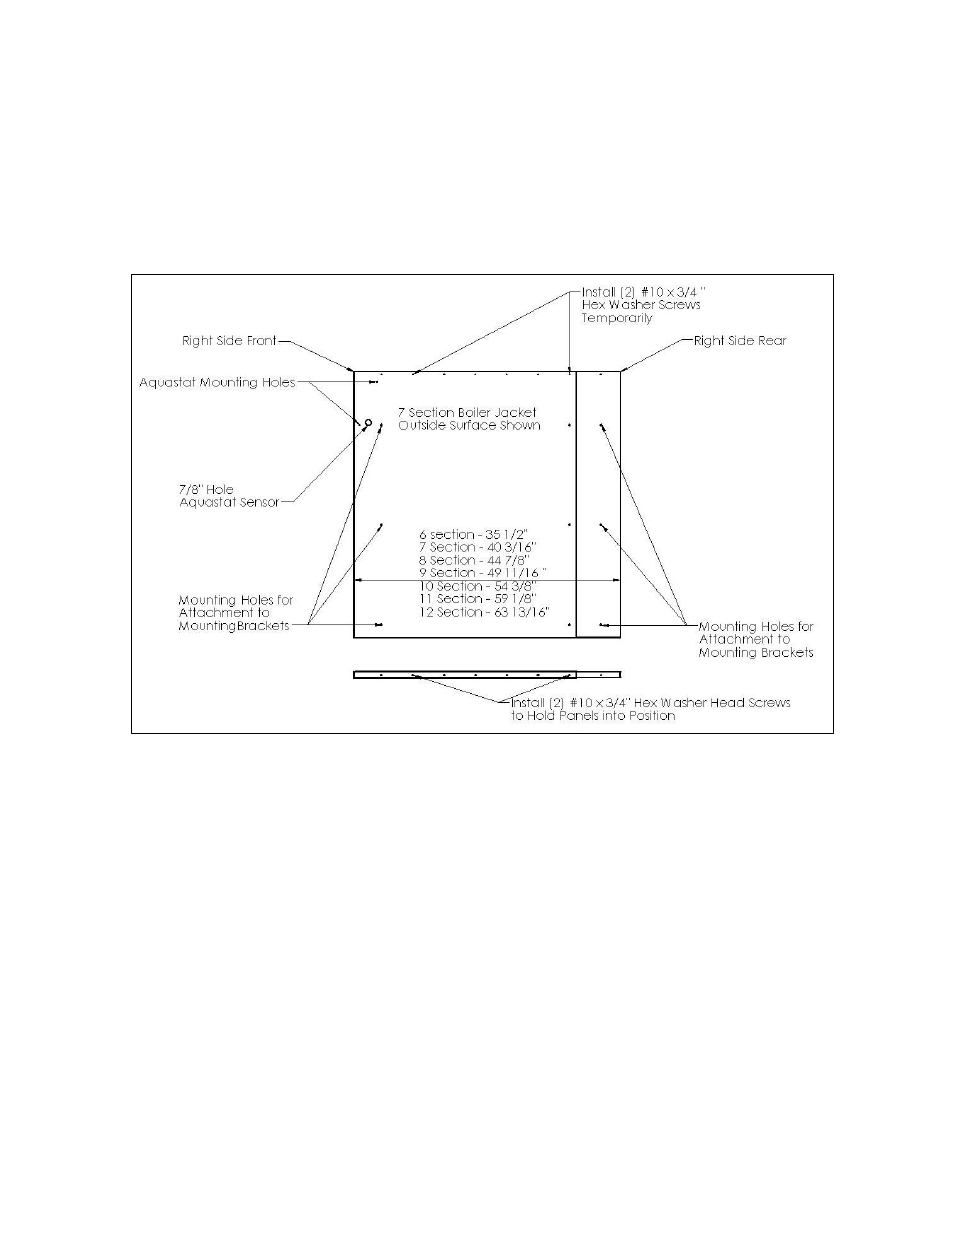
On a flat surface place the rear side upside down with the bottom channel facing up. Place the bottom
channel of the front panel over the channel of the rear panel and adjust the overall length of the side panel as
shown in Figure 4 below.
Place two #10 x 3/4” hex washer sheet metal screws into the bottom channel to lock the overall length of the
assembled side to the proper length as shown in the figure below.
Install two #10 x 3/4” hex washer sheet metal screws along the top to hold the two halves together
temporarily.
Figure 4
Repeat the above procedure for the left side jacket assembly.
Assemble Side Jacket Assemblies to Boiler
Align the six holes as indicated in Figure 4 with those located in the boiler mounting brackets. Fasten the
sides to the brackets using six #10 x 3/4” hex washer sheet metal screws.
Install three #8 x 1/2” hex washer head self drilling screws in the holes as indicated in Figure 4 to further
attach the sides together.
Remove the two #10 x 3/4” hex washer sheet metal screws which were installed temporarily along the top
of the jacket side assemblies.
Install two brass cup washers and two #10 x 5/8” Phillips flat head screws into the 1/8” holes on the front
edge of both the left and right side panel as shown in Figure 2
Rear Jacket Panels
Place rear panel insulation on back section of boiler with the foil facing outward.
Install the lower rear jacket panel to the side panels using four #10 x 3/4” hex washer sheet metal screws.
See Figure 3 and Figure 5.
Install the upper rear jacket panel to the side panels using four #10 x 3/4” hex washer sheet metal screws.
See Figure 3 and Figure 5.