Operation – Brinly P20-500 BH Push Spreader User Manual
Page 11
1008066 Rev. B
11
10
15
20
25
30
NOTE: When determining required setting, the edge of the
wingnut is the marker, and not the center of wingnut. When
the fl ow control handle is opened fully, the edge of the
wingnut should be on the 30 mark.
IMPORTANT! Remember to start and stop the spread while
moving. Do not open the fl ow control lever while stopped or
material will simply run onto the ground without being spread.
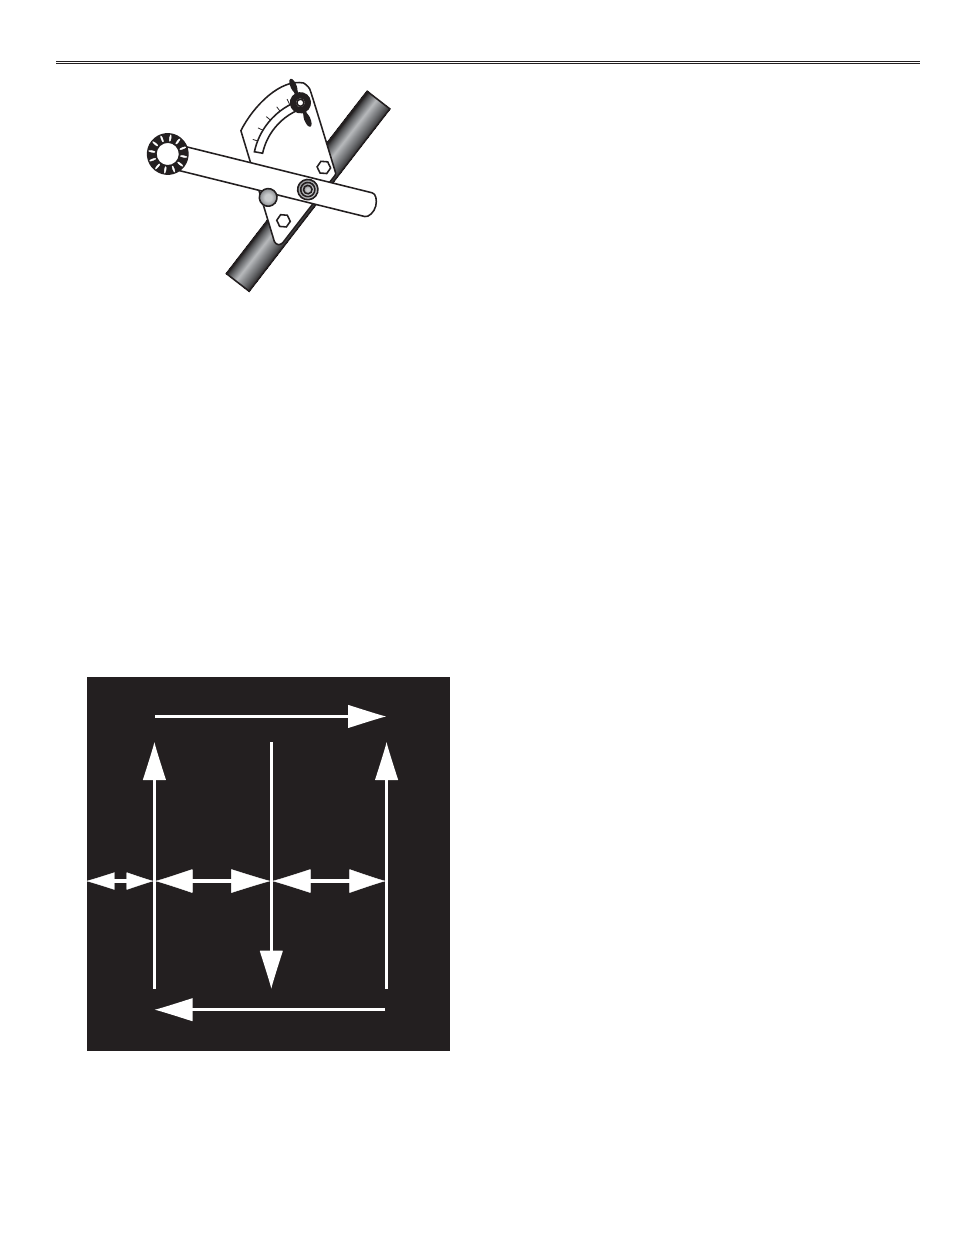
Spread header strips at each end of area. This allows a
turn-around area to align spreader for next pass. Then start
on the edge of the area to be spread. Spread until you hit
the header area. Turn the fl ow control handle to off while still
moving. Make your turn and start down the next row. Turn
the fl ow control handle back on as you hit the edge of your
header area. Turn the fl ow control handle on while move.
Header
6’
6’
3’
Header
Spreading Ice Melt
Remove screen from hopper to prevent damage.
Start with fl ow control setting at 20 and make a trial pass.
Adjust as needed to increase or decrease coverage.
When complete be sure to thoroughly clean spreader as ice
melt can be highly corrosive.
Re-install screen when complete.
Calibrating Shut Off Plate
See Figure 6 and Figure 7 on page 8 and 9.
MAINTENANCE
To ensure years of trouble free service, clean the spreader
thoroughly after each use. Move fl ow control handle as you
rinse to avoid build up of material.
For rust on frame parts, sand lightly and paint with enamel.
Periodically lubricate all bearing surfaces.
Never allow material to remain in hopper for extended
periods of time.
Periodically check all fasteners for tightness.
TROUBLESHOOTING
Flow control handle is hard to actuate or will not move:
Check for buildup of material between bottom of hopper and
shut off plate. Clean as needed.
OPERATION