Campomatic UC990B Tornado User Manual
Page 3
3
6
1
4
5
6
9
11
8
7
2
17
16
18
15
14
FRONT
BACK
12
13
11
12
3
10
Fig.2/1
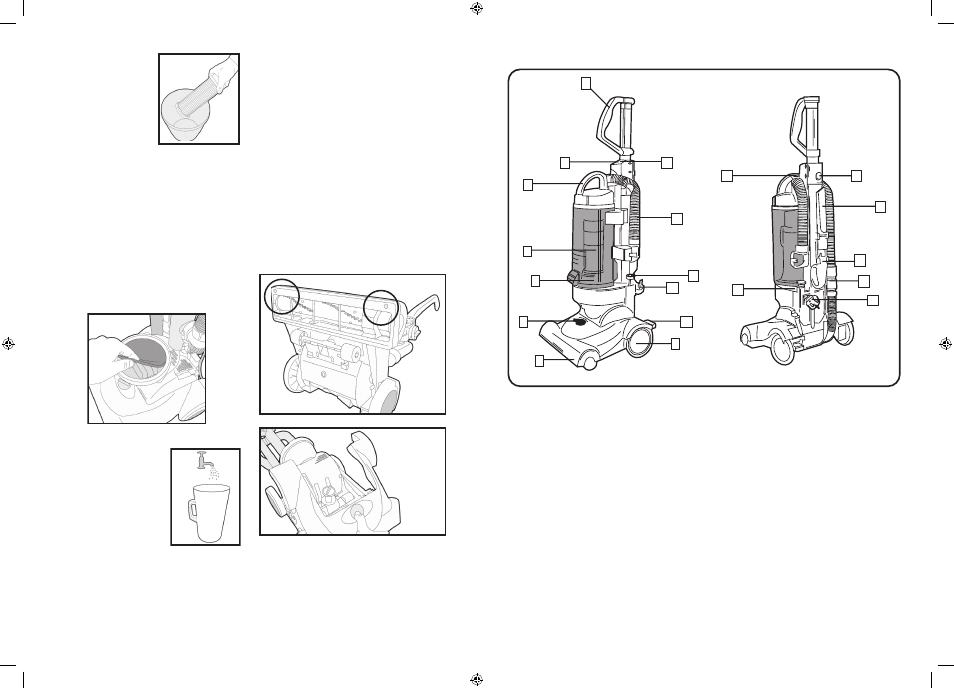
2. Parts Overview
7. Rotating Brushbar:
Removal & Replacement
Tools required: Phillips screwdriver.
WARNING: To reduce the risk of injury,
the power cord must be disconnected
before removing the dirt container, HEPA
filter, changing the filters or performing
maintenance/troubleshooting checks.
Occasionally, the power nozzle drive belt will
require changing, the frequency will depend
upon the amount of vacuum use.
1. Turn vacuum off and unplug from power
supply. Press handle release button and
lay vacuum cleaner on a flat, level surface.
2. Using a Phillips screwdriver, remove the
four (4) screws on the underside of the
cleaner (Fig.7/1) to release the top cover of
the vacuum head (Fig.7/2).
NOTE: The HEPA filter
may be washed by
running it under tap
water. We recommend
washing it once a
month or when suction
appears reduced.
Always allow HEPA
filter to thoroughly
air dry before replacing into the vacuum.
WARNING: Always empty the dirt container
and clean the HEPA filter before each use and
during prolonged usage. Never over fill the dirt
container. During prolonged usage remove
and clean the HEPA filter each time the dirt
container is emptied as motor damage may
occur.
Cleaning the Pre-Motor Filter
Underneath the dirt container is a pre-motor
filter. If found to be defective, please replace
(Fig.6/6).
Fig.7/1
Fig.7/2
Cleaning the Dirt Container
WARNING: To reduce
the risk of injury, the
power cord must be
disconnected
before
removing
the
dirt
container, HEPA filter,
changing the filters or
performing maintenance /
troubleshooting checks.
• The dirt container can be washed in
lukewarm water (max 40ºC) (Fig.6/7).
• Do not use strong detergents or wash in
dishwasher.
•
Telescopic handle
2. On/off button
3. Height adjuster button
4. Dirt container lid
5. HEPA filter
6. Dirt container
7. Brushbar height adjuster
8. Vacuum head
9. Wheel
10. Foot pedal
11. Power cord
12. Auto cord rewind
13. Extendible hose
14. Handle release button
15. Crevice tool
16. Dusting brush
17. Hose connector
18. Dirt container button release
Fig.6/5
Fig.6/6
Fig.6/7
3. Lift the right side of the brushbar and then
the left hand side and remove the brushbar
from the vacuum cleaner head (Fig.7/3).