3 clamping angle mounting (outdoor), Clamping angle mounting (outdoor) – Daktronics WP-2101 Water Polo LED Scoreboard User Manual
Page 11
Mechanical Installation
5
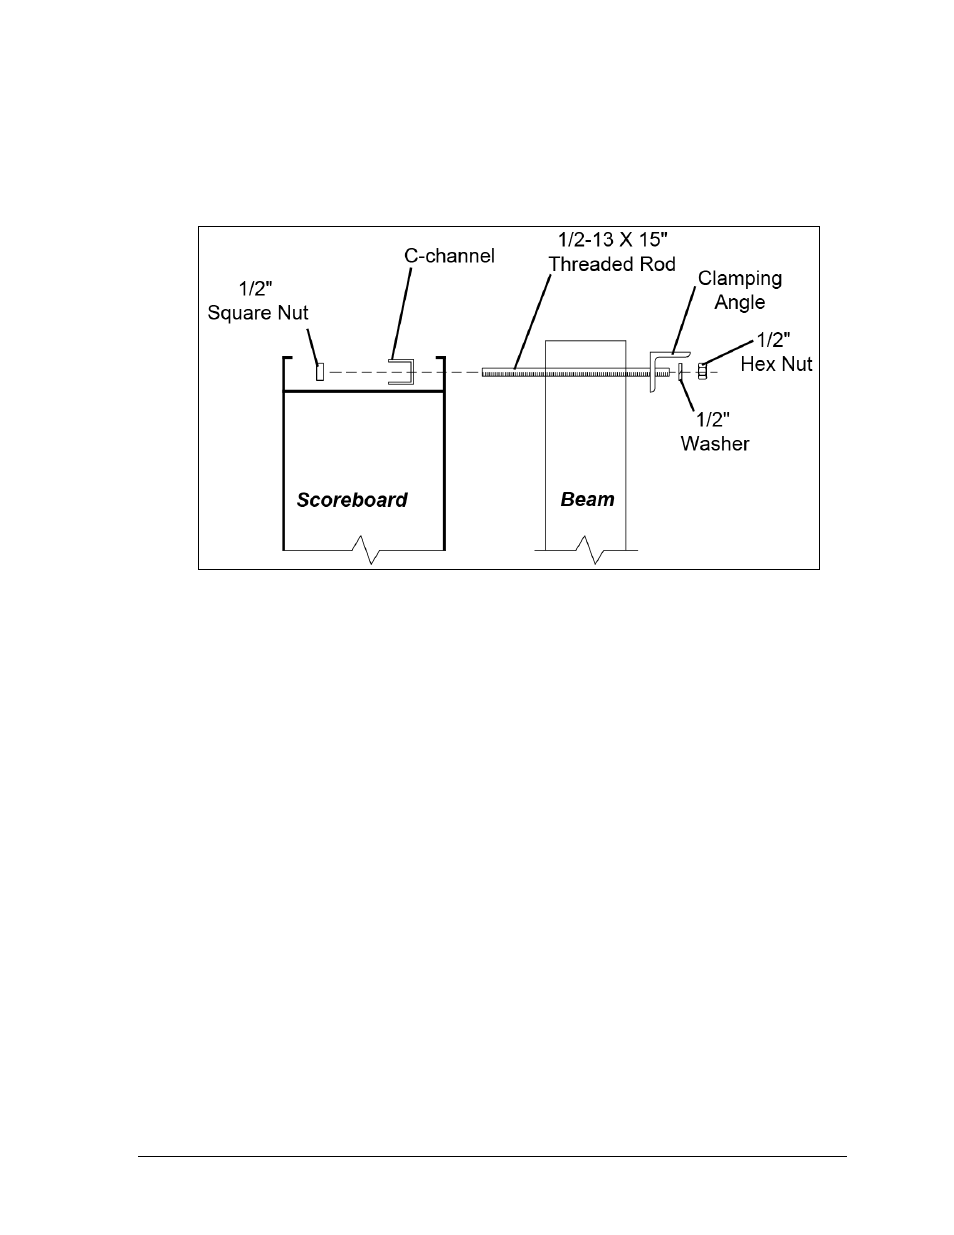
2.3 Clamping Angle Mounting (Outdoor)
Mounting hardware includes C-channels; rear clamping angles;
1
/
2
-13 x 15" threaded rods;
and
1
/
2
" square nuts, hex nuts, and lock washers. Refer to Figure 7 and Drawing A-1130246
in Appendix A.
1. Position the scoreboard at the front of the beams, and lift it to the desired height.
2. Place a C-channel against the upper rear flange of the scoreboard next to each beam.
3. With the C-channel as a template, use a
9
/
16
" bit to drill holes in the upper rear flange of
the scoreboard cabinet where the rods will pass through. The rods should be as close to
the beam as possible.
4. Push the rods through the holes in the rear flange of the scoreboard cabinet and into the
C-channel, and then thread
1
/
2
" square nuts onto the rods inside the C-channel.
5. Place clamping angles over each pair of rods and secure with
1
/
2
" lock washers and hex nuts.
6. Make final adjustments in the positioning of the scoreboard to ensure it is flush and level,
and then firmly tighten all of the
1
/
2
" hex nuts.
7. Repeat steps 2-6 for the lower rear flange of the scoreboard for every beam.
Figure 7: C-channel Mounting Method, Side View