Daktronics FLR3-100 User Manual
Installing the receiver
FLR3-100 Installation Quick Guide
Page 1 of 5
DD2291475 Rev 05
6 August 2014
PO Box 5128 201 Daktronics Drive, Brookings, SD 57006-5128
tel: 800-325-8766 fax: 605-697-4700
www.daktronics.com
This quick guide provides steps for installing the receiver and setting up a FLR3-100 key fob with a
Fuelight
TM
Gen 3 display.
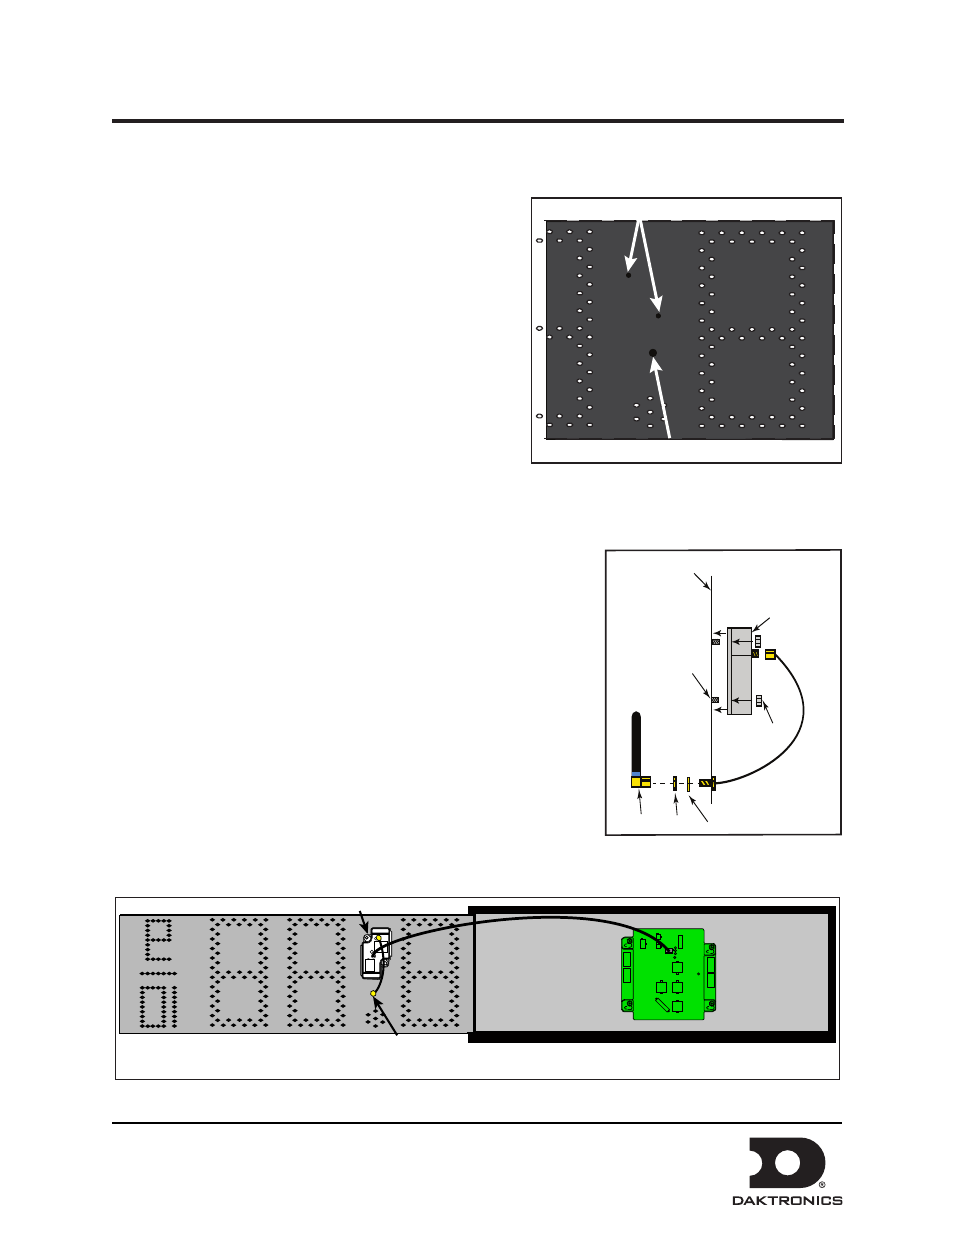
Installing the Receiver
1. Using a flat-head screwdriver, open the digit face to
access inside the digit cabinet.
2. Remove both antenna hole plugs from the digit face.
3. Place the receiver on to the mounting studs on the back
of the digit face. Refer to
4. Use a
5
/
16
" nut driver to secure the receiver to the
mounting studs using the two provided nuts.
5. Place the threaded end of the antenna cable through
the antenna hole.
6. Place the flat washer over the threaded end of the antenna cable.
7. Thread the provided nut on to the threaded end of the antenna
cable and tighten using an
11
/
32
" wrench.
8. Thread the female end of the antenna on to the threaded end of
the antenna cable and turn the antenna clockwise until snug. Refer
to
9. Connect the receiver cable from receiver to the driver. Refer to
10. Neatly secure any excess cable with cable ties.
11. Close and secure the digit face.
Antenna Hole Plug
AH
Mounting Stud
Figure 1: Digit Door Receiver Mounting Overview
Receiver
Antenna
Mounting Stud
Nut
Digit Face
Nut
Washer
Figure 2: Mounting Profile
Figure 3: Final Receiver Assembly
Digit Cabinet
Driver
Receiver
Antenna Cable