Ssn-100, Lifting, Mounting – Daktronics Sportsound Indoor (SSN-100/150) User Manual
Page 12: Aiming, Ssn-150
6
Mechanical Installation
SSN-100
Reference Drawings:
Shop Drawing; Sound System, SSN-100 ............................................ Drawing C-1152497
Lifting
The SSN-100 unit does not have lift eyes. It is light
enough to be raised along with personnel on a lift and
held in place while being mounted.
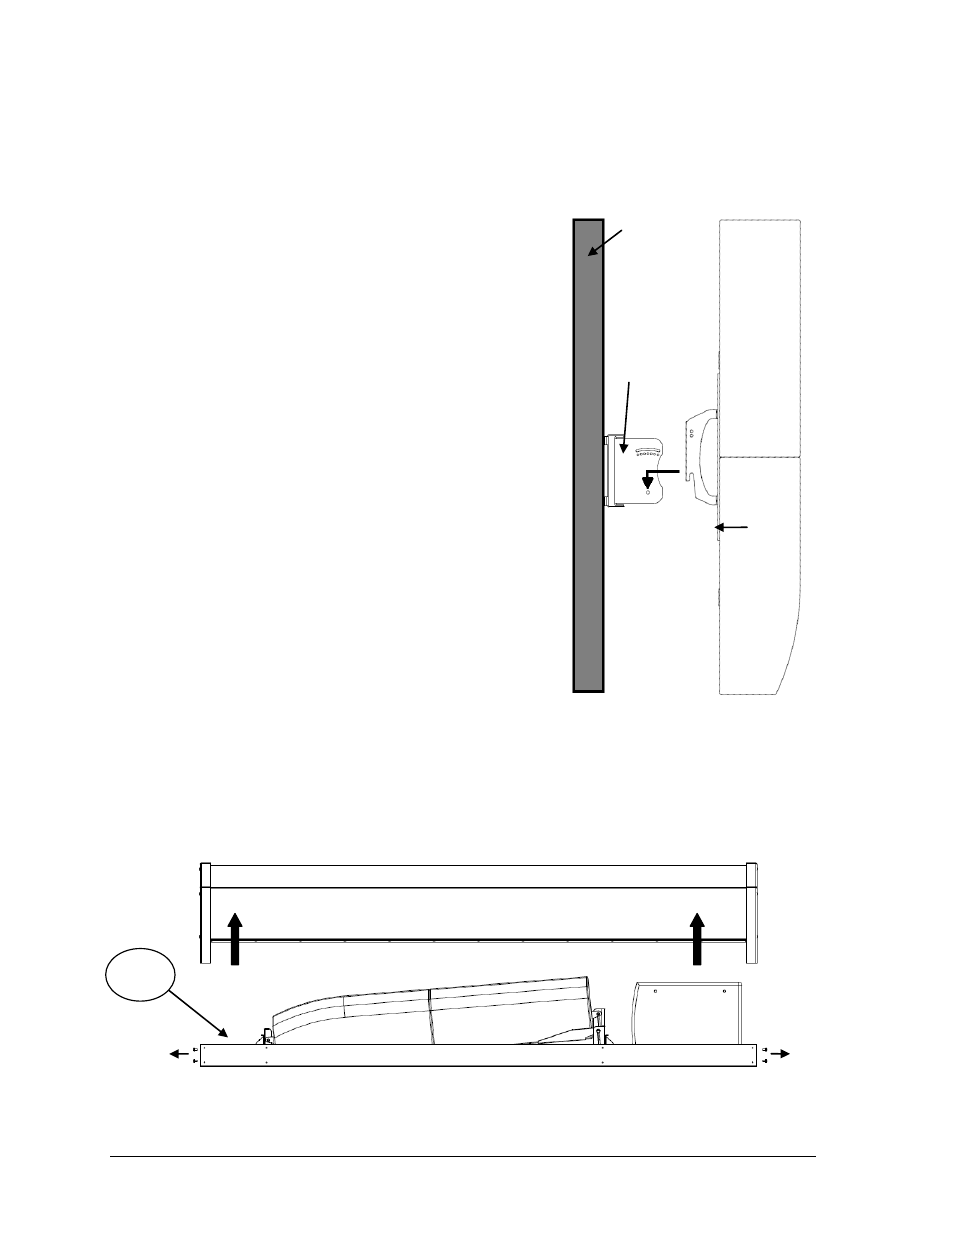
Mounting
Refer to the CBT 70J-1 and CBT 70JE-1 Bracket
Installation Guide for assembly/mounting
information. First connect both speakers using the
coupler plate and provided hardware. Install the
supplied swivel-tilt wall bracket to the wall using all
four screw holes, and then attach the speaker bracket
to the wall mounting bracket (Figure 6).
Aiming
Tools Required: Philips screwdriver
Once the cabinet has been mounted in place, it may be
necessary to adjust the direction of the speakers for
the individual facility. Drawing C-1152497 in
Appendix A provides speaker aiming instructions as
well as recommended angles to position the speakers,
based on the cabinet’s location in relation to the
seating area(s).
SSN-150
Before installing the SSN-150 sound cabinet, the front grille frame assembly must be
removed. Remove the four (4) rear screws on both ends of the sound cabinet, then lift the
grille frame assembly off and set aside (Figure 7). Note that two lift eyes are included inside
the cabinet, toward the bottom.
Figure 6: Bracket-to-bracket Attachment
Figure 7: Grill Frame Assembly Removal
Wall
Grille Frame Assembly
Sound Cabinet Assembly
1. Install Wall
Bracket.
2. Attach
Speaker
Bracket to
Wall Bracket.
Lift eye
location
Coupler
Plate