Echo Bear Cat 71110 User Manual
Instructions, Warning
Instructions
PN 71120
Rev. 070114
SUBJECT: TWO SPEED BLOWER
WITH 8-BLADE FAN, KIT # 71110
FITS MODELS: SC5540 (70054)
AND SC5614 (71020)
Before inspecting or servicing any part of this machine,
shut off power source, and make sure all moving parts
have come to a complete stop.
WARNING
BEFORE INSTALLING
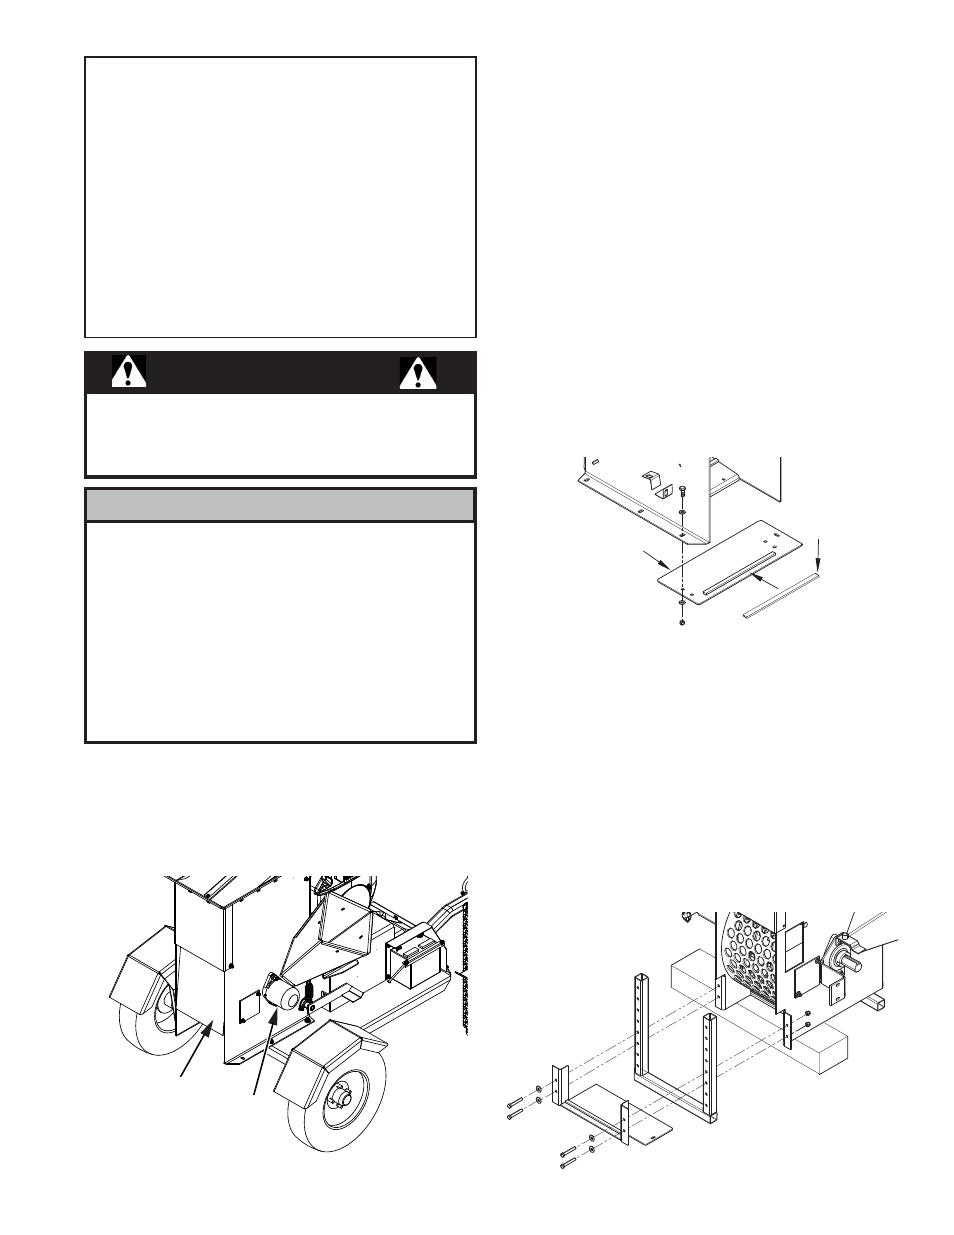
1. Remove the discharge door and rod. A new rod is
provided with the kit.
2. Remove the rotor shaft end cap as shown below. The
hardware will be used later.
REMOVE
DISCHARGE
DOOR
REMOVE
ROTOR
SHAFT END
CAP
INSTALL BELT GUARD SUPPORT PLATE
Two support plates are provided with the kit. One support
plate is for towable models, the other is for PTO models.
Select the appropriate plate for your machine.
TOWABLE MODELS
The mounting plate measures 16-1/4 x 7-1/2 inches. It
has key stock welded to one end.
NOTE: If your model does not have predrilled mounting
holes, align the mounting plate on the bottom of the
chipper/shredder, mark the positions of the holes on the
bottom of the chipper/shredder frame, and drill two 3/8"
holes through the metal on the frame.
To mount the plate:
1. Apply the seal to the plate as shown below.
2. Align the mounting plate with the 3/8" holes on the
bottom of the chipper/shredder.
3. Attach the mounting plate to the frame using 3/8" x 1"
bolts, washers, and nuts as shown below.
NOTE
Before mounting the blower to the towable chipper/
shredder, we recommend moving the axle to the rear
position on the trailer base as follows:
1. Raise the trailer so that the wheels clear the
ground.
2. Place blocks under the unit to suppport it.
3. Remove the bolts holding the axle to the trailer.
4. Position the axle so that the bolt holes align with
the two rear holes on the trailer base.
5. Attach the axle with the bolts and torque to the
proper setting.
PTO MODELS
The mounting plate has angled supports that bolt on to
the chipper/shredder support leg.
To mount the plate:
1. Support the discharge end of the chipper/shredder
by inserting blocks under the frame until the blocks
support the weight of the chipper/shredder.
2. Remove the four bolts that attach the leg stand to the
chipper/shredder.
3. Slide the mounting plate onto the leg stand.
4. Reattach the leg stand to the front of the chipper/
shredder with four (4) 3/8" x 2-1/2" bolts and nuts as
shown below.
MOUNTING
PLATE
SEAL