B. keys, C. ph measurements – Electro-Chemical Devices (ECD) H10 User Manual
Page 8
8
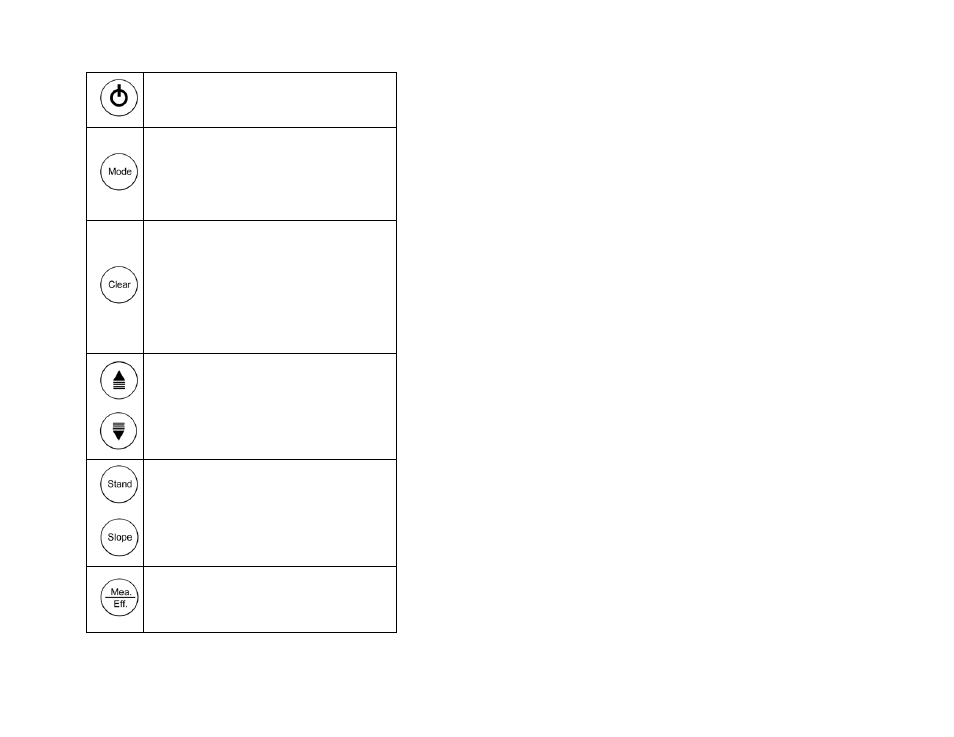
B. Keys
On/Off‐
Powers on and shuts off the meter.
Mode‐
Selects display mode. Pressing this key changes the
display sequentially to display pH‐AUTOLOCK, mV‐
AUTOLOCK, pH and mV. The calibration values will not
be affected by changing the display modes. In “pH
calibration”, press “Mode” key to exit the two point
calibration mode.
Clear‐
It is used to clear the unit when error signal appears. It
clears all calibration values stored in the internal
memory. Under normal use the key will not be activated
unless pressed and held for 2 seconds to prevent
accidental erasing stored memory. When the Clear key is
pressed, all segments of the LCD will be on. After about 2
seconds the unit will enter the pH‐AUTOLOCK mode. The
“AUTO” will be on and “STAND” will start to flash. This
means that the unit must be calibrated.
Up/Down‐
Increases or decreases the displayed value as desired
Stand/Slope‐
The Stand and Slope keys are used for dual or three
point pH calibration of the unit. Pressing and holding the
Stand key while turning on the power, will change the
buffer set to the other available buffer set.
Mea. / Eff.‐
The key is used to bring the unit out of the AUTOLOCK
condition when operating in the pH‐AUTOLOCK or mV‐
AUTOLOCK mode. Press and hold this key for 5 seconds,
the LCD will display the efficiency of the electrode.
13
[Note: For accurate measurements, it is recommended that pH
calibration is preformed once a week and after replacing the
electrode.]
C. pH Measurements
To take pH measurements, “STAND” and “SLOPE” icon must be
on, indicating the unit is either dual-point or three-point calibrated
and ready for measurements. If “STAND” and “SLOPE” flash,
perform a pH calibration before taking measurements.
Measurement with an ATC/Temp probe in the pH
AUTOLOCK mode
1.
Connect the pH electrode to the BNC connector and the
ATC/Temp probe to the ATC/Temp connector of the unit.
The “ATC” icon will light up.
2.
Press “Mode” key until “pH” icon and “AUTO” icon light
up.
3.
Rinse the pH electrode and ATC/temp probe with distilled
water and immerse in the sample to be measured.
Remove any air bubbles trapped around the probe by
shaking or stirring the probe.
4.
Press the “Mea.” key. The “WAIT” icon will start flashing.
The unit is waiting for a stable reading. The display will
track the pH value as sensed by the pH electrode and the
ATC/Temp probe.
5.
When the “WAIT” icon disappears, the reading is then
“HOLD” and will not respond to further changes from the
sample. The pH value shown is the pH value of the sample
at the displayed sample temperature.
[Note: For samples that are inherently unstable, the unit
will not AUTOLOCK. In these cases, use the pH NON‐
AUTOLOCK mode for measurements.]
Measurement with manual temperature
compensation in the pH‐AUTOLOCK mode
1.
Connect the pH electrode to the BNC connector of the
unit. The “MAN” icon will lit up. Set unit to display the
sample temperature by pressing the up and down keys (‐
10.0 to 120.0Ԩ).