Exacq Enterprise System Manager User Manual User Manual
Page 20
www.e
x
acq.com
Page 20 of 37
6/9/2015
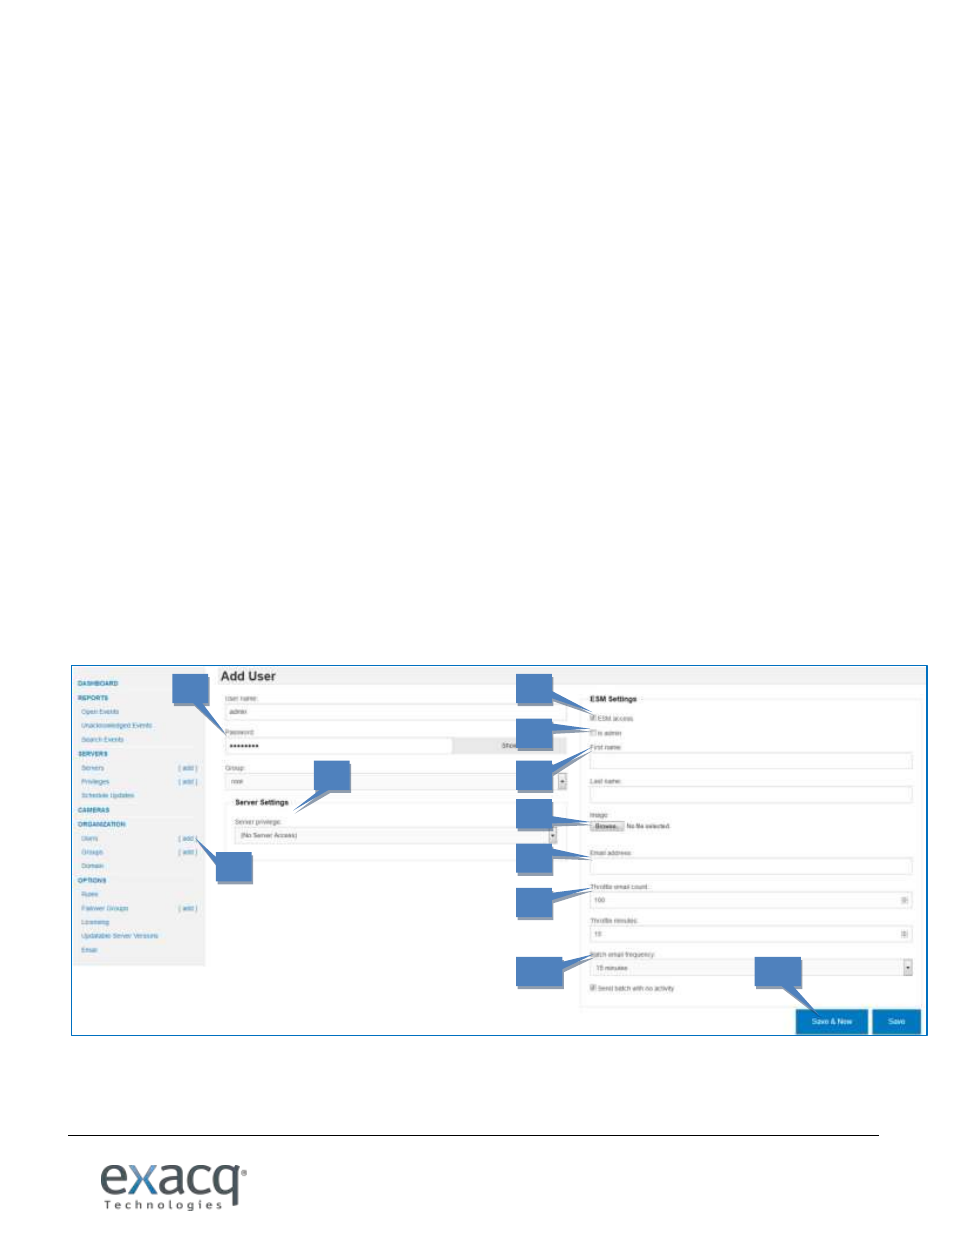
The Add User page contains the following options:
1. Click [add] next to Users.
2. Enter a user name, password, name, and group information for the new user.
3. Select the server privileges that the user should have. The default list of privileges matches the default
user permission levels available on exacqVision systems. Any custom privilege levels that have been
created are also listed.
4. Select ESM Access if you want to enable web access to ESM for this user.
NOTE: The following options are enabled only if ESM Access is selected.
5. Select Is Admin to allow the user to add servers, add users, and schedule updates. A global admin (an
admin without a group) can also see the Options menu and Add Group menu item; a user assigned to a
group can schedule updates and add servers only for that group. For example, a global admin can create
multiple groups, one for each group administrator. The global admin could manage which server updates
are available to the group admin, and the group admin could add servers, schedule updates, and add
users to their group.
6. Enter the user’s first name and last name.
7. If desired, browse to an image that identifies the user.
8. Enter the user’s email address.
9. Throttle Email Count allows you to limit the number of emails that can be sent over the period of time
entered in Throttle Minutes. This can be used to prevent an extreme number of notifications over a short
period of time.
10. Batch Email Frequency allows you to send a single email containing all notifications in increments as short
as every 15 minutes. You can also choose to send the batch email even if no qualifying activity has
occurred during the selected time period.
11. Click Save to create the user and push it to the selected group and its subgroups, or click Save & New to
create the user and configure another.
2
4
3
6
5
1
7
8
9
10
11