EXCALIBUR PR11BK Motorized Bumper Boat User Manual
Page 3
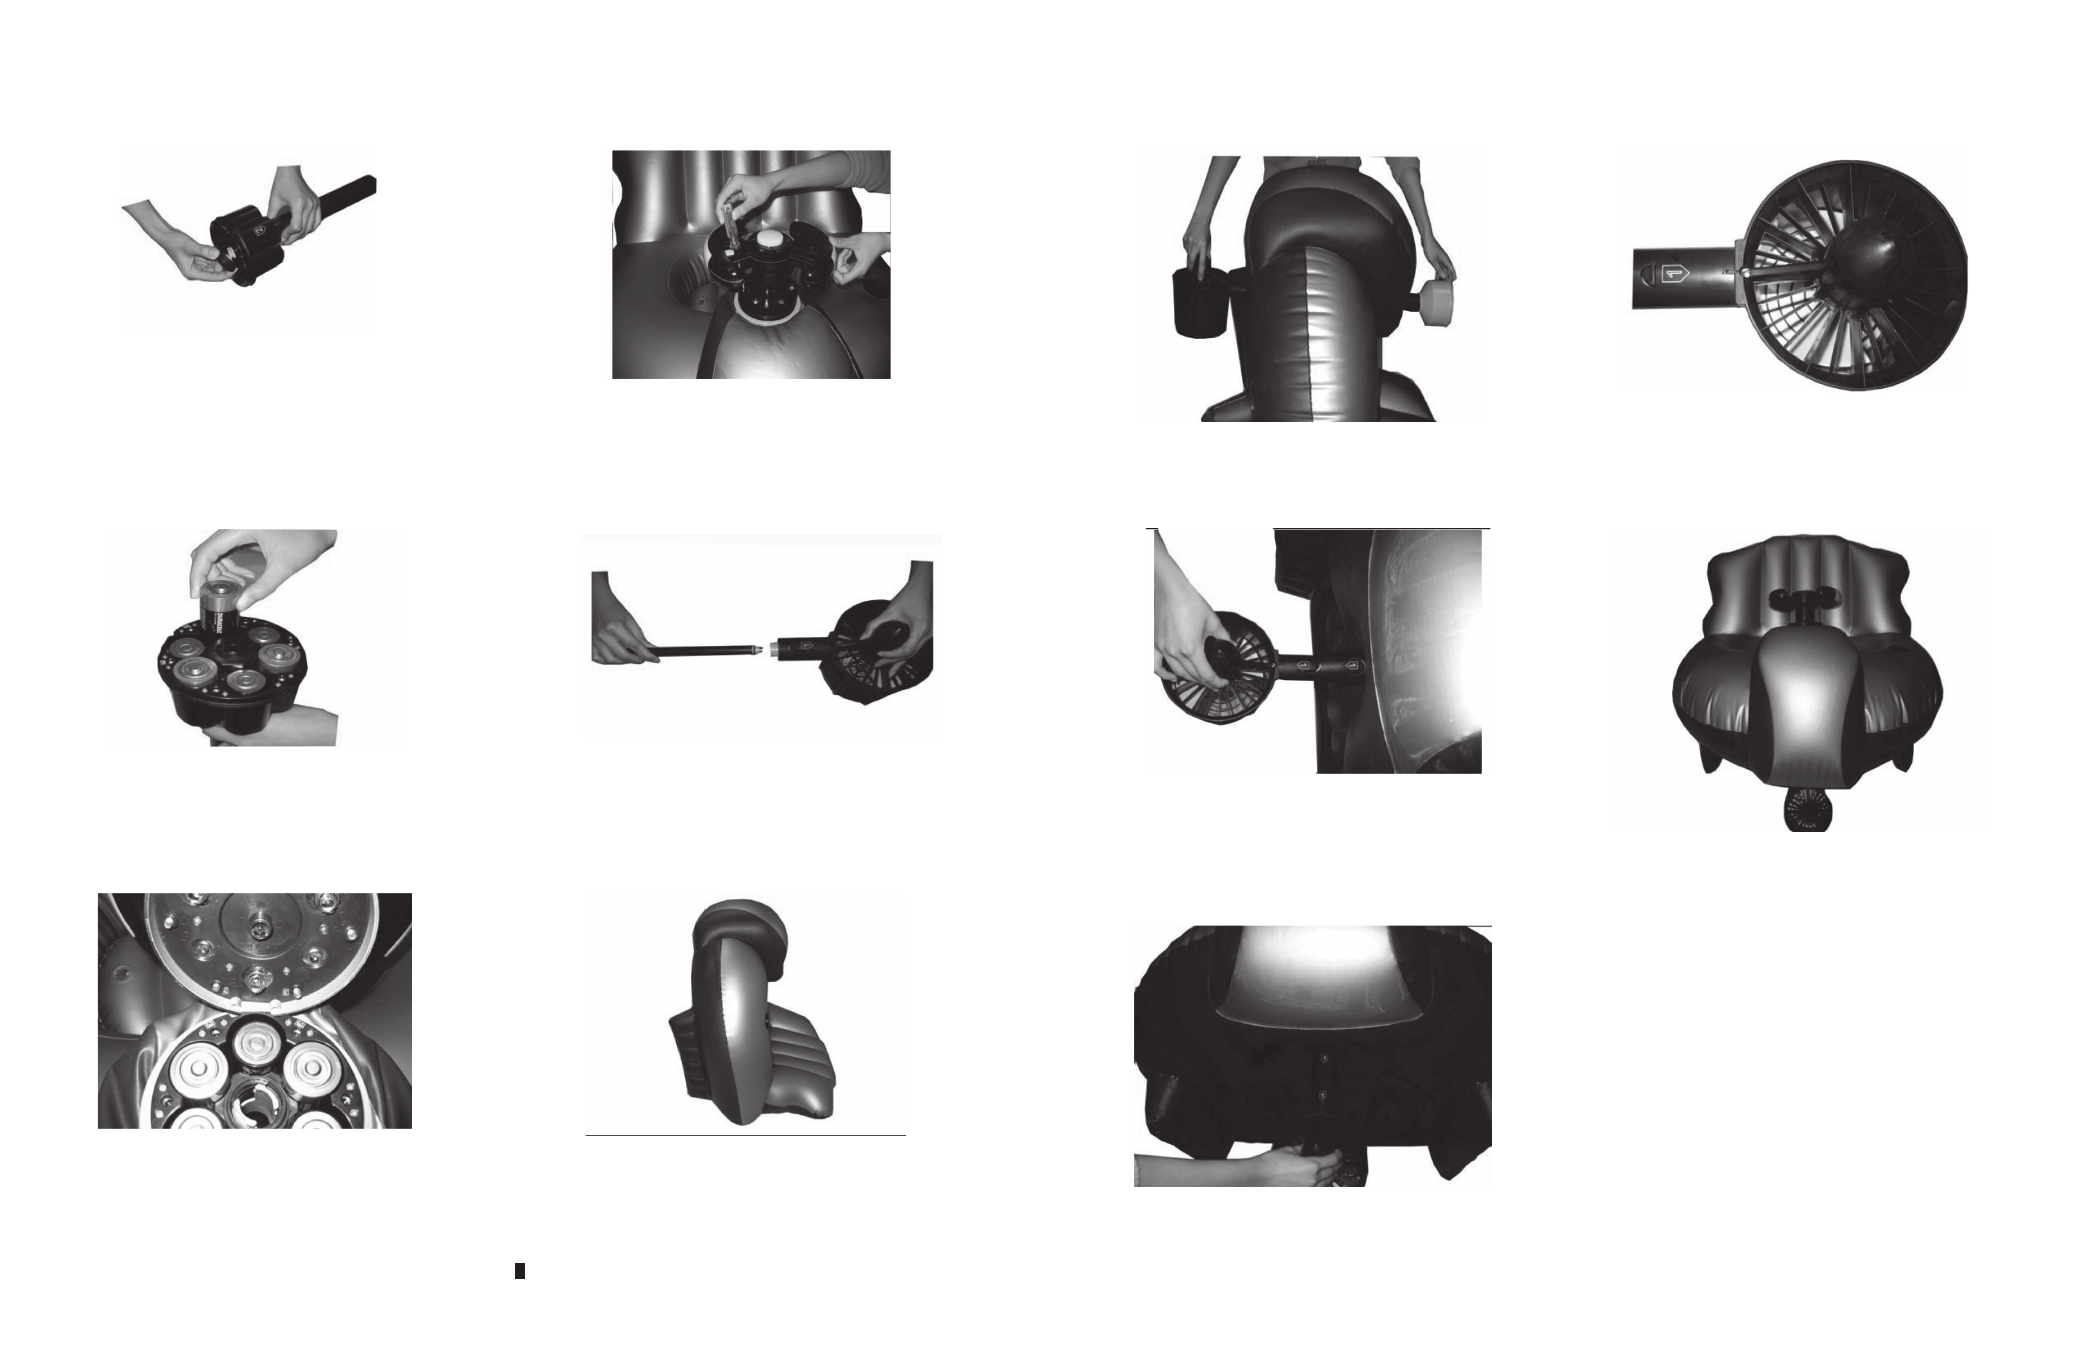
6. Screw the large plastic hexagon nut onto the top of the
battery compartment to secure the control arm
in place.
7. Insert 6 D-cell batteries into the battery compartment,
making sure to match the polarity (+ and -) with the
diagram inside the battery compartment.
8. Carefully align the battery compartment cover
by matching the “3” that is printed on both the cover
and compartment.
9. Fasten the nuts with the wrench. It is generally best
to start at the two nuts directly across from the handle,
then the two nuts on both sides of the handle, then the
last remaining two.
10. Insert the electrical connection shaft into the motor
subassembly that encloses the propeller.
11. Hold the Bumper Boat vertically. This will make it
easier for the fi nal steps of the assembly.
12. Insert the control arm sleeve into the hole located at
the front-center of the Bumper Boat.
13. Insert the control arm through the top of the control
arm sleeve. Insert the electrical connection shaft
through the bottom of the control arm sleeve.
14. From the bottom of the Bumper Boat, you can see
the “1” printed on both sides of the control arm and
propeller.
15. Push up the electrical connection shaft and make sure
that it is tightly secured into the propeller.
16. You have fi nished assembling the Bumper Boat.
5