Disassembling the univalve – Flowserve V-370 R3 Edward Valves User Manual
Page 5
EDWARD UNIVALVE USER INSTRUCTIONS ENGLISH 12-13
5
DISASSEMBLING THE UNIVALVE
(continued)
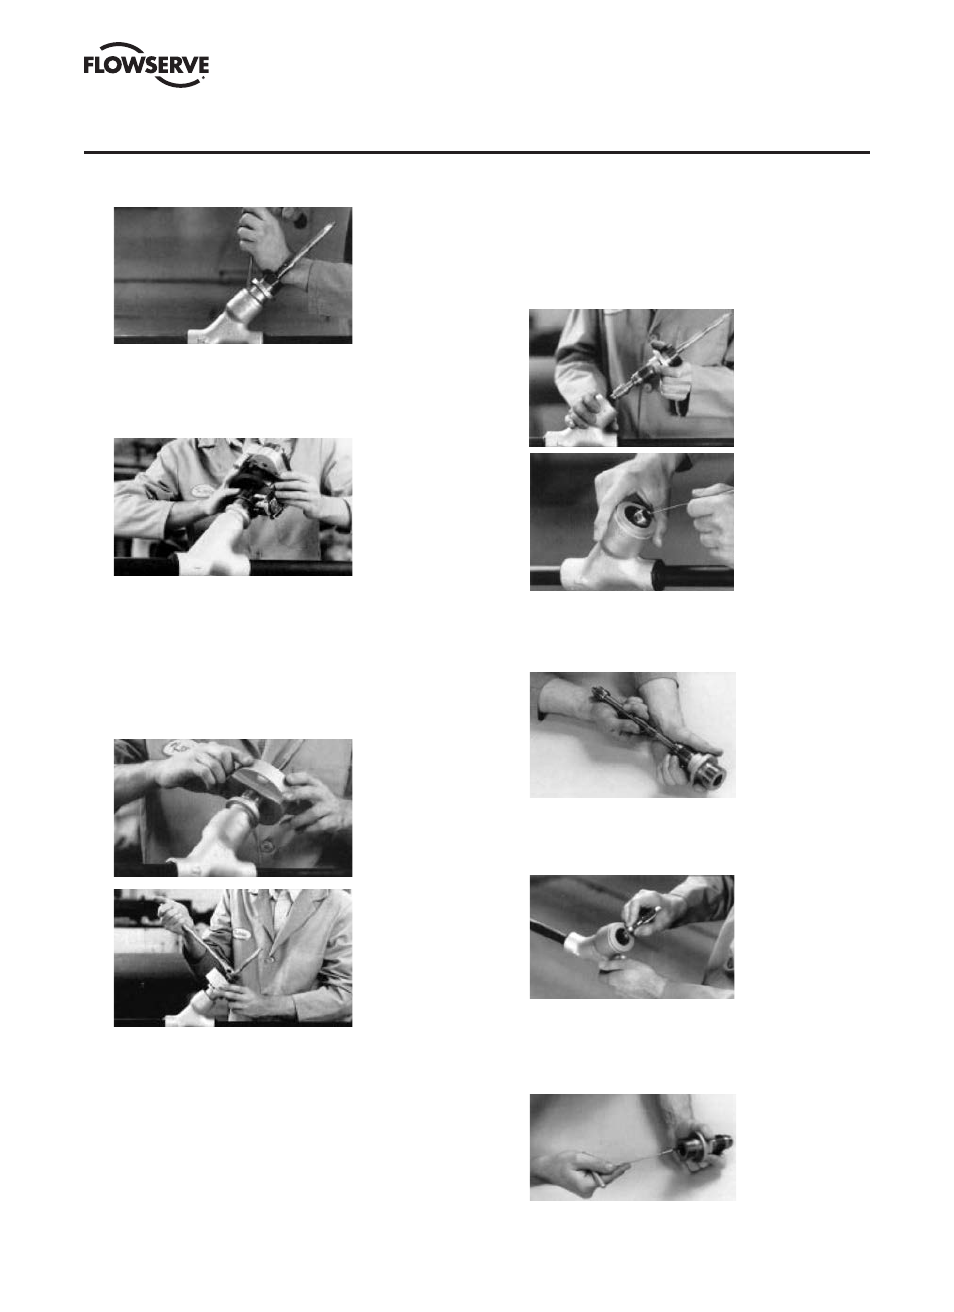
11. Remove the valve bonnet-stem-disk assembly if the
valve being repaired is a stop valve (figure XXX2X).
The disk in a stop-check vaIve (figure XXX6X) and
the bonnet insert in welded Class 4500 vaIves (figure
961XX) may be removed by forming a short piece of
soft wire into the shape of an L and lifting it up in the
disk bore.
12. Remove the stem from the bonnet. It may be necessary
to rotate the stem through the packing before it can be
removed.
13. If the valve is unwelded, the graphitic gasket must be
replaced. Do so by removing it from the valve body,
but take care not to damage machined surfaces.
14. Using a packing tool, remove the old packing.
Stainless steel Univalves are equipped with a
metal junk ring in the bottom of the packing
chamber. (See pg. 16 for repacking instructions.)
8. If the valve is unwelded, remove the locking collar.
9. If the valve to be repaired is seal-welded, prepare
the Seal Weld Cutting Machine for the weld cutting
operation. If a cutting machine is not available, use one
of the alternate methods shown on pg. 8.
10. Refer to the chart on pp. 10–13 to select the proper
torquing collar assembly (consisting of lock nut and
collar). Screw the torquing collar clockwise onto the
bonnet until it bottoms. A left hand threaded lock nut
is used to lock the torquing tool to the bonnet. Use
the appropriate size open end or socket/box wrench
(1-¼", 1-¾" or 2" hex) on the lock nut to turn the tool
counterclockwise to remove the bonnet.