Fusion PP-CM525 User Manual
Page 2
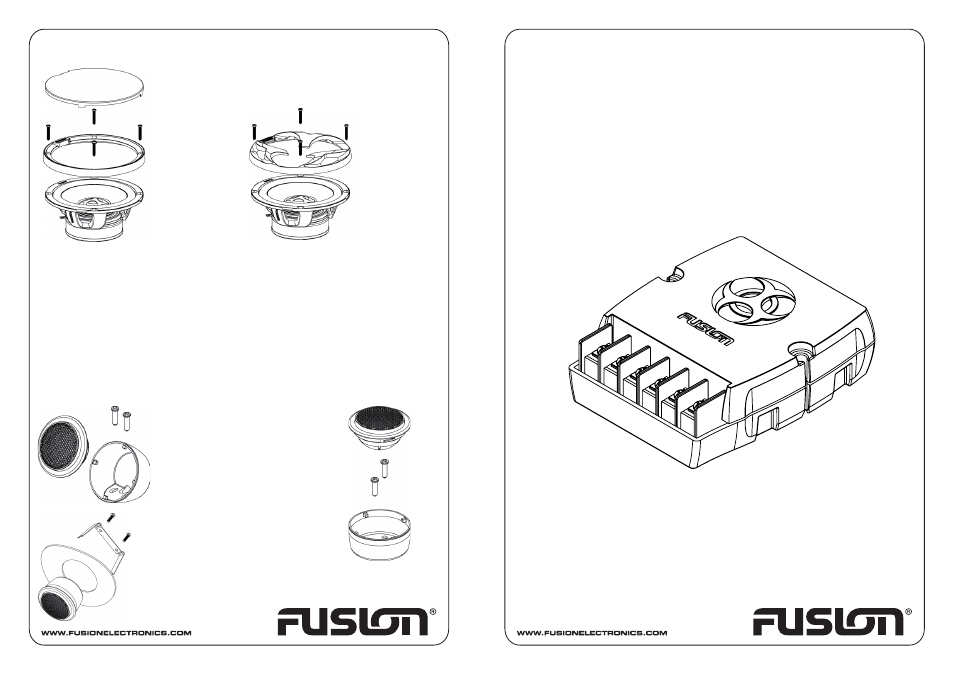
Diagram A - mesh grille
Diagram B - Custom grille
Tweeter Installation
Surface/angle mount
FUSION offers three choices of mounting styles to accommodate the varying requirements for on and off axis mounting
positions. The most important goal for tweeter placement is the need to keep an un-obstructed path on axis to approxi-
mately 4” below the rear vision mirror. The reason for this is to enhance the perception of centre image. When mounting,
make sure there is no wiring behind the mounting surface, use the tweeter mount that enables the best sound focus and
use this as the template for drilling the mounting holes. Run the wiring back to the crossover.
Flush mount
First check that the tweeter can be flush mounted into the surface you have chosen, especially with regards to depth.
Mark out a 50mm hole and cut this out. Having a hole saw will greatly improve the tidiness and the integrity of the hole.
Assemble the rear mount with the spring clamp and press through from the rear of the mounting surface, then bayonet
the front plate and the rear mount together as shown in the flush mount illustration. Run the wiring back to the
crossover.
Crossover Installation
1. FUSION crossovers are manufactured specifically for use with the FUSION full range component system. Use of any
other crossover may result in damage to one or more of the components.
2. The x-over is designed for installation under the vehicle dash, under the rear parcel shelf or in the trunk of the
vehicle. They should not be located where they are subject to moisture, such as a leaky door. If possible locate the
crossovers closer to the speakers than the amplifier.
3. Use the crossover to mark the mounting holes. Make sure there is sufficient clearance on the other side of the
mounting surface and that the mounting surface is perfectly flat to avoid damage to the crossover.
4. Drill two pilot holes for the screws and wire the crossovers.
5. Cut the pre-run speaker cable to the correct length. Connect the cable to the crossover, ensure the correct
polarity.
6. Screw into position.
7. Adjust the tweeter level by removing the lid and selecting the desired setting. There are three options available
–3, 0, +3dB.
Mesh
Grille
Grille
Angle
Flush
Surface
27.3
90.4
66.0
73.3
SOURCE INPUT -
SOURCE INPUT +
TWEETER OUT -
TWEETER OUT +
WOOFER OUT -
WOOFER OUT +