Installation – GAI-Tronics XCP0400A ICP9000 Upgrade Kit User Manual
Page 2
Pub. 43003-032C
Model XCP0400A CommandPLUS Console Upgrade Kit
Page: 2 of
3
f:\radio products-draft\gtc 43003\43003-032c\43003-032c.doc
12/10
Installation
CommandPLUS Series Desktop Console
1. Disconnect power from the CommandPLUS Series Desktop Console and remove all attached cables
from the rear of the console.
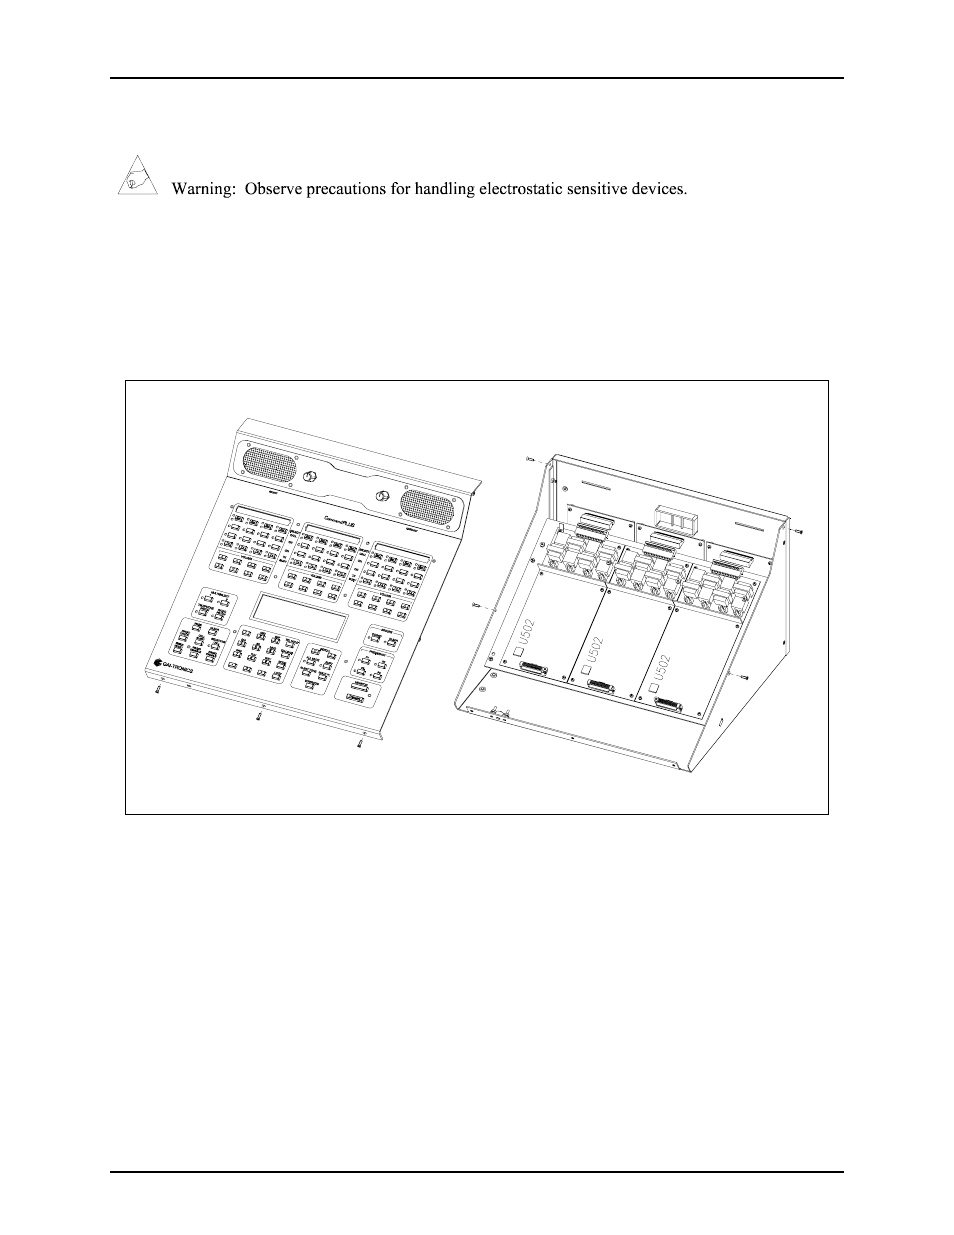
2. Remove the seven screws securing the top panel and gently lift the cover exposing the attached
speaker cable and master display cable. See Figure 1.
Figure 1.
3. Disconnect the speaker cable at the male-to-female connection point. Unplug the master display
cable from the top cover.
4. On each slave PCBA (CP-CSD) locate U502 EPROM socket and extract the EPROM.
5. Replace them with the Slave EPROM (SLAV**) provided in this kit, taking care to observe the
direction indicated on the socket of the EPROM. Ensure that the chip is properly seated in the socket.
6. Disconnect the ribbon cables (SLV-CBL-M) attached to the Main PCBA.
7. Remove the four screws attaching the mounting plate to the base.
8. Disconnect the (SLV-CBL-P) cables from the surge suppression PCBAs. This allows you to remove
the mounting plate giving access to the main control PCBA. See Figure 1.