Guralp Systems CMG-DCM Installation User Manual
Cmg-dcm, Data module, Network installation
CMG-DCM
Data module
Platinum Firmware
Network installation
Check you have all components and cables.
*
CMG-DCM module
*
Green digitizer
DCM cable
*
Blue/grey combined DCM PC and power cables
*
Yellow DCM Ethernet cable
You will need a Windows or Linux PC with an RS232
(COM) port, a Güralp Systems digitizer or digital sensor
and a DC power supply of between 12 and 24 volts.
Choose a suitable location for the DCM.
↔
↔
↔
Connect the various parts together:
*
Connect the green digitizer cable (signal + power)
between the PORT A socket on the DCM and the
DATA connector on the digitizer. Connect a second
digitizer or digital sensor to PORT B if applicable;
*
Connect the yellow DCM Ethernet cable between
the NETWORK socket on the DCM and your network
switch or hub;
*
Connect the 9-pin ‘D’ connector on the blue cable
to your PC’s serial (COM) connector;
*
Connect the free, stripped end of the grey cable to
the power supply. Connect the black wire to the
negative (–) terminal and the red wire to the
positive (+) terminal;
*
The blue and grey cables are joined together at a
10-pin mil-spec socket. Attach this to the DATA
OUT connector on the DCM, and switch on the
power supply. Do this step last..
↔
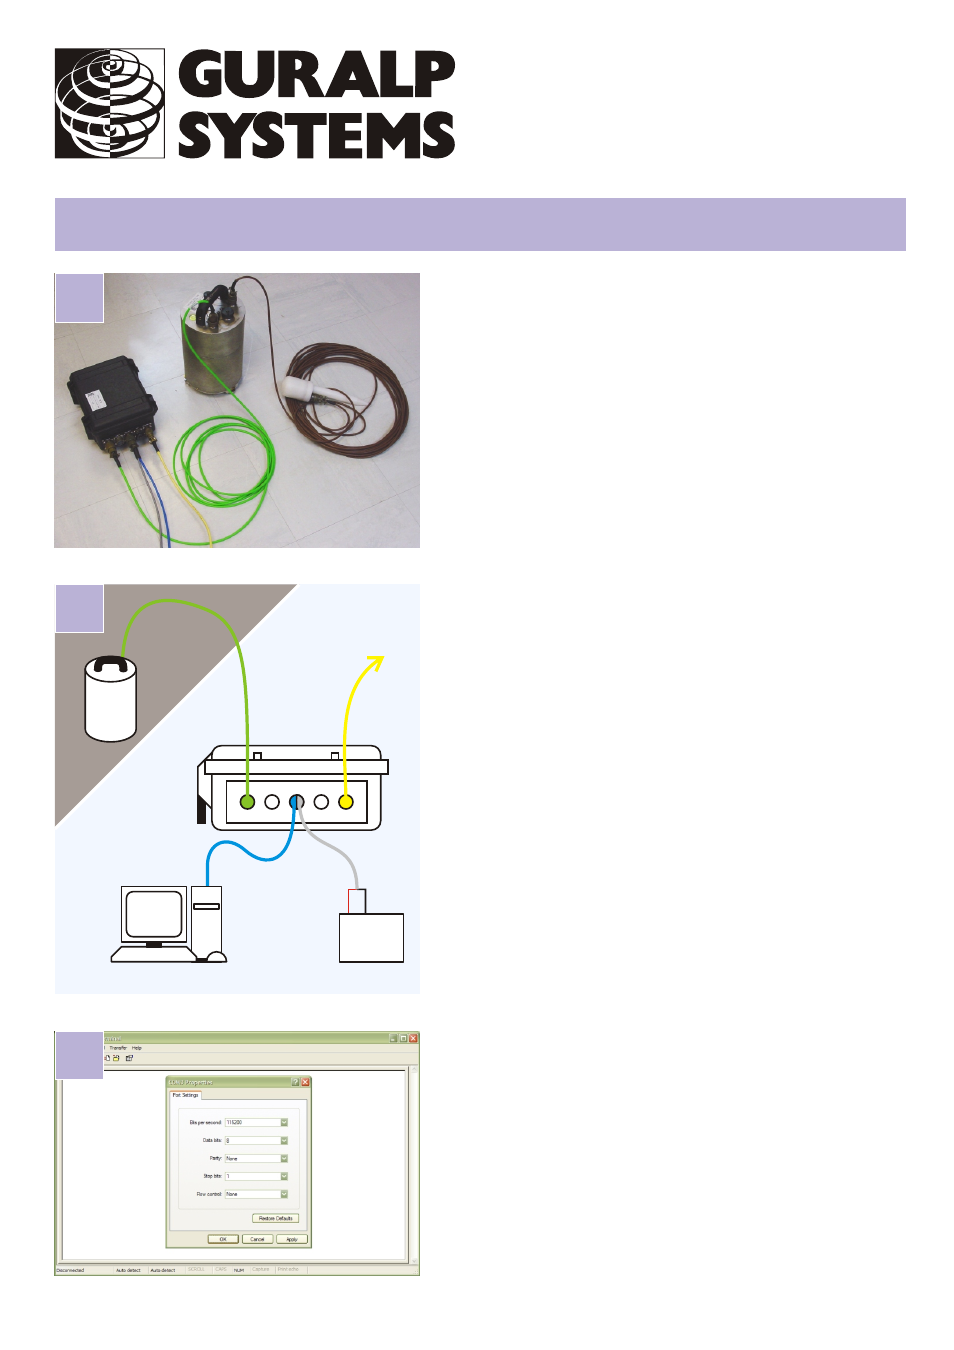
Run a terminal program, e.g. HyperTerminal, on your PC.
Connect to the relevant serial port with these settings:
*
115,200 baud;
*
8 data bits;
*
No parity bit;
*
1 stop bit;
*
No flow control; and
*
vt100 emulation (necessary for gconfig).
Press ENTER a few times until you get a login: prompt.
1
3
2
RS232
PORT A
NETWORK
Power
supply
+
–
DCM
Digital
sensor
PC
DATA OUT