Infloor Heating Cable Repair Kit User Manual
Heating cable repair kit, Installation guidelines, Materials and tools needed
Heating Cable Repair Kit
Installation Guidelines
Warranty Disclaimer: This repair kit and these installation guidelines
are provided by I
Incorporated to assist in repairing a I
heating cable damaged at the job site. I
does not, in any way,
warranty the repair or ensure proper function of the product
following the repair. Only a
electrician should make repairs
to the I
heating cables. It is highly recommended that
an experienced tile installer remove the tile over the damage. For
further assistance, please contact I
Incorporated.
I
does not qualify electricians, tile installers, or I
install-
ers to perform diagnostics, tile removal, or cable repair. It is the
responsibility of the installing party or homeowner to contact a quali-
person to follow these guidelines.
DO NOT USE this repair kit to splice
erent cables together. The
kit is only for making a repair within a cable.
DO NOT USE this repair kit to repair a cable within a shower area
or a mat that extends into a shower area.
Materials and Tools Needed
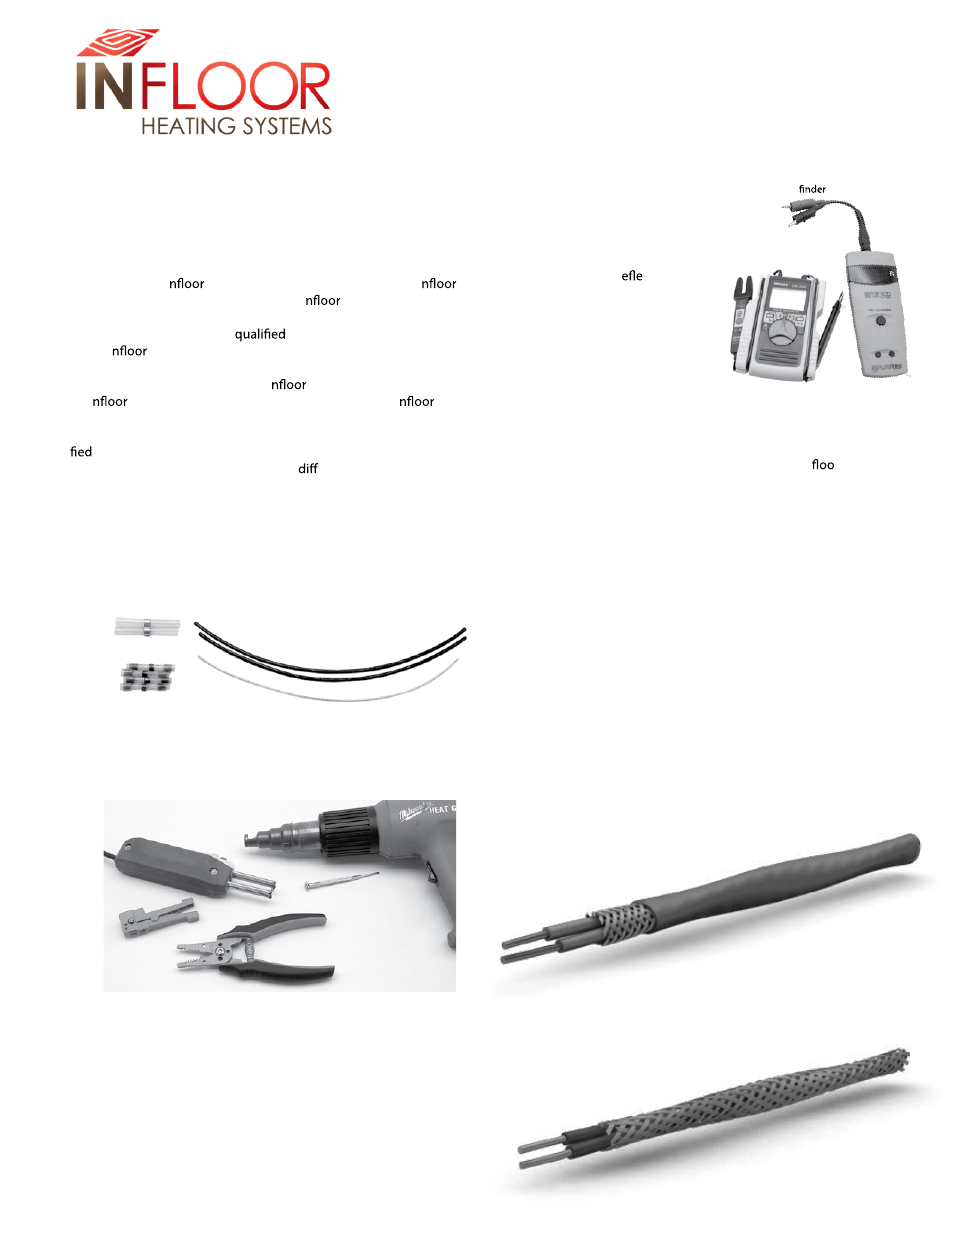
Heating Cable Repair Kit: Manufacturer order number 38650
This heating cable repair kit contains components for making a
repair at one location. Certain components may not be used depend-
ing on the method of repair selected.
Electrical Repair Kit: Manufacturer order number ####. Available for
rent or purchase as a kit. NOTE: Items are subject to change.
Heat gun
• Must be able to heat to about 1000°F.
• Milwaukee Model 8975.
Thermal wire strippers
• For stripping the heating wires.
• Omega Model TW-1.
Scoring tool
• For cable with an outside jacket.
• Ideal Model 45-403 with blade Part K-6502.
Wire strippers
• For cutting and stripping 16-AWG wire.
• GB Model GESP-55.
Small screwdriver
•
To help separate heating wire from braid.
•
Paper clip or similar pointed tool may also be used.
Electrical Test Tools: Manufacturer order number #####. Available for
rent as a kit.
NOTE: Items are subject to change.
Digital multimeter
•
Must measure up to 20,000 ohms.
•
A. W. Sperry Model DM-2000.
TDR (Time Domain R
ctometry) meter
•
For diagnostic testing if
additional damage is detected.
•
Harris Corp. Model TS-90 or
TS-100 “Cable Fault Finder.”
Other Tools
Hammer and chisel
•
For removal of tile and mortar if needed, and for creating a
“valley” in which to lay the splice.
Hot glue gun with standard stick adhesive
•
For adhering splice into the “valley” chiseled into
r.
Scissors
Part 1. Getting Started
Step 1.1. Make sure the power is OFF!
Step 1.2. Two repair methods are shown in these guidelines. Choose
the method that is best for the installation.
Direct splice: This method is used when the damaged cable has
enough “play” to be cut and overlapped by about 3/4 of an inch. This
also gives the best possible heating uniformity over the splice versus
using the jumper splice.
Jumper splice: This method is used when the damaged cable does
not have enough “play” to be cut and overlapped. This also results
in a splice section that will have very little heating directly over the
splice.
Step 1.3. Depending on the installation, the heating cable is con-
structed in one of the two following ways:
Jacketed heating cable: This cable is comprised of two insulated
heating wires, covered by a metal braid, which in turn is covered by
an outer covering. Each heating wire consists of one heating element
that must be kept intact and undamaged.
Non-jacketed heating cable: This cable is comprised of two
insulated heating wires covered by a stainless steel braid. Each wire
consists of one small heating element that must be kept intact and
undamaged.
Thermal wire
strippers
Scoring tool
Wire strippers
Small
screwdriver
Heat gun
4 Solder tubes
2 Ground solder tubes
2 jumper wires
1 Ground jumper wires
Braided metal grounding jacket
Jacketed heating cable
Multimeter
Fault
P.o. Box 4945 / Buena Vista, Co 81211
800-608-0562 / 719 395-3400 (phone) / 719 395-3555 (fax)