General operation, 1 use with windows xp / vista / 7 / 8 – Kanguru QS2 DVDRW User Manual
Page 7
7
2. General Operation
Please carefully read the following instructions and make sure you understand them completely. For
ease of use, please print this manual for reference.
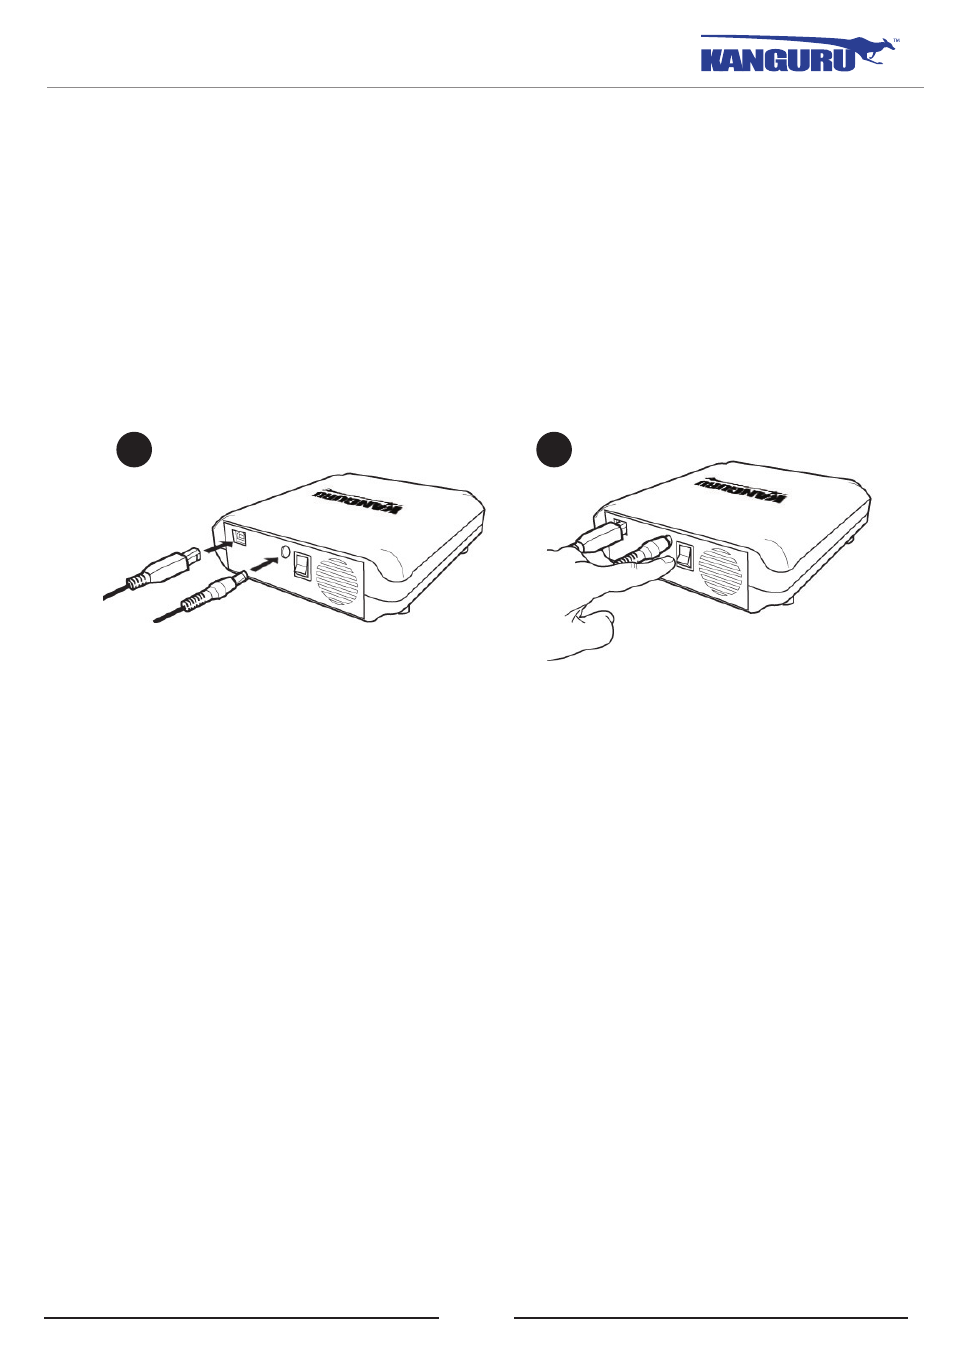
1. Connect the USB cable from your DVDRW to the PC and the AC power adapter from your
DVDRW to an electrical outlet.
2. Flip the On/Off switch to the On position.
2.1 Use with Windows Vista / 7 / 8
The Kanguru DVDRW does not require any driver files for use with Windows XP SP2, Windows
Vista, Windows 7 or Windows 8 operating systems. These operating systems already have built-
in drivers that support USB connection with the Kanguru DVDRW. Simply connect your Kanguru
DVDRW to your PC and turn it on. Windows will automatically detect the new hardware and install
the appropriate driver. When the installation has completed successfully, you will find a “DVD/CD-
RW Drive” icon displayed under My Computer.
Turn on the power to your drive and you will see a new “DVD/CD-RW Drive” icon in My Computer.
Current Windows operating systems come with the ability to burn CD and DVDs through Windows
Explorer. Please refer to Microsoft Windows’ documentation for instructions on burning CDs and
DVDs.
To properly disconnect the drive from your computer, click on the Safely Remove Hardware icon
located in the taskbar. This will allow you to select any removable devices that you have connected to
your computer. Select the drive that you want to remove and Windows will alert you when it is safe
to remove the device.
WARNING! Do not unplug the Kanguru DVDRW from the USB port of your computer or hub while
copying files to or from the device or while files or applications stored on the Kanguru DVDRW are
in use. DOING SO MAY RESULT IN LOSS OF DATA.
General Operation
1
2