Kleenmaid OCCDB User Manual
Page 11
I
N
S
P
E
C
T
I
O
N
11
11
1.
With burner controls in ‘OFF’ position, open the gas cylinder
valve or connect to gas supply.
2.
Upon first assembly the gas lines and burners will be full of
air. In order for the burners to light properly the lines must
fill with gas. It may require several attempts at lighting
the burners before you are successful.
3.
Push the igniter button and check for sparking at the
stainless steel gas collector, located adjacent to each burner.
4.
If a spark is not evident at the gas collector, check that the
ignition lead is firmly attached to the spark plug.
5.
With sparking established at collector box, turn the burner
control to
‘HI’ to establish a flame on the burner.
6.
Push and turn the required burner control as required in an
anti-clockwise direction to the ‘HI’ position. Cross lighting
channels inside the barbecue body enables the flame to
transfer across to the centre and opposite side burners to
ignite them.
7.
If any burners fail to light after several attempts, turn off gas
supply at source.
Wait until burners cool and inspect for obstructions to gas flow.
See also Safety instructions (page 4), Lighting and Operating
instructions (page 13).
BURNER OPERATION
AND IGNITION SYSTEM CHECK
Electronic igniter
Gas valve assembly
Orifice
Burner tube
Screw
Gas collector /
electrode
This test will ensure that the spark electrode tips are properly
positioned so your barbecue lights easily and properly.
WITH THE ASSISTANCE OF ANOTHER
PERSON, PERFORM THIS ELECTRODE
CHECK BEFORE PROCEEDING.
Ensure the gas source is turned off – or is disconnected and all
burner control knobs are set to
‘OFF’– and open the lids / side
shelves.
Have your assistant stand behind to the right of the barbecue
and look toward the front of the barbecue. Never put your face
inside the barbecue.
Press the igniter cap or turn
‘IGN’. You should hear a ‘clicking’
sound. Your assistant should see a blue spark within each gas
collector box. If a spark is present the electrode tips are properly
positioned.
If no spark is seen, the spark gap needs to be
adjusted as follows:
•
Using an adjustable spanner, loosen the inside nut until the
gas collector box can be turned upward. If the gap between
the spark electrode tip and receiver is more than 4 - 5 mm use
long nose pliers to gently squeeze the gas collector box to
narrow gap. Return the gas collector box to its original position,
secure the inside nut and try the electrode check again.
If no ‘clicking’ sound is heard:
•
AA battery may be installed backwards.
•
Electric wires may be loose. Remove the AA battery and
inspect the igniter junction box found behind the control
panel and reconnect any loose wires.
+
-
4-5 mm spark
gap
Gas collector
box
Spark
electrode tip
Spark
receiver
Inside
nut
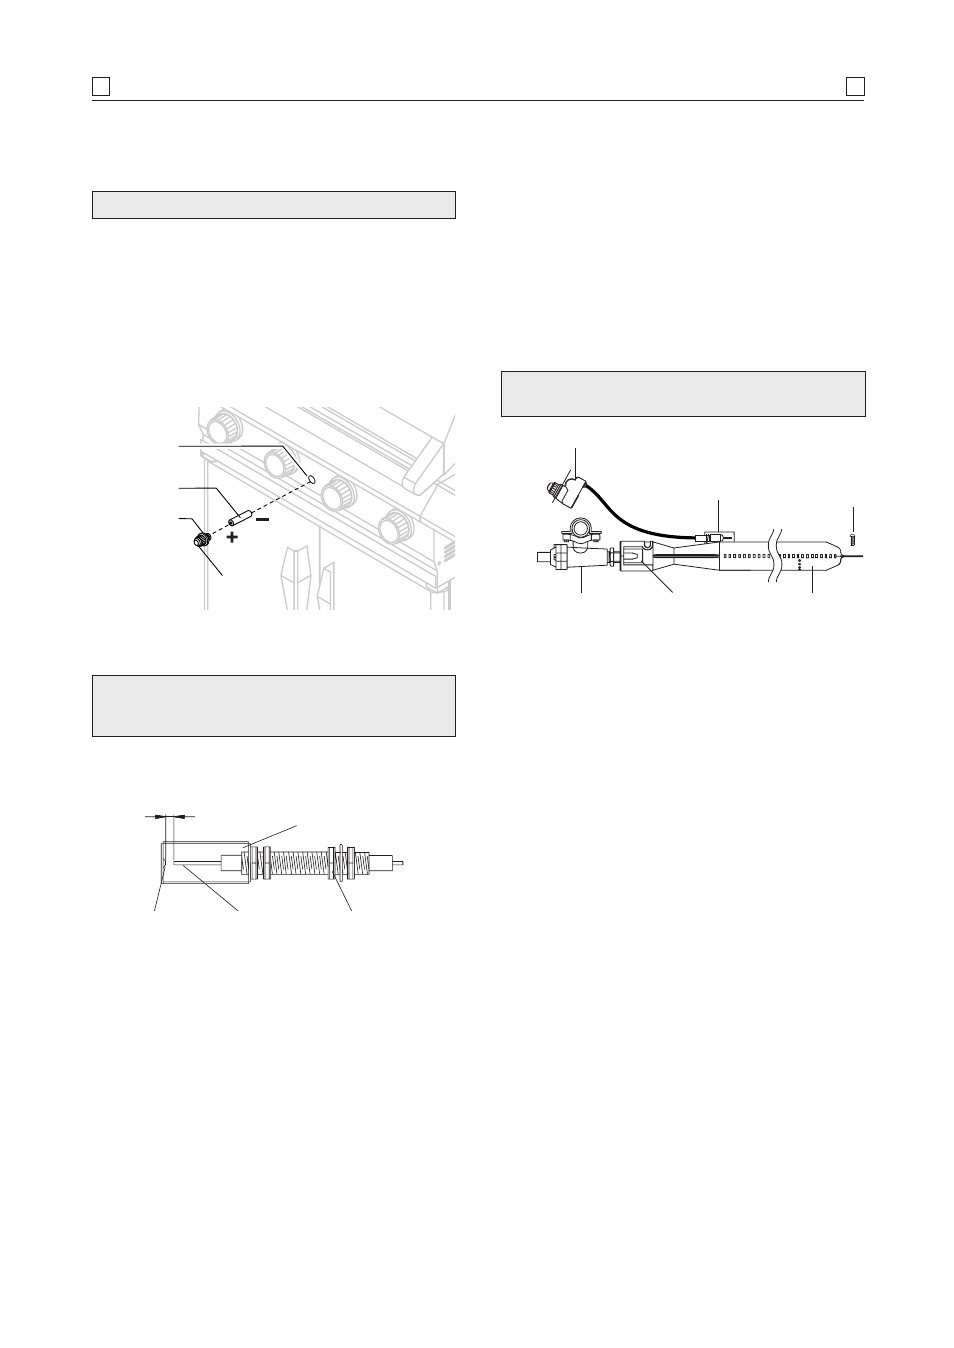
1.
Unscrew the igniter cap located on the barbecue control
panel and remove the contact and spring from the igniter
slot.
2.
Place the manufacturer supplied AA battery into the igniter
slot. Be sure to place the positive pole facing toward you.
3.
Place the spring over the AA battery, then place the contact
on top of the spring. Screw the igniter cap back onto the
barbecue control panel.
IGNITION BATTERY INSTALLATION
Spring
AA battery
Igniter slot
Igniter
cap