7description of the hood, Operation, Control panel – Kleenmaid RHU60 User Manual
Page 7: Maintenance, Cleaning, Panel, Grease filter, Charcoal filter (filter version only), Replacing lamps
7
Description of the hood
Fig. 1
1. Control panel
2. Grease filter
3. Grease filter release handle
4. Halogen lamp
5. Perimeter suction panel
Operation
Use the high suction speed in cases of concentrated kitchen
vapours. It is recommended that the cooker hood suction is
switched on for 5 minutes prior to cooking and to leave in
operation during cooking and for another 15 minutes
approximately after terminating cooking.
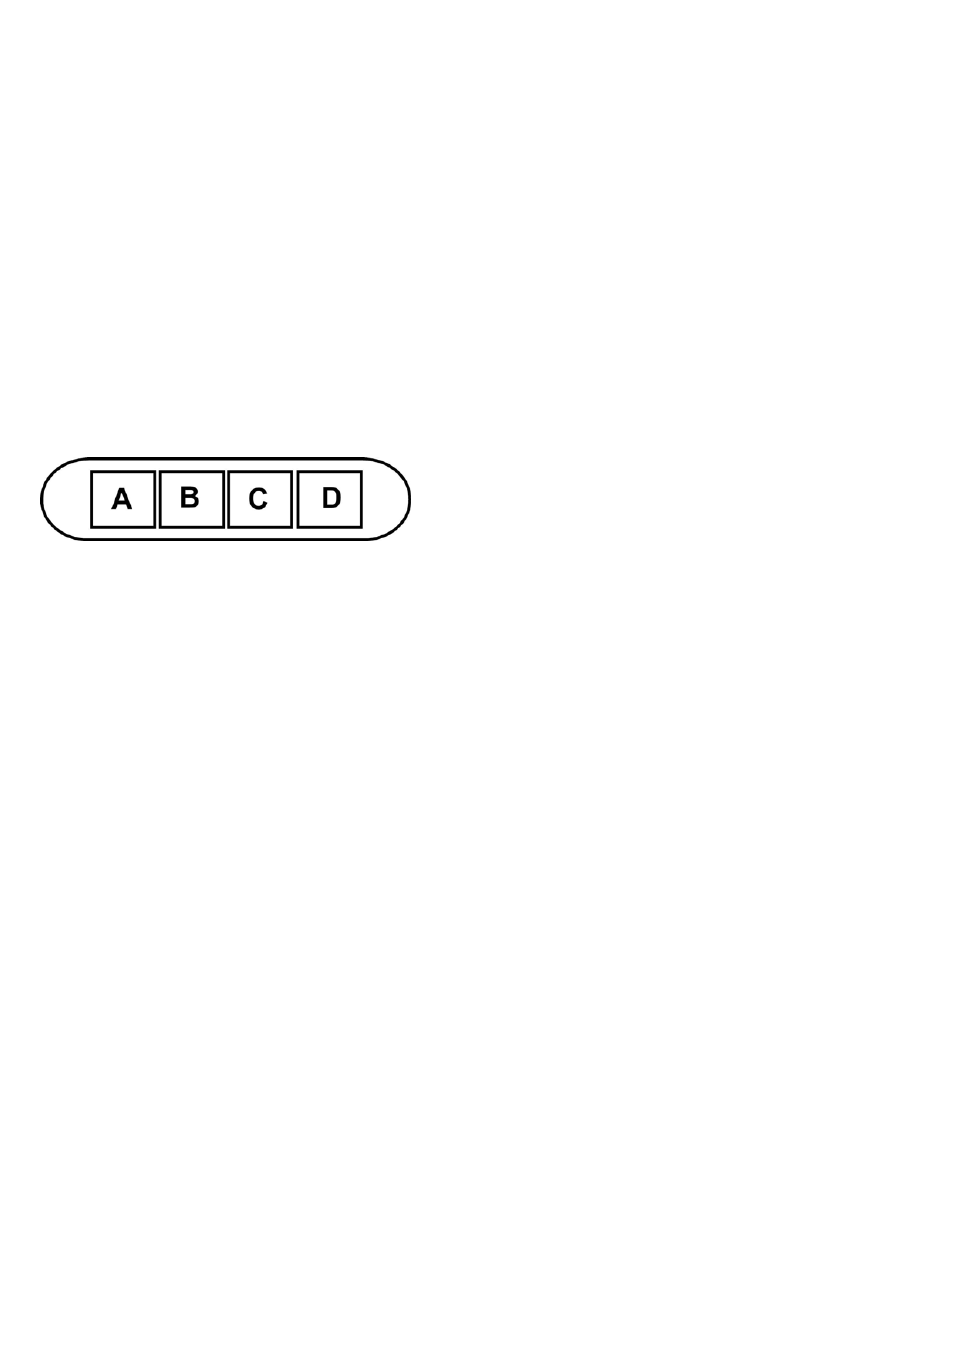
Control panel
A. on/off light switch
B. on/off aspiration switch and minimum power selection
B+C. medium power selection aspiration switch
B+D. maximum power selection aspiration switch
Maintenance
ATTENTION! Before performing any maintenance operation,
isolate the hood from the electrical supply by switching off at
the connector and removing the connector fuse.
Or if the appliance has been connected through a plug and
socket, then the plug must be removed from the socket.
Cleaning
The cooker hood should be cleaned regularly (at least with the
same frequency with which you carry out maintenance of the
fat filters) internally and externally. Clean using the cloth
dampened with neutral liquid detergent. Do not use abrasive
products. DO NOT USE ALCOHOL!
WARNING: Failure to carry out the basic cleaning
recommendations of the cooker hood and replacement of the
filters may cause fire risks.
Therefore, we recommend observing these instructions.
The manufacturer declines all responsibility for any damage to
the motor or any fire damage linked to inappropriate
maintenance or failure to observe the above safety
recommendations.
Panel -
Fig. 2
Attention! Hold the panel with both hands when
dismantling and re-mounting in position to avoid it falling
and causing damage to people or things.
Dismantling:
pull the panel (FRONT SIDE) downward with decision,
unscrew safety knob S and unhook it from the rear hinge.
Cleaning:
Clean the suction panel with the same frequency as the fats
filter using a cloth soaked in neutral liquid detergents.
Avoid the use of products containing abrasives. DO NOT
USE ALCOHOLS.
Montage:
The panel must be hooked at the back and fixed in front fitted
into the pins for the purpose on the surface of the hood.
Attention! always check that the panel is well fixed in its
place.
Grease filter -
Fig. 3
Traps cooking grease particles.
This must be cleaned once a month (or when the filter
saturation indication system – if envisaged on the model in
possession – indicates this necessity) using non aggressive
detergents, either by hand or in the dishwasher, which must
be set to a low temperature and a short cycle.
When washed in a dishwasher, the grease filter may discolour
slightly, but this does not affect its filtering capacity.
To remove the grease filter, pull the spring release handle.
Charcoal filter (filter version only) -
Fig. 4
It absorbs unpleasant odours caused by cooking.
The saturation of the charcoal filter occurs after more or less
prolonged use, depending on the type of cooking and the
regularity of cleaning of the grease filter.
In any case it is necessary to replace the cartridge at least
every four mounths.
The charcoal filter may NOT be washed or regenerated.
Remove the grease filters.
Fit the charcoalfilters over the motor.
Align the pins R
on the cowl with the slots S, then turn the
filter clockwise until it locks in place.
Reverse the above procedure to remove the charcoal filters.
Refit the grease filters.
Replacing lamps -
Fig. 5
Disconnect the hood from the electricity.
Warning! Prior to touching the light bulbs ensure they are
cooled down.
•
Use a small screwdriver as a lever on the borders of the
lamp in order to remove the lightbulb.
•
Slide out the lightbulb to be replaced and replace with a
new 12V 20W MAX 30° Ø35 12V GU4.
•
Carry out the replacement and mount the new lightbulb
by following instructions in the reverse.
If the lights do not work, make sure that the lamps are fitted
properly into their housings before you call for technical
assistance.