Installation instructions, Cutout dimensions – Kleenmaid BRF520T User Manual
Page 3
3
Installation Instructions
Introduction
A qualified engineer must connect refrigerator in
accordance with these installation instructions. Measure
door opening and depth and width of refrigerator. Remove
handles or doors as required. Engineer must follow local
electrical company connection regulations
Proper installation will ensure that this refrigerator
operates most efficiently. Amana Refrigeration, Inc.
cannot be responsible for improper installation.
• See HTK530 International Handle and Trim Kit for
installation of door handles and trim.
1. Remove doors if necessary.
H
D
W
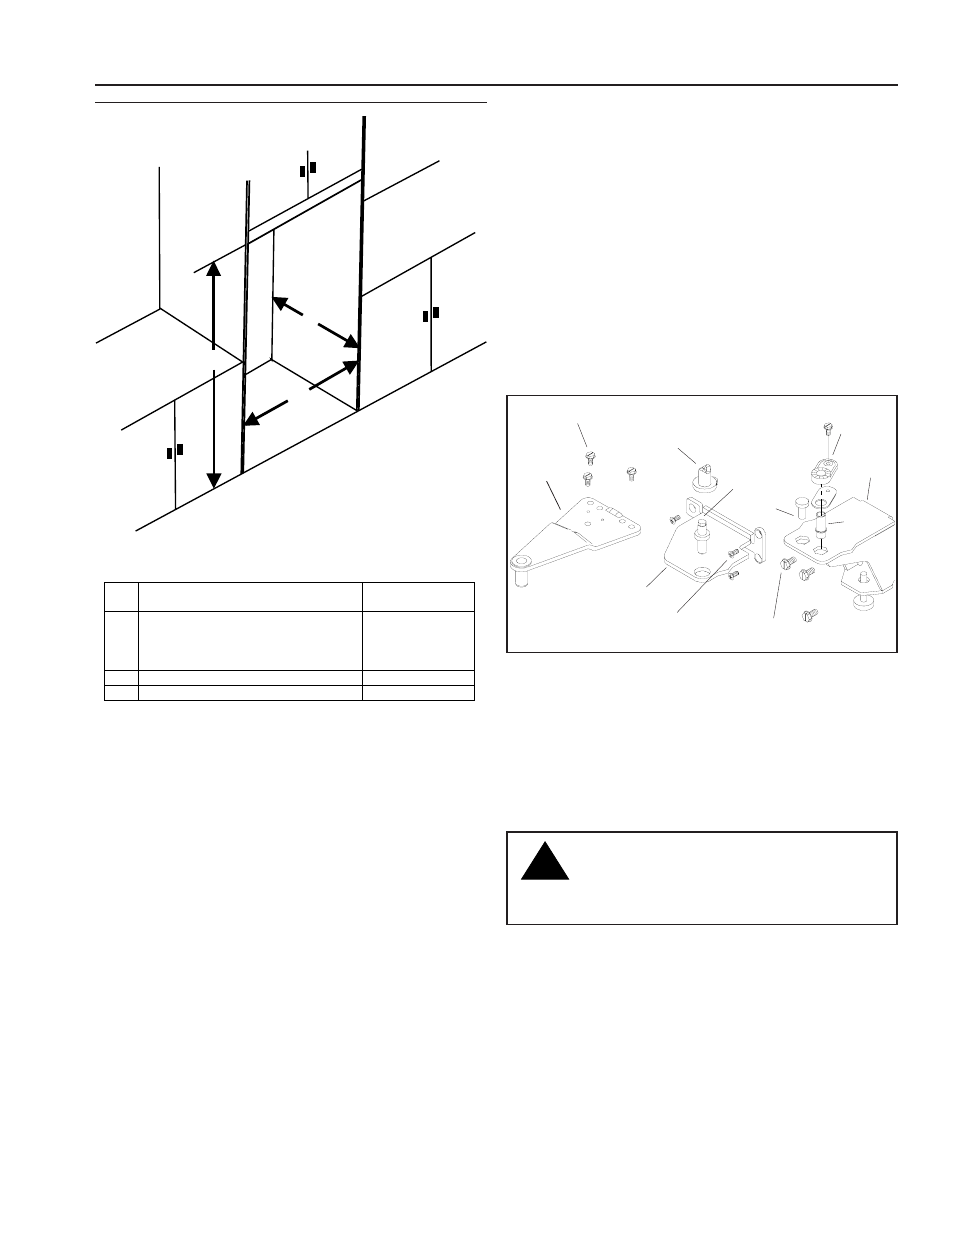
Cutout Dimensions
S in g le In s ta lla tio n
D o u b le
In s ta lla tio n
H
1 7 5 .3 c m w ith 3 0 .5 c m d e e p
c a b in e ts a b o v e re frig e ra to r.
1 7 7 .8 c m w ith 6 1 .0 c m d e e p
c a b in e ts a b o v e re frig e ra to r.
W
9 1 .4 c m
1 8 4 .8 c m
D
6 1 .0 c m
6 1 .0 c m
• See BID trim kit for specifications.
9 mm screws
8 mm screws
Top hinge
Center hinge
Phillips
screws
Door closure
Door
closure
Center hinge
pin
Plug
a. Remove top hinge cover. Remove top hinge.
b. Remove Fresh Food door.
c. Lift door closure off center hinge pin. Remove center
hinge pin.
d. Remove Deepfreeze
®
door. An internal support rod
may slide out. Replace rod prior to hanging door.
e. Remove center hinge bracket.
f. Remove toe grille. Remove bottom hinge(s).
Caution
To avoid property damage, protect soft vinyl or
other flooring with cardboard, rugs, or other
protective material when moving refrigerator.
g. Slide appliance cart under side of refrigerator. Wrap
refrigerator with blanket or pad. Thread cart strap
around refrigerator and tighten. Do not overtighten
strap. Move refrigerator in front of final location.
h. Reverse doors if necessary.
• Replace internal support rod in hinge side of
Deepfreeze
®
door prior to hanging door.
• Move bottom hinge pin and door closure from
right bottom hinge to left bottom hinge. Move
plastic plug from left bottom hinge to right
bottom hinge using a needle nose pliers. Pinch
tabs from underside of hinge to remove.
Pin
!
Bottom
hinge