True-flex, Featherboard, Precision router table fence – Kreg PRS3040 Precision Router Table Insert Plate Levelers User Manual
Page 2: Precision insert plate leveler instructions
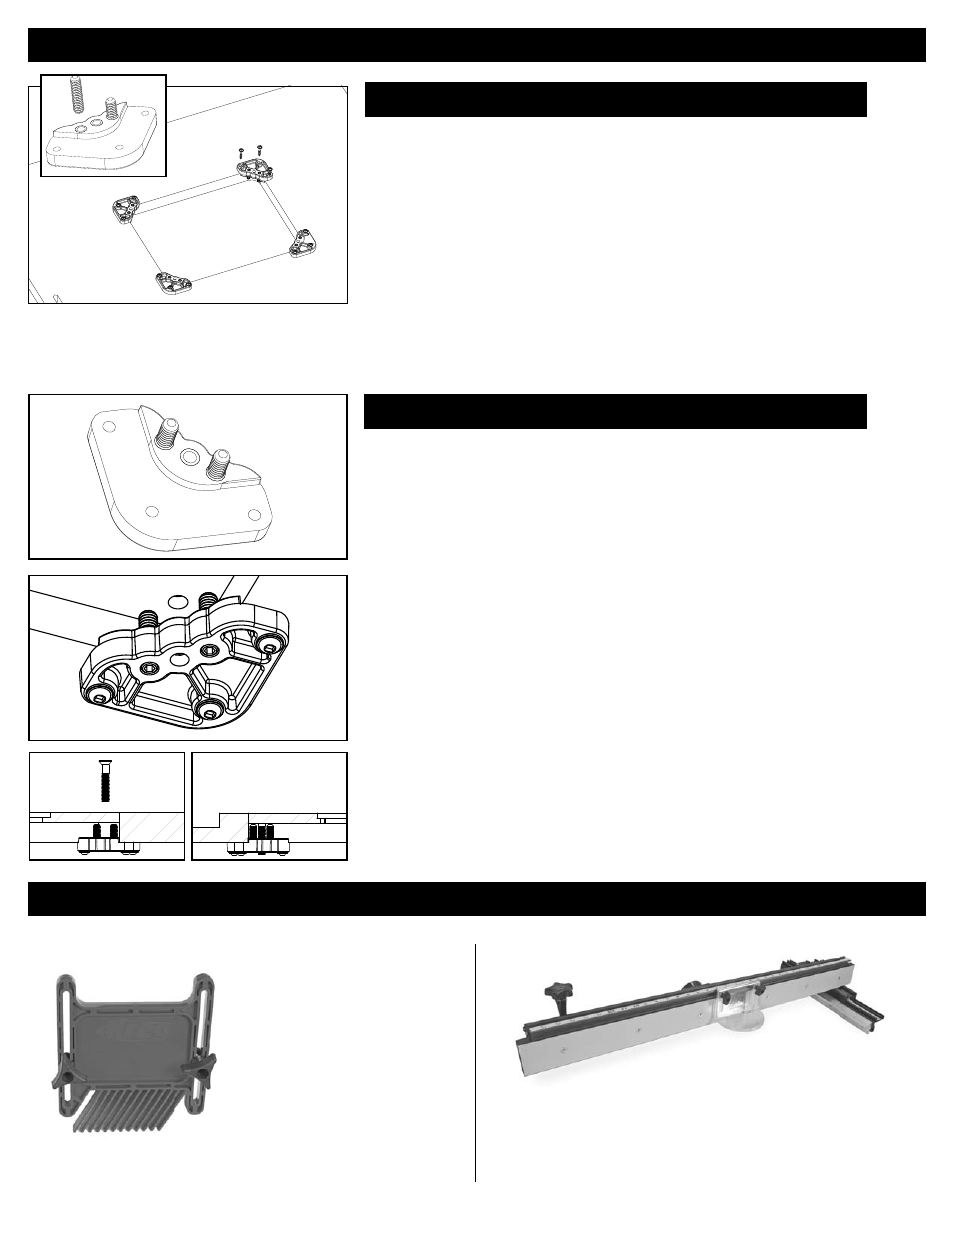
These unique levelers are self-aligning for easy installation.
Use the curved tab on
the Insert Plate Levelers to locate each Leveler in the corner of the Insert Plate
opening and fasten them in to place using three 1-1/4” coarse thread screws per
leveler. Be careful not to overtighten.
Thread the eight 1/4-20 x 1-1/2” cup point socket set screws into the two holes as
shown, and thread about half way in
Note: The 1 ¼” course thread screws included are meant to be used on router table
tops with a minimum thickness of 1”. Depending on your setup, you may fi nd it
necessary to purchase your own hardware to reduce the possibility of the screws
penetrating the surface of the router table top or not providing enough hold-strength.
The unique design of the Precision Insert Plate Levelers and adjustable leveling
screw system applies pressure to both sides of the insert plate so that – once locked
in – your Insert Plate stays fl ush regardless of the weight applied. The 8 Leveling
Screws and 4 Lock-Down screws work together to keep your insert plate fl ush with
the router table surface at all times.
Set the eight ¼-20 x 1-½” Set Screws to aproximately the same height and lay the
insert plate into the opening with the router already attached. The insert plate should
be resting on the eight adjustable set screws. Using the 1/8” Allen Wrench (included),
adjust the set screws from the bottom side of the Insert Plate, being careful to adjust
each screw the same distance as the other. Adjust the plate as close as possible to
fl ush with the surface of the router table top and run your fi nger along the perimeter of
the insert plate to check that all edges are fl ush with the router table top.
If you are using a Kreg Precision Router Table Insert Plate, Thread the four ¼-20 x 1-
3/4” Phillips Flat Head Machine Screw (Lock-Down Screws) through the countersunk
holes into the center hole on each leveler and snug down. Run your fi nger along the
perimeter of the insert plate again to check that all edges are fl ush with the router
table top and adjust each set screw as needed to bring each side of the insert plate
fl ush with the surface of the router table top.
Step 2:
Leveling the Insert Plate
Step 1:
Mounting the Insert Plate Levelers to the Table Top
Precision Insert Plate Leveler Instructions
Other Precision Routing Products
This unique featherboard can be
quickly and easily connected to almost
any miter slot or t-slot without the need
for additional hardware. It features a
durable plastic composite body which
ensures optimum workpiece pressure.
True-FLEX
True-FLEX
Featherboard
Featherboard
TM
Item# PRS3010
This is the only fence on the market that utilizes t-square style design that
allows for fast and easy positioning of the fence and a cam style lock down
which keeps it perfectly parallel to the miter slot at all times.
Precision Router Table Fence
Precision Router Table Fence
Item# PRS1010