Precision insert plate installation, Cd e, Rabbeted opening method – Kreg PRS3038 Precision Router Table Insert Plate - Undrilled User Manual
Page 3
Precision Insert Plate Installation
2.
Form the insert-plate opening in your router table top
Rabbeted opening method
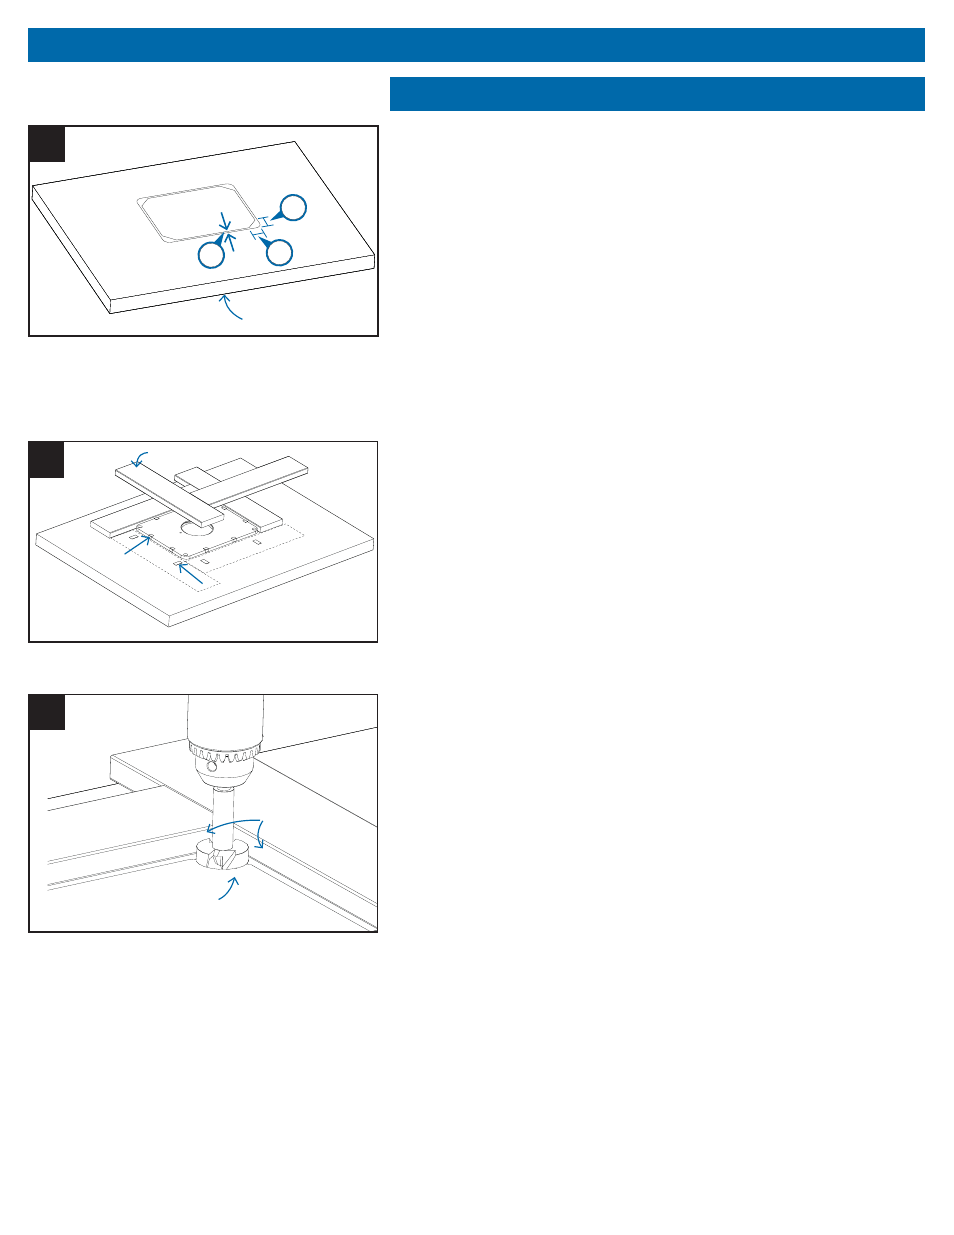
1.
Position the insert plate on your router table top, squaring the
plate with the table. Trace around the plate with a pencil. Remove
the plate. To form areas to anchor the four ¼-20 x 1 ¾" fl athead
machine screws (lock-down screws) that secure the insert plate to
the router table top, draw 45° lines across each corner of the outline
to form triangles with 1 ¾"-long legs [Drawing C]. Draw lines ⅜"
inside and parallel to the traced insert-plate outline.
2.
To provide clearance for installing and removing the insert plate,
adhere strips of masking tape to all four edges of the plate. Then
apply small pieces of double-faced tape to one face. (Use just
enough tape to keep the plate in place. Too much tape will make
the plate hard to remove later.) Reposition the insert plate on your
router table top and fi rmly press it into place.
3.
Cut four ¾ x 3½ x 15½" scrapwood routing guides. Apply double-
faced tape and adhere the routing guides to the router table top
with the edges against the masking tape strips on the insert plate
edges [Drawing D]. Remove the plate. Chuck a 1½" Forstner bit
into your drill press. Drilling test holes in the area of the router-table
top you’ll remove for the insert plate, set the drilling depth to ⅜".
With the edge of the bit just touching the inside faces of the routing
guides, drill a ⅜"-deep hole into the router-table top at each corner
[Drawing E].
4.
Drill a blade-start hole inside the pencil lines. With the outside
edge of your jigsaw base riding on the routing guides and the inside
edge supported by a ¾"-thick scrapwood block, cut just inside the
lines, leaving the ⅜"-wide area inside the insert-plate outline as well
as the triangular areas at each corner.
3
⁄
8
"
1
3
⁄
4
"
1
3
⁄
4
"
Routing guide
Masking
tape shim
Double-faced tape
Drill bit
touches guides
Drill 1½" hole
⅜" deep
Router table top
C
D
E