Lacava llc 5 – Lacava 1846 User Manual
Page 5
Advertising
LACAVA LLC
5
8. Finish the wall around the plaster guards. Make sure the valve is at the proper depth before finishing the wall.
9. Once the surrounding wall is finished remove the plaster guards.
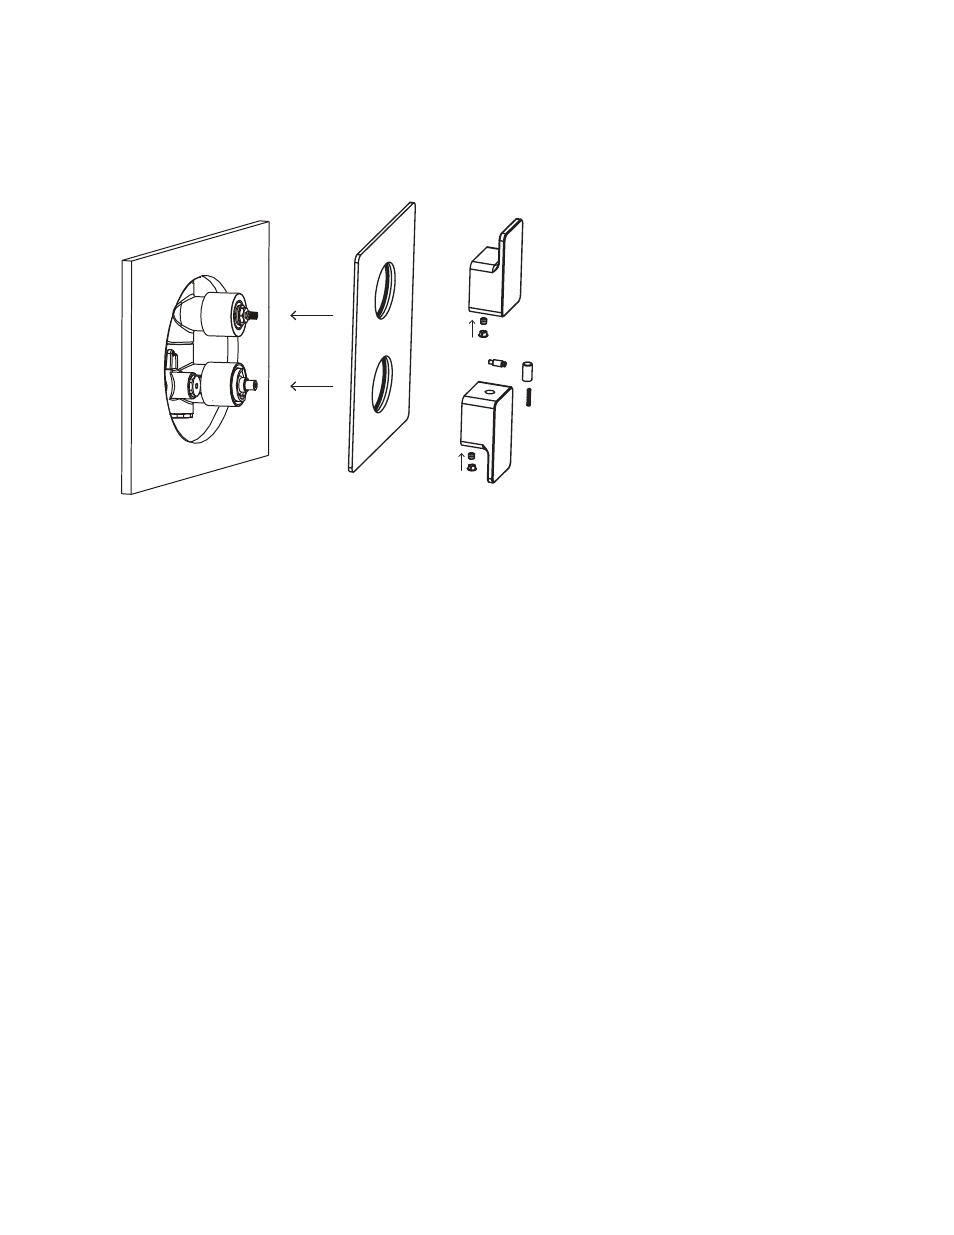
Installation Instructions/Instrucciones de Instalación
10. Apply a bead of silicone sealant onto the back edge of the backplate and slide into place over the cartridge
bodies. Using a clean rag, wipe off any excess silicone.
11. Loosen the set screw inside the thermostatic temperature control handle (A). Slide it on to the cartridge stem and
tighten the set screw. Install finished cap.
12. Loosen the set screw inside the diverter handle (B). Slide it onto the cartridge in the proper position, tighten
the set screw, and install the finished cap.
A
B
Advertising