Legrand KC10RT8 User Manual
Dequorum, Worksurface portal – kc & kf series
deQUORUM
™
Worksurface Portal – KC & KF Series
I N S T A L L A T I O N I N S T R U C T I O N S
Installation Instruction No.: 42362 – December 2002
Wiremold Electrical Systems conform to and should be installed
and properly grounded in compliance with requirements of the
current National Electrical Code, Canadian Electrical Code or
codes administered by local authorities.
All electrical products may represent possible shock or fire hazard
if improperly installed or used. Wiremold electrical products are UL
Listed to U.S. and Canadian safety standards, made for interior
use only, and should be installed in conformance with current local
and/or the National Electrical Code.
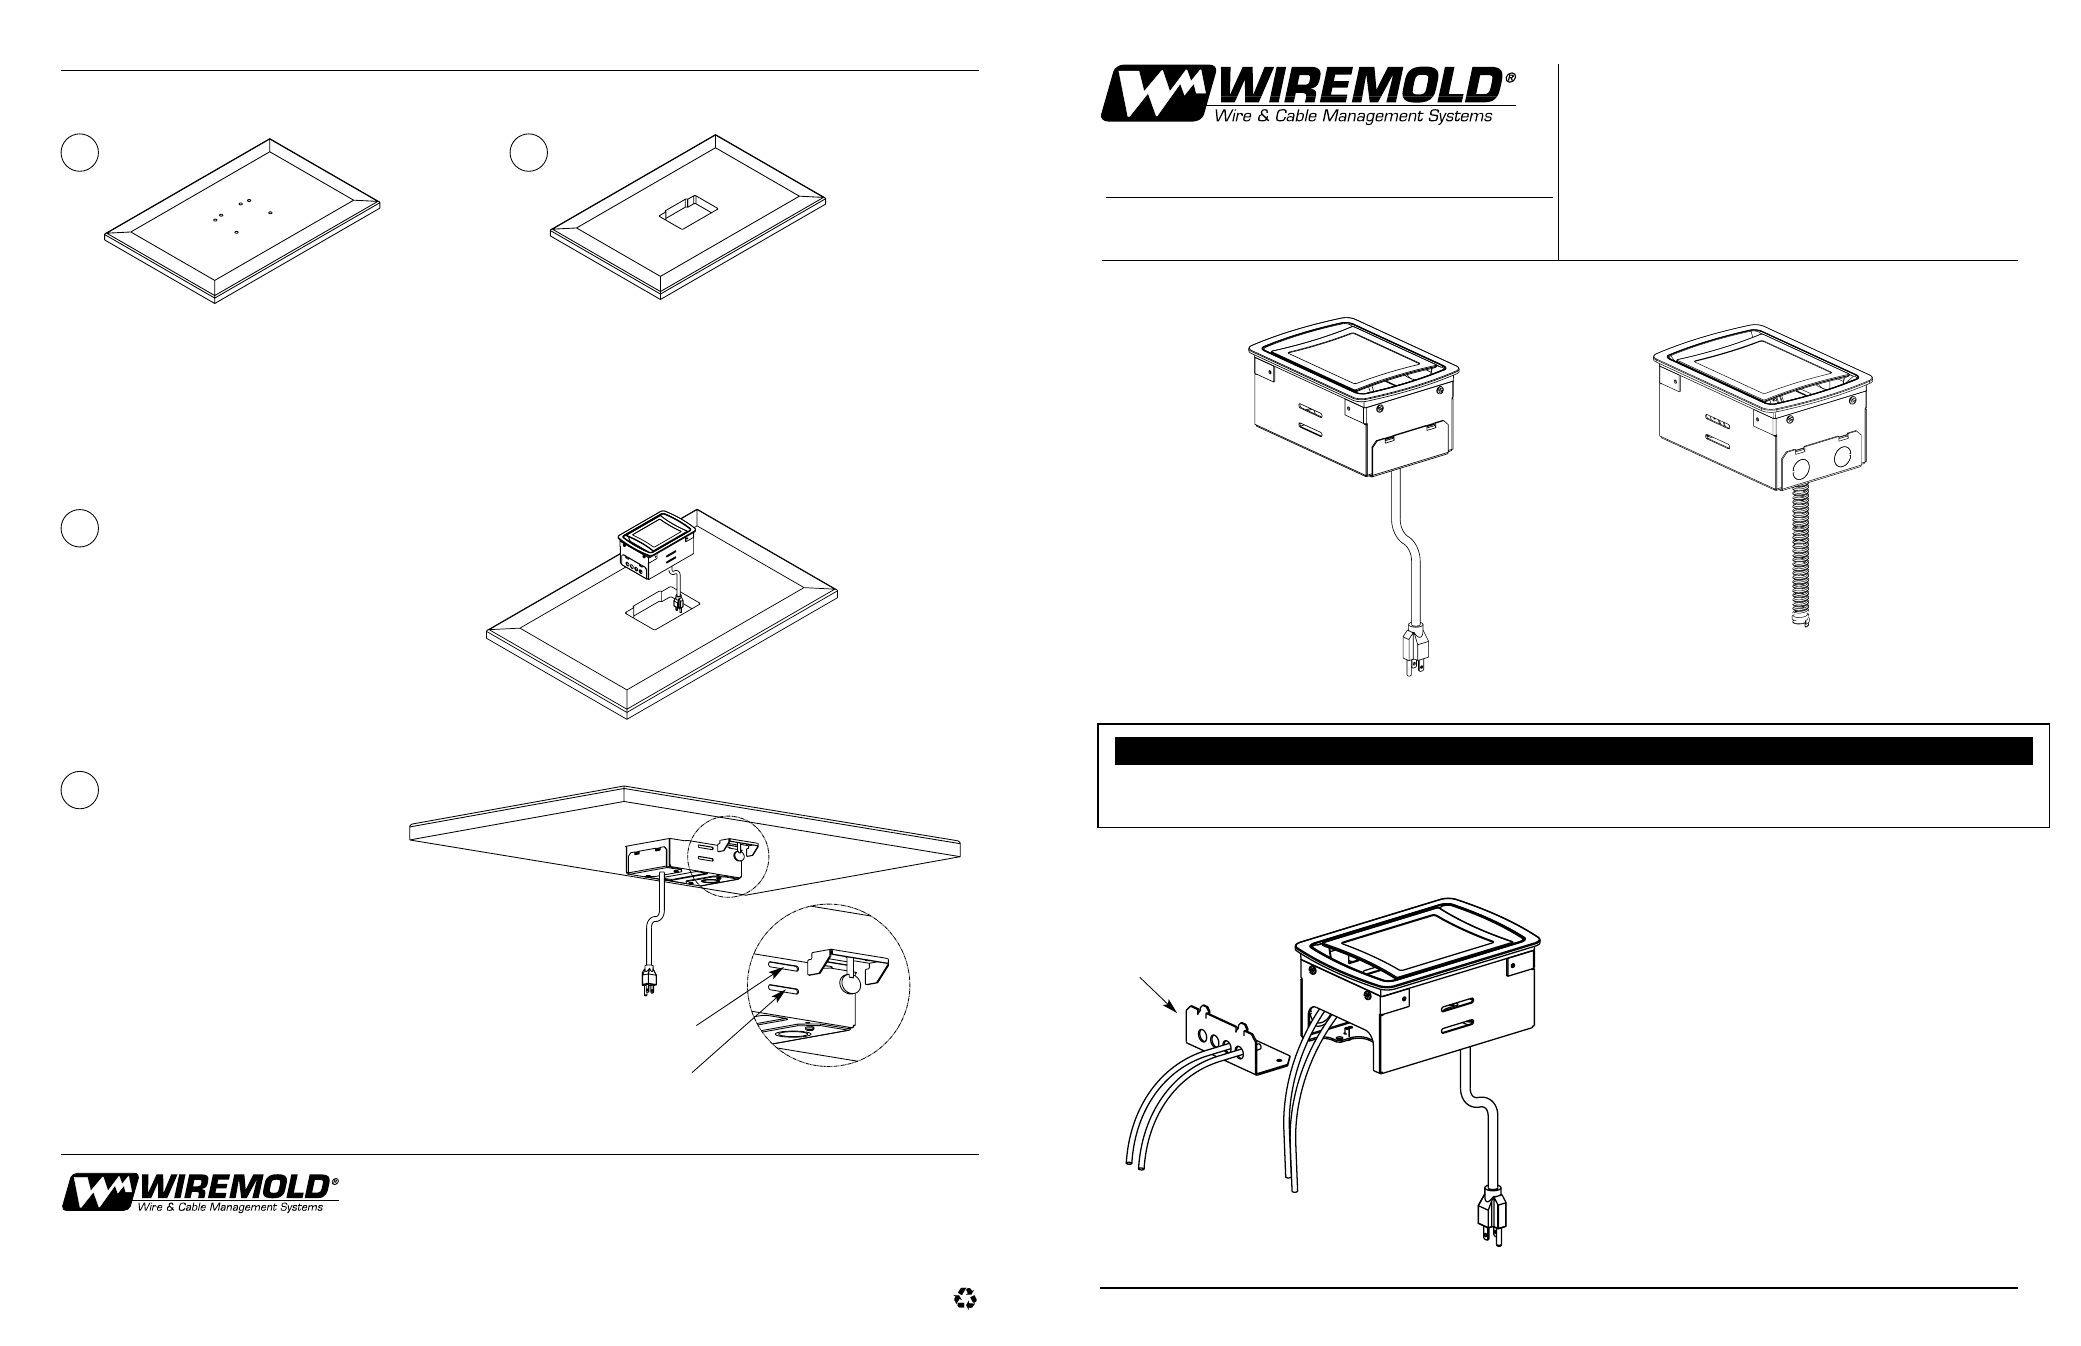
KC SERIES
(Cord Ended)
ACCESS PLATE
KF SERIES
(Field Installed)
COMMUNICATIONS INSTALLATION
FOR USE IN DRY LOCATIONS ONLY! NOT FOR USE IN FLOORS
The provided receptacle is dust and splash resistant only. If liquid enters the unit, promptly disconnect breaker or unplug power
and allow to dry thoroughly.
The communication compartment is enclosed with
a removable access plate which has grommeted
openings. One communication cable can be passed
through each grommet. For larger volumes of
communication cables, remove the access plate
and use the provided caterpillar grommet to cover
the cut edges of the communication opening.
The Wiremold Company
U.S. and International:
60 Woodlawn Street • West Hartford, CT 06110
1-800-621-0049 • FAX 860-232-2062 • Outside U.S. 860-233-6251
Canada:
850 Gartshore Street • Fergus, Ontario N1M 2W8
1-800-741-7957 • FAX 519-843-5980
42362 - December 2002
© Copyright 2002 The Wiremold Company All Rights Reserved
ÉPAISSEUR DE LA TABLE :
_ À 1 _ PO
[19 À 38 MM]
ÉPAISSEUR DE LA TABLE :
1 _ À 2 _ PO
[38 À 64 MM]
Aplicando la plantilla provista, perforar orificios piloto en los
ángulos con un taladro eléctrico y mecha de 1/2" (12,7 mm).
En utilisant le gabarit fourni, percer les trous pilotes d’angle
au moyen d’une perceuse électrique munie d’une mèche de
_ po [12,7 mm].
Con una sierra de calar portátil, cortar a lo largo del contorno
interior de la plantilla. Probar el ajuste de la tapa en la abertura
cortada. Si es necesario, limar cuidadosamente la abertura con
una escofina para madera.
Découper le long du bord intérieur de la ligne du gabarit à l’aide
d’une scie sauteuse ou d’une fraiseuse portable. Vérifier si le
boîtier s’adapte correctement à l’ouverture pratiquée. Au besoin,
limer l’ouverture soigneusement au moyen d’une râpe.
Por debajo de la superficie de la mesa, insertar los
accesorios de fijación provistos en las ranuras
correspondientes del cuerpo de la caja, a
cada lado. Ajustar los pernos cautivos
hasta que entren en contacto con la
parte inferior de la mesa. Atornillarlos hasta que
queden firmes, sin ajustar demasiado.
Hacer las terminaciones finales. Enchufar el cable en
un tomacorriente eléctrico apropiado. Se recomienda
usar circuitos con protección GFCI.
En travaillant sous la table, installer les supports de
montage inclus dans les fentes correspondantes du
boîtier, de chaque côté. Serrer l'attache prisonnière
jusqu'à ce qu'elle touche la face inférieure de la table.
Fixer solidement, mais ne pas trop serrer.
Faire les derniers raccordements. Brancher le
cordon dans une prise électrique appropriée. Il est
recommandé d'utiliser des circuits protégés contre
les défauts à la terre.
INSTALACIÓN EN EL RECORTE
DÉCOUPE DE L’OUVERTURE
1
2
3
4
Conectar toda alimentación eléctrica y
de comunicaciones y dejar caer la caja
en la abertura.
Brancher les dispositifs d'alimentation
électrique et de communication et
insérer le boîtier dans l'ouverture.