Legrand 895DCC User Manual
Ratchet-pro, Installation instructions
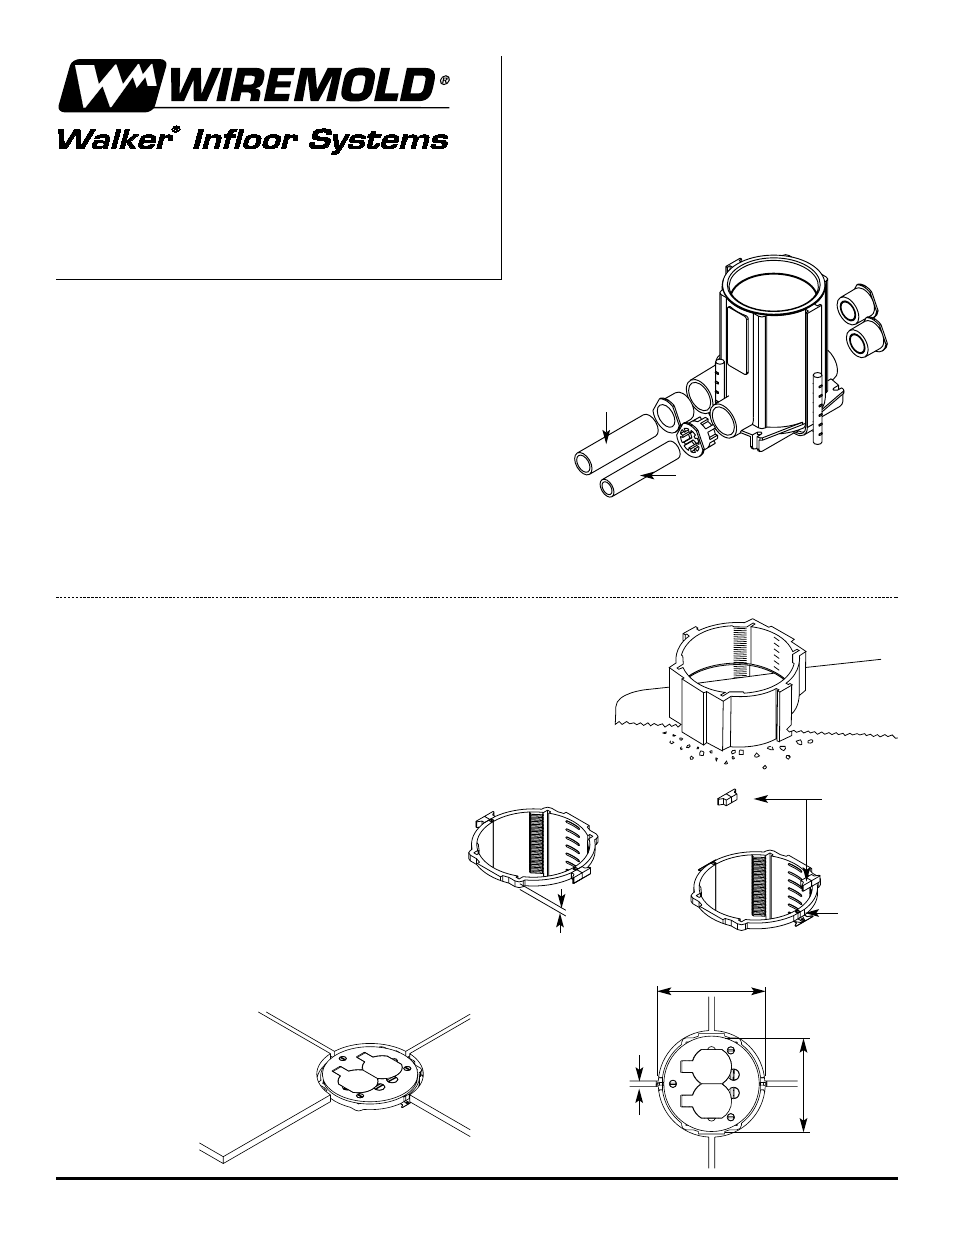
Before Pour:
1. Locate box position. Orientation of duplex
receptacle is aligned with the conduit.
2. Cement conduit closure plugs to unused ports and conduit
reducers if reduction from the 1" [25mm] hubs is required.
3. Secure box to grade or form using nails, screws,
rebar and wire or other appropriate means.
4. Cement conduit feed to hubs/reducers.
5. Pour concrete to required height (2 1/4" to 6 1/2" [57mm to 165mm]).
6. If used for dual service, use the center hubs for power and the outer hubs for low voltage.
After Concrete Sets:
1. Use a hand saw to cut the top of the box
extending above the floor surface (see Figure 1).
2. Tile: Cut must be square and parallel
with the floor surface for tile applications.
a.
For 1/8" [3.2mm] thick tile, cut top
of box flush with concrete pour.
b.
For 3/8" [9.5mm] thick tile, cut top
of box 1/4" [6.4mm] above concrete
pour (see Figure 2).
1. Cut away flanges at screed
level (see Figure 3).
2. Apply tile over concrete
floor (see Figure 4).
3. 1/4" [6.4mm] of grout
is required between tile
flange and tile (see Figure 5).
Ratchet-Pro
™
881 PVC Floor Box
895DCC Cover
INSTALLATION INSTRUCTIONS
Walker
®
electrical systems conform to and should
be properly grounded in compliance with require-
ments of the current National Electrical Code or
codes administered by local authorities.
All electrical products may present a possible
shock or fire hazard if improperly installed or
used. Walker electrical products may bear the
mark as UL Listed and/or Classified and should
be installed in conformance with current local
and/or the National Electrical Code.
Low Voltage
Power
4 1/4" [108mm]
Flange Diameter
Figure 1
Cut Edge
Figure 3
1/4" [6.4mm]
Above Concrete
Figure 2
4 3/4"
[121mm]
1/4" [6.4mm]
Clearance
Required
Between
Flange and Tile
Figure 4
Figure 5
Saw Away
These Sections