Is-0368 rev. o – Legrand F7596-xx User Manual
Page 2
301 Fulling Mill Road, Suite G
Middletown, PA 17057
Phone (800) 321-2343 / Fax (717) 702-2546
www.onqlegrand.com
Page 2 of 2
INSTRUCTION/INSTALLATION SHEET
inQuire™ 1000 Intercom Door Unit
IS-0368 REV. O
©Copyright 2006 by On-Q/Legrand All Rights
Reserved
.
NOTE: Make sure that the included weather proofing gasket is placed over the Door Unit circuit board
and speaker before terminating the Cat 5 cable.
1. As shown in Figure 3, punchdown the Cat 5 cable onto the 110 punchdown block on the rear of the Door
Unit. Follow the T568A standards described in Figure 2.
2. Insert the Door Unit with the gasket in position and the Cat 5 cable
into the 2 gang box and secure the unit to the box using the 4
included screws.
3. Terminate the other end of the Cat 5 cable, at the inQuire™ 1000
Intercom Module, with an RJ45 plug using the T568A wiring
standard.
4. Insert the RJ45 plug into one of the DOOR UNIT jacks on the
Intercom Module. If this is the third Door Unit in the system,
then insert the plug into port 12 and remove the shunt from J1
on the rear of the Intercom Module.
5. Apply power to the Intercom Module and verify system functionality.
4. Other Information:
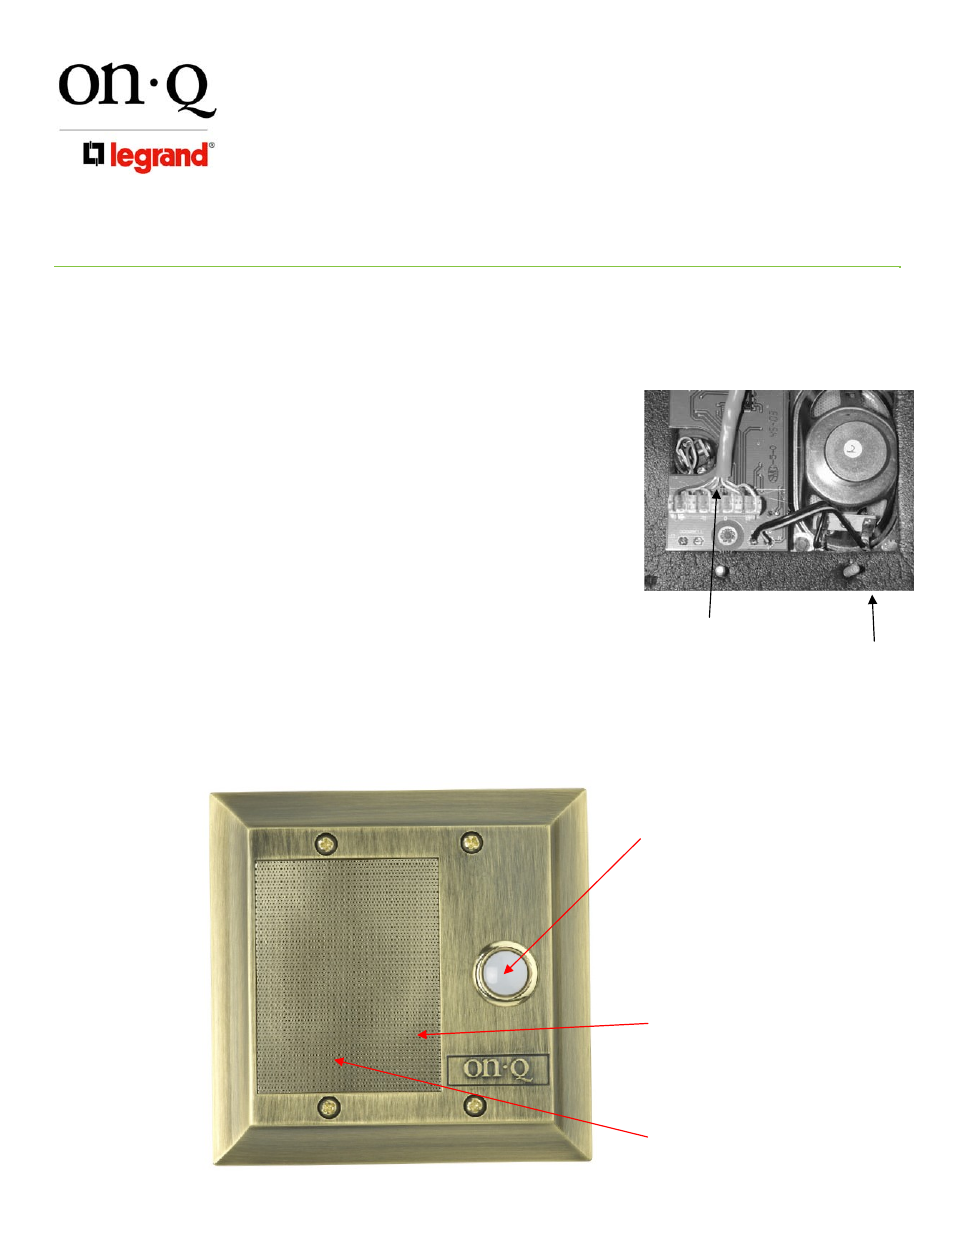
Please refer to Figure 4 to familiarize yourself with the operation of the inQuire™ 1000 Door Unit.
Figure 3
Figure 4
½”
maximum
untwisting
Door Chime Button: When a visitor
pushes this button, the Door Chime will be
neard throughout the home at each active
intercom unit. The occupants of the home
can then press the Door button at any
intercom unit to answer the door. The visitor
will hear the occupant over the Door Unit
speaker and be able to talk to them over the
Door Unit microphone. The occupant may
also choose to release the electronic door
latch (if equipped) and let the visitor in.
Speaker
Microphone
gasket