Legrand 364406-01 User Manual
Is-0122 rev. a
301 Fulling Mill Road, Suite G
Middletown, PA 17057
Phone (800) 321-2343 / Fax (717) 702-2546
www.onqlegrand.com
Page 1 of 2
INSTRUCTION/INSTALLATION SHEET
High Performance RJ45 Modular Plug
Hand Tool
IS-0122 REV. A
©Copyright 2008 by On-Q/Legrand All Rights
Reserved
.
1. Introduction
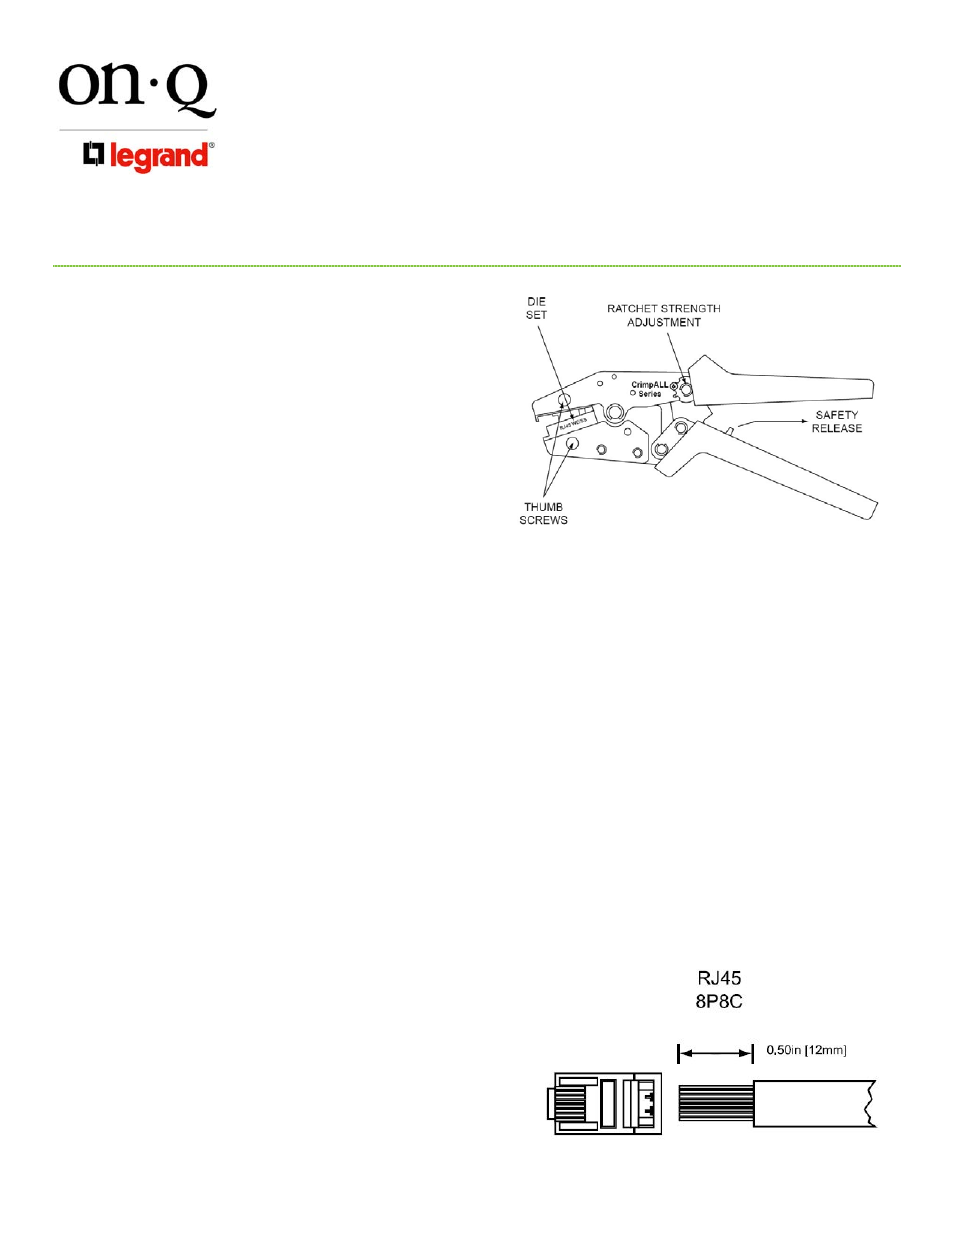
The On-Q/Legrand High Performance Modular Plug Hand
Tool, PN 364406-01 (see Figure 1), is used to crimp RJ45
plugs, PN 364405-01, to category UTP cable. The tool
comes with interchangeable die sets and can be used for
other terminations using Paladin Tool die sets.
2. Crimping a Cable Assembly
a. If not already installed, install the required die set in the
crimp tool by removing the thumb screws located in the
jaws. Install the die set with the text facing outward when
crimper is in position shown in Figure 1.
b. Install the thumb screws and tighten to maximum thumb tightness.
NOTE: Do not use pliers or tools to tighten screws - only hand tightening is necessary.
c. Assemble cable and connector as specified by the connector and cable manufacturers’ instructions.
d. Insert connector/cable assembly into the die set and squeeze the handles through a complete ratchet cycle.
e. Crimp is complete.
3. Emergency
Release
In the case of an emergency where a crimp cycle is stopped and the tool needs to be reopened, flip the safety
trigger forward in the direction of the jaws to engage the release mechanism.
4. Ratchet Strength Adjustment
Remove the gear screw. Adjust gear +/- to desired force. Replace the screw.
5. Telephone Cable Assembly (see Figure 2)
a. Strip approximately 1/2” of the outer insulation off the
cable.
b. Do not strip the insulation off the smaller internal wires
and align the conductors.
c. For round cable (twisted-pair), un-twist and align
conductors in pairs based on color. Verify the wiring pin-
out required for the system. Typically, pairing is either 1-
to-1, or is paired for pins 1&2, 3&6, 4&5 and 7&8 (for EIA
standard). The equipment connecting to the cable
determines the wiring pin-out (see Figure 3).
Figure 1
Figure 2