Legrand PW7639 User Manual
Instruction / installation sheet
INSTRUCTION / INSTALLATION SHEET
Multi-Voltage Power Distribution Module
IS-0363 Rev. O
301 Fulling Mill Road, Suite G
Middletown, PA 17057
Phone (800) 321-2343 / Fax (717) 702-2546
www.onqlegrand.com
©Copyright 2006 by On-Q/Legrand All Rights Reserved.
Page 1 of 1
Figure 2
Figure 3
Figure 1
1. INTRODUCTION
The On-Q/Legrand Multi-Voltage Power Distribution Module (P/N PW7639) (see Figure 1) allows you
to power a wide variety of modules and devices.
2. FEATURES
• Allows you to power a wide variety of modules and devices
• The Multi-Voltage Power Distribution Module distributes:
– 15 volts DC to up to four locations (3 front / 1 rear)
– 12 volts DC to up to two locations
– 5 volts DC to one location
• Includes single bay bracket (P/N 364890-01) for mounting in On-Q style enclosure (see Figure 2)
• Includes six 24" power cord jumpers
• Overcurrent protected with an automatically resetting polyswitch device
• Main power indicator LED
• Overcurrent
LED
3. POWER
REQUIREMENTS
Power to the module is supplied by up to two 15V, 1.45A power supplies (P/N PW7715) that must
be purchased separately.
NOTE: To provide the specified voltage and the maximum total power,
the module must be connected to two power supplies.
NOTE: Using two supplies, the max total current is 2.9Amp; 1Amp Max per port.
If the max total current is exceeded, the red "Overcurrent" LED will illuminate and
DC Output power cannot be guaranteed.
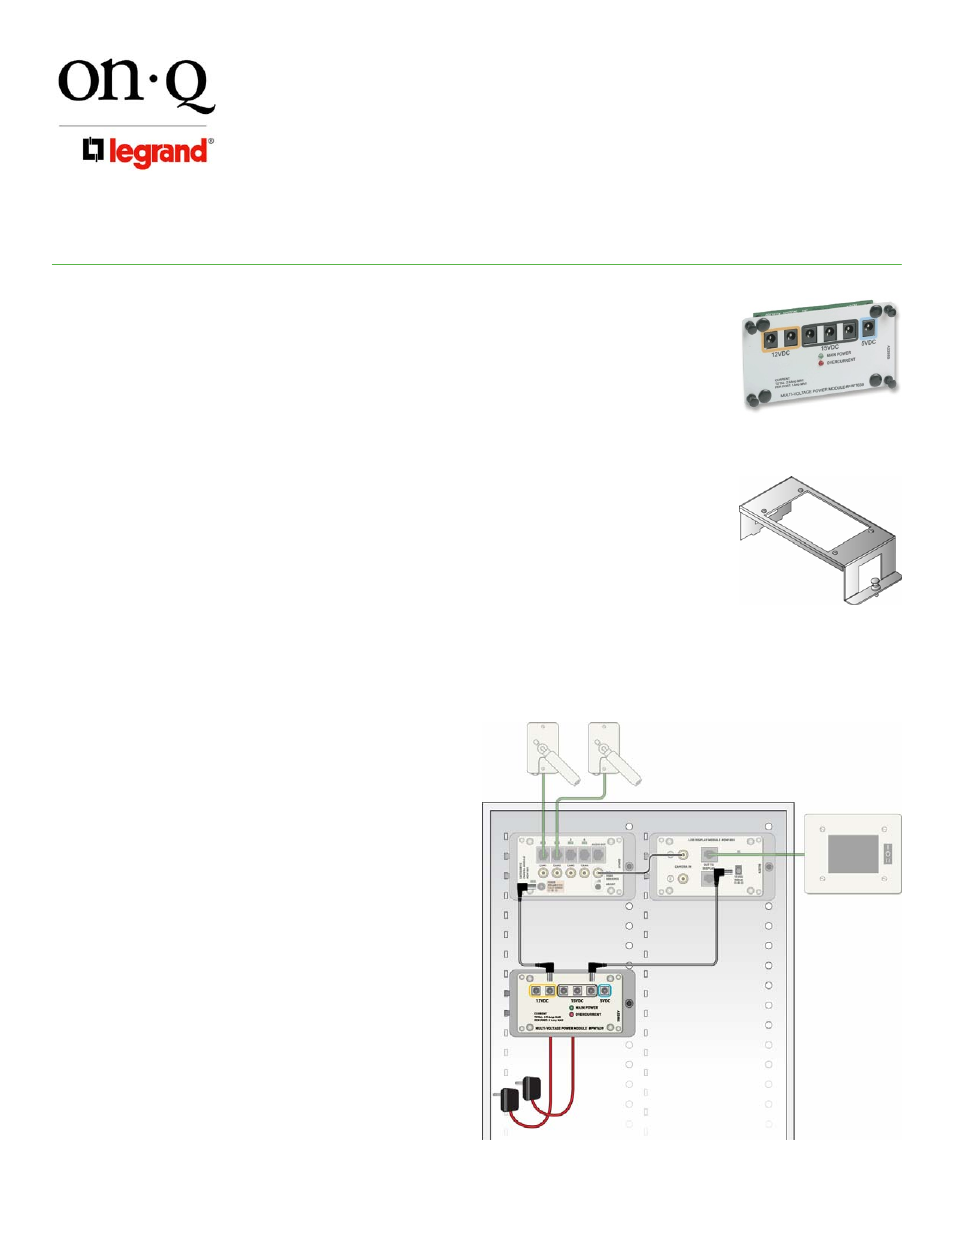
4. INSTALLATION
Refer to the example shown in Figure 3 during
installation.
A. Snap the Power Distribution Module onto the
included bracket using the push-pins at each
corner.
B. Plug the cord from the first power supplies into
the socket labeled "IN 1"; if using a second power
supply, plug its cord into the socket labeled "IN2".
C. Without mounting the module, find the
appropriate spot in the enclosure where all the
power cord jumpers reach the modules to be
powered.
D. Mount the module/bracket into the enclosure,
insert the tabs on the left side of the bracket into
the slots in the enclosure and push the bracket
pushpin into an appropriate hole in the enclosure
to secure the module/bracket to the enclosure.
E. Make the appropriate connections with the power
cord jumpers.
F. Plug the power supplies into the AC Input
receptacle(s).