Advanced operation, Amp operation – Marantz SR5004 User Manual
Page 42
NAMES AND
FUNCTIONS
40
BASIC
CONNECTIONS
BASIC
OPERA
TION
ADV
ANCED
CONNECTIONS
SETUP
ADV
ANCED
OPERA
TION
TROUBLESHOOTING
OTHERS
ADV
ANCED
OPERA
TION
ENGLISH
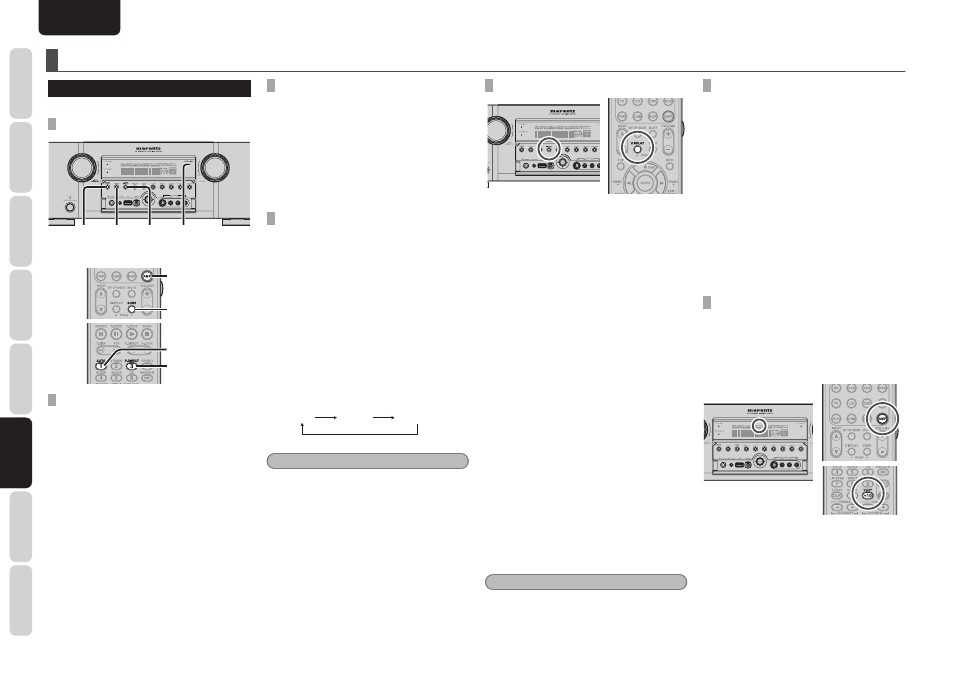
ADVANCED OPERATION
AMP OPERATION
The unit shown in the illustrations is SR6004.
SELECTING THE SURROUND MODE
SURR.
MODE
AUTO PURE
DIRECT
PURE
DIRECT
INDICATOR
AMP
SURR
P.DIRECT
AUTO
SURROUND MODE
For details on surround mode, refer to page 83.
(Using the unit)
Press the SURR. MODE button several times until
the desired surround mode is selected.
(Using the remote controller)
After pressing the AMP button, press the SURR
button several times until the desired surround
mode is selected.
AUTO SURROUND
(Using the unit)
To select the Auto surround mode during playback,
press the AUTO button on the front panel.
(Using the remote controller)
To select the Auto surround mode, press the AMP
button and press the AUTO button.
• For surround modes, see “Surround Mode” on
page 83.
PURE DIRECT
(Using the unit)
Press the PURE DIRECT button.
(Using the remote controller)
After pressing the AMP button, press the P.DIRECT
button.
When this button is pressed once, “SOURCE
DIRECT” appears on the FL display. If pressed
again, “PURE DIRECT” appears. After 2 seconds,
the FL display indication goes out.
In the source/pure direct mode, the tone control
circuitry and bass management are bypassed.
Each time this button is pressed, this mode changes
as follows.
AUTO
S-DIRECT
PURE DIRECT
Notes
• The surround mode is automatically switched to
AUTO when the pure direct function is turned
on.
• Additionally, speaker configurations are fixed
automatically as follows.
Front SPKR = LARGE
Center SPKR = LARGE
Surround SPKR = LARGE
Surround Back SPKR = LARGE
Sub woofer = YES
DISPLAY MODE
You can select the display mode for the front display
of the unit.
To select this mode, press the DISPLAY on the
remote controller or the front panel.
When this button is pressed, the display mode is
switched in the following sequence.
Normal → Volume → Auto display OFF → Display
OFF → Normal → ...
Normal mode:
The following three mode types are displayed.
• Displays the selected input function. If the
function has been renamed using the Function
Rename feature (see page 26), the renamed
name appears on the display.
• Displays the input mode set via the Function
Input Setup feature. (See page 25)
• Displays the status of the selected surround
mode.
Volume mode:
The input function and input mode are displayed
in the upper part, and the current volume level is
displayed in the lower part.
Auto Display Off mode:
The display is off. But, if you make a change to the
unit such as the input or surround mode, the display
will show that change, then go back to off after
about 3 seconds. When changing the volume, it is
not displayed.
Display Off mode:
The display is off completely.
Note
• Only the “DISP” indicator will be illuminated on
the front display in display off condition.
DIALOGUE NORMALIZATION MESSAGE
Dialogue Normalization (Dial Norm) is a feature of
Dolby Digital.
When playing back software which has been
encoded in Dolby Digital, sometimes you may see
a brief message on the FL display which will read
"D-NORM X dB" (X being a numeric value).
Dialogue Normalization serves to let you know if
the source material has been recorded at a higher
or lower level than usual. For example, if you see
the following message: "D-NORM + 4 dB" on the
FL display, to keep the overall output level constant
just turn down the volume control by 4 dB. In other
words, the source material that you are listening to
has been recorded 4 dB louder than usual.
If you do not see a message on the FL display, then
no adjustment of the volume control is necessary.
VIDEO ON/OFF
When no video signal is connected to the unit or
a DVD, etc., is connected directly to your TV, the
unnecessary video circuit can be turned off by
selecting the “VIDEO OFF” setting.
To select video off, press the AMP button and press
the V.OFF button.
The “V-OFF” indicator on the front display panel
will light.