Advanced connections, The wireless receiver connection, Remote control connection – Marantz MCR503 User Manual
Page 24: Setting the remote control, Ct (clock time)
19
Getting Started
Basic Connections
Advanced Connections
Advanced Connections
Basic Operations
Advanced Operations
Troubleshooting
Explanation terms
Specifi
cations
Index
ENGLISH
Advanced connections
This section explains how to connect a iPod and USB memory
device.
For other connections, see the sections below.
n Speaker connections (vpage 9)
n Connecting components (vpage 10)
n Connecting an antenna (vpage 10)
n Connecting the power cord (vpage 11)
Audio cable (sold separately)
iPod cable
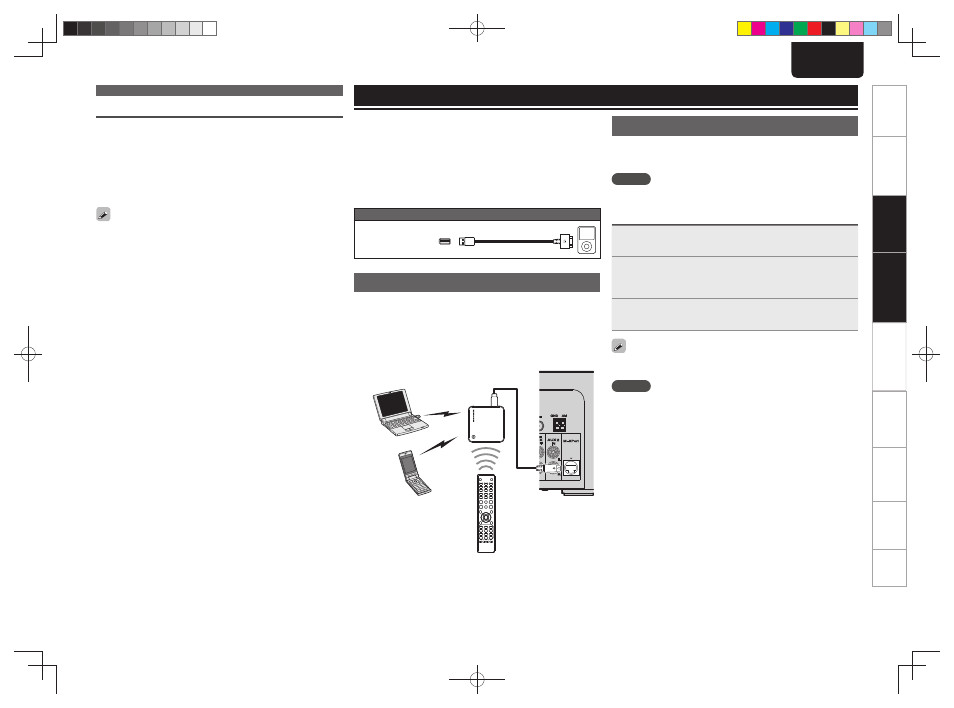
The wireless receiver connection
The unit allows the RX101 wireless receiver (sold separately) to be
connected.
Connect the RX101 to the M-XPort (Marantz-eXtension Port) of the
unit.
• For the installation and operating procedures, read the operating
instructions that come with the RX101.
RX101
Bluetooth device
Remote control connection
The unit can be controlled using the remote sensor of RX101
connected to the unit. Be sure to set “IR=DISABLE” when controlling
in this way.
NOTE
When making this remote control connection, be sure to set the IR
switch of RX101 that is connected to the unit, to ON.
Setting the remote control
1
Press
<ON/STANDBY>
to set the unit to standby
mode.
2
Press and hold down
<2>
and then press
<ON/
STANDBY>
.
“IR=ENABLE” or “IR=DISABLE” fl ashes on the display.
3
Press
<ui>
to select “IR=DISABLE” and then
press
<ENTER>
.
To restore original settings, repeat steps 1 – 3, select “IR=ENABLE”
and press
<ENTER>
.
NOTE
The unit cannot be controlled using the remote controller while
“IR=DISABLE” is set.
Basic Operations
Tuner playback
CT (Clock Time)
Use this to correct the time of the clock on this unit.
q During CT reception, press
[MENU]
or
<MODE>
for 3 or more
seconds.
The “AUTO Adj mm:ss” is displayed.
w Press
[ENTER/MEMO]
or
<ENTER>
to set.
The “RDS mm:ss” is displayed.
• The time on the set’s internal clock is updated to the currently
displayed “CT” time.
Do not operate any buttons while the time is being updated. If buttons
are operated, CT reception is not possible and the time is not updated.
1.M-CR503N_ENG_4th_0610.indd 19
1.M-CR503N_ENG_4th_0610.indd 19
2010/06/11 18:24:19
2010/06/11 18:24:19