Putting modules on the worksheet …… a-8, And wbk options …… a-8, Wbk14 …… a-8 – Measurement Computing DASYLab User Manual
Page 44: Putting modules on the worksheet, Working with the wavebooks and wbk options
A-8 Configuring DASYLab for WaveBooks
989693
DASYLab - Standard Driver
Putting Modules on the Worksheet
The WaveBook and WBK option modules can be found in the Analog Input Module menu.
You can add your modules to the worksheet, as you deem appropriate.
If you place an icon on the worksheet that is not physically or properly
connected in the WaveBook daisy chain, your worksheet will generate an error
“0x10”. This is caused by assigning WBKs to connectors in the Hardware Setup
that do not exist in the physical setup.
Correcting the hardware configuration so it matches your setup will eliminate
the error. This means that you can’t develop your worksheet without having the
hardware setup actually connected to your computer’s parallel port interface.
Working with the WaveBooks and WBK Options
WaveBooks
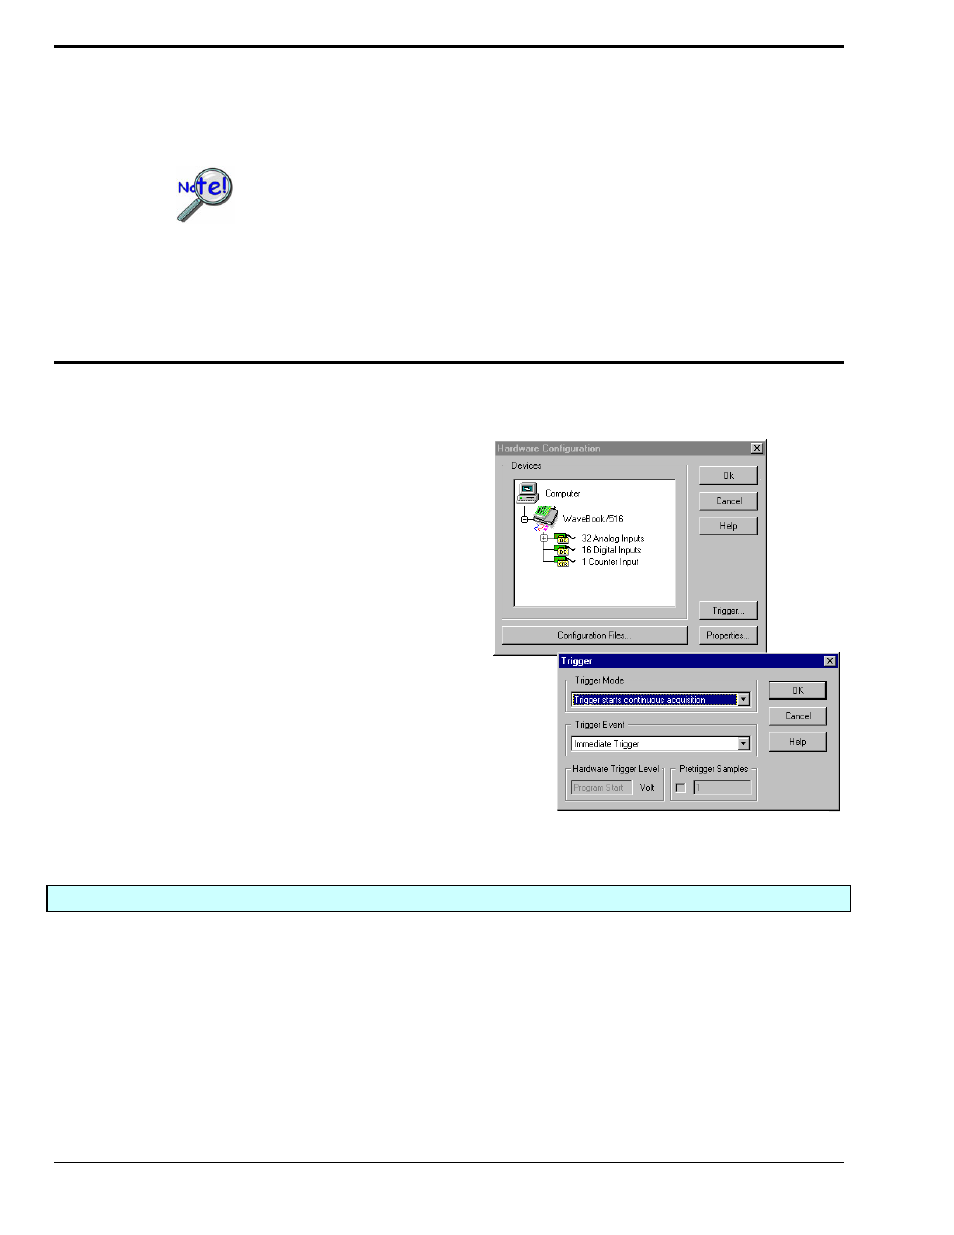
To use one of WaveBook’s many
triggering features, open the Hardware
Configuration dialog box, then click the
<Trigger> button. This accesses a
Trigger dialog box from which you can
set various trigger-related parameters.
There are several software trigger functions can
be used on the DASYLab worksheet to control
data flow. Thus, the worksheet can be set to run
in a continuous fashion while the software
triggers regulate the flow of data.
Configuring the Trigger for WaveBook
WBK14
To adjust WBK14 settings you will need to access the WBK14 Expansion Selection dialog box. To do this:
1. Open the Hardware Configuration dialog box.
2. Double-click on the WBK14 icon in the Analog Input list (see following figure, left-hand side).
The Expansion Selection box [not shown] will appear.
3. In the Expansion Selection dialog box, click on the <Settings> button.
The WBK14 Module Configuration dialog box will appear (following figure, right-hand image).
4. Adjust the settings as desired, then click the <OK> button.