Measurement Computing DaqBook User Manual
Daqbook, Quick start guide, 1) set jumpers
457-0941, rev 1.2
03-01-00
DaqBook Quick Start Guide 1
DaqBook
Quick Start Guide
For DaqBook/100, /112, /120, /200, /216, /260*
* Note: DaqBook/260 is shipped with an instruction guide detailing the removal of the slide-out drawer and steps for installing internal cards.
&$87,21
Turn off power to the DaqBook and externally connected equipment before connecting cables and setting
configuration jumpers and switches, and before removing the cover. Electric shock or damage to equipment can
result even under low-voltage conditions.
Take ESD precautions (packaging, proper handling, grounded wrist strap, etc.)
DaqBook Installation Steps, Pictorial Overview
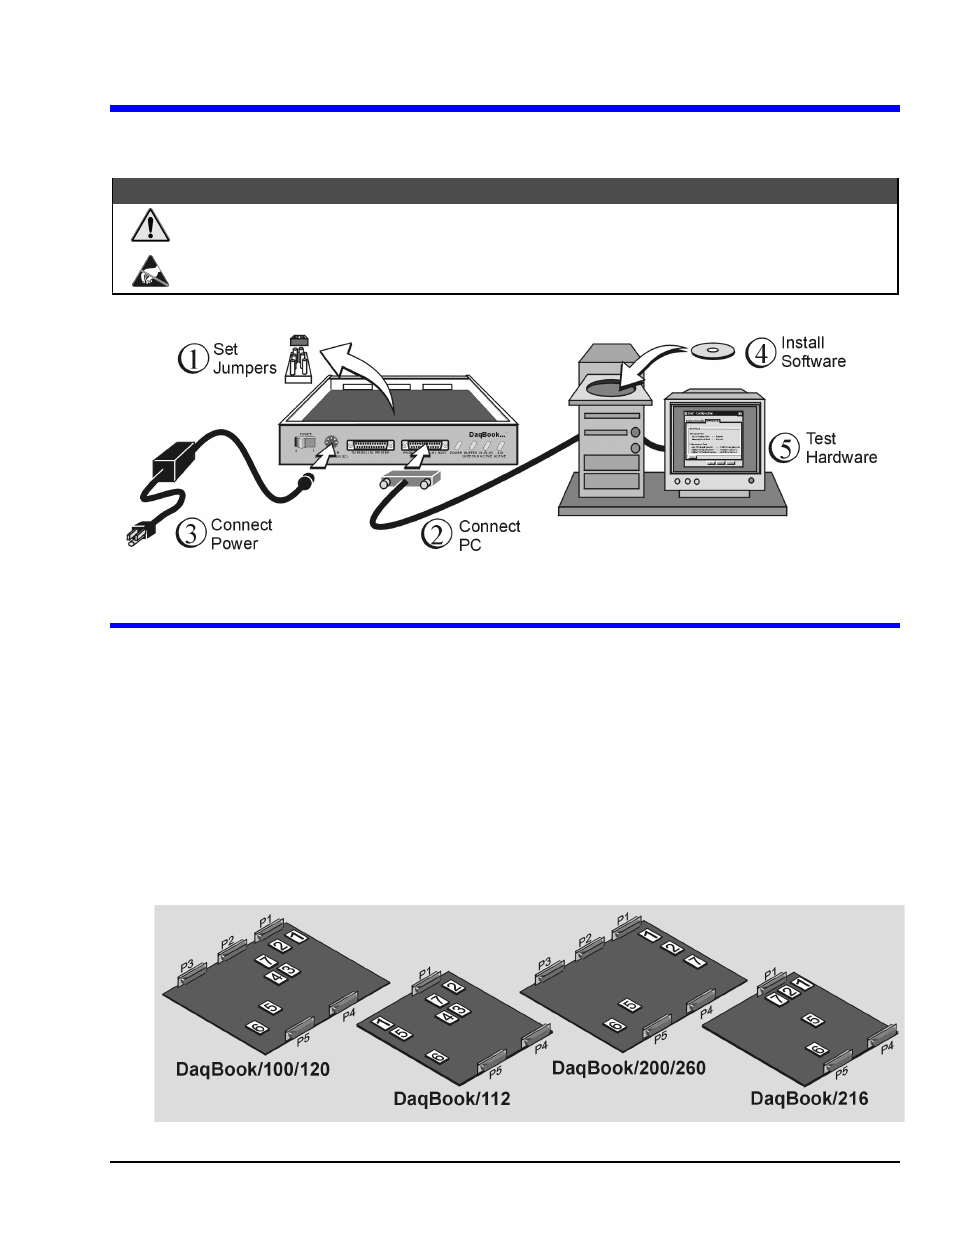
(1) Set Jumpers
1.
Place the unit on a flat, stable surface. Ensure no power or signal lines are connected.
2.
Remove cover screw(s), and slide the top cover plate free of the device. All jumpers are accessible from above the board, and no
further disassembly is required.
3.
Set jumpers JP1 through JP4 as needed for your application. Jumper configuration options follow shortly. Note that jumpers are
clearly labeled on the actual motherboards.
DaqBook/200, /216, and /260 do not have JP3 and JP4 jumpers. For those units, related settings are made via software.
4.
Leave JP5, JP6, and JP7 in their default positions. JP5 (Time Base Selection) default position is for 1 MHz. JP6 (Watchdog Timer
Enable/Disable) default position selects “disabled.” JP7 concerns calibration. See user’s manual prior to changing the settings of
these three jumpers.
5.
Replace and secure the cover before applying power and signals.
Motherboard Jumper Locations
Note that DaqBook/112 and DaqBook/216 boards are physically smaller than the other boards.