Measurement Computing RS-232 User Manual
Rs-232 to usb interface adapter kit quick start
446-0941
rev
1.0
RS-232 to USB Interface Adapter Kit Quick Start
For use with ChartScan/1400, MultiScan/1200 , TempSan/1100 , LogBook/300, and LogBook/360.
This USB Interface option allows you to connect an applicable acquisition device to a USB port on the host PC instead of
connecting it to an RS-232 interface. The kit includes all the items you will need for proper connection.
Your kit contains 1 each, of the following:
CA-47 null modem serial cable
CA-271 RS-232 to USB interface cable
Data Acquisition CD 8.1.2 (or higher)
IMPORTANT! Software must be installed first!
Quick Start (446-0941)
Before you get started
Verify that you have the following items.
Data Acquisition Device
RS-232 to USB Interface Adapter Kit
Monitor: SVGA, 1024 x 768 screen resolution
Windows 2000 SP4 and Windows XP users
:
PC with
I
ntel
™
Pentium [or equivalent]; 1GHz
512 MB memory; 10 GB disk space
Windows Vista users:
PC must be Windows Vista Premium Ready
Step 1 - Install Software
(Software must be installed before connecting hardware)
1.
Close all running applications on the host PC.
2.
Insert the Data Acquisition CD (8.1.2 or higher) into your CD-ROM drive and wait for the PC to auto-run. An Opening
Screen will appear. If AutoRun is disabled: (a) right click Windows Start menu, (b) select Explore; and (c) double-click
MasterSetup.exe. As an alternative to using the CD, you can download software from
3.
Click the <ENTER SETUP> button.
Note: If you are downloading software from our website, follow instructions provided there.
4.
From the hardware selection screen, select your data acquisition device then follow the on-screen instructions.
Note - ChartView Users:
ChartView is used with ChatScan/1400, TempScan/1100, and MultiScan/1200.
To enable all ChartView features:
(a) From ChartView’s main window, open the File pull-down menu,
(b) select Authorization,
(c) enter
C3523DFA6C0A
in the dialog box and apply the code.
Note - LogView Users
:
LogView is used with LogBook/300 and LogBook/360.
To enable all LogView features:
(a) From LogView’s main window, open the File pull-down menu,
(b) select Authorization,
(c) enter
ED7B55484273
in the dialog box and apply the code.
Step 2
– Check Hardware
Refer to the manual and/or quick start for your specific device.
1. If your device has a voltage stated [near the power switch], make sure it matches the voltage of your intended AC power
supply. If you need to change the voltage, refer to your user’s manual.
2. If your device has a DIP switch refer to your users’ manual for the setting options.
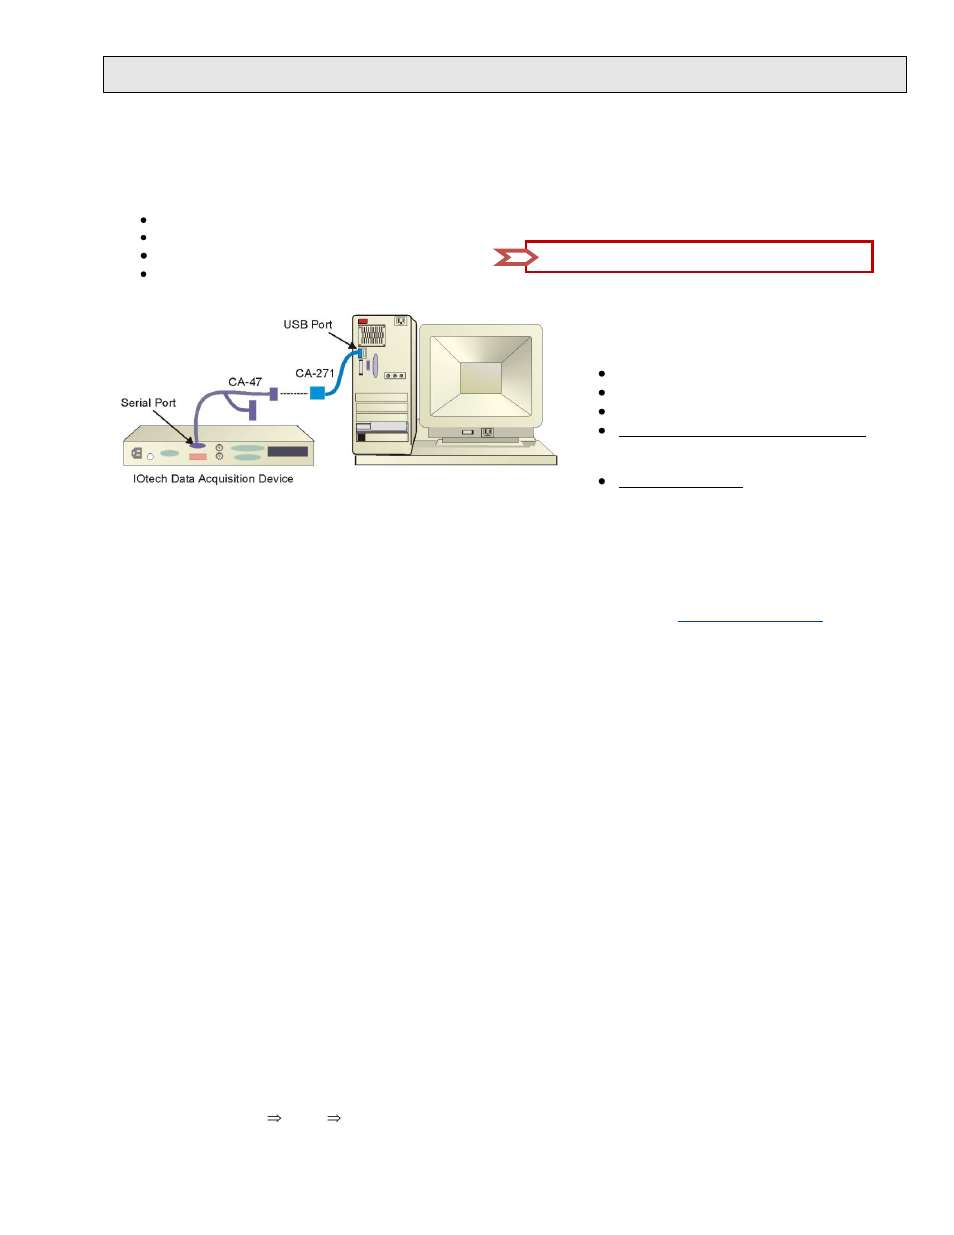
Step 3 - Connect to the Host PC
Note: To check the host PC’s COM port status, navigate from the Windows Desktop as follows:
Control Panel
System
Device Manager tab, then click on Ports (COM & LPT).