General, Controls and settings – MK Products Cobra MX Gun - ACWC User Manual
Page 10
Cobra
®
MX Owner's Manual - Page 2
Conduit
The Cobra
®
MX gun comes standard with a poly-lined conduit, for feeding
aluminum wire. The longer fitting with a shallow groove is used on the gun
end. A set screw located on top of the gun handle secures the conduit in
place.
Gas Hose
The gas hose is secured over the barbed gas fitting with a tie wrap. The
cabinet end of the gas hose uses our standard gas fitting (1/8” - 27 nps).
Coolant Supply Hose
If so equipped; one end of the liquid hose is secured over the barbed liquid
fitting with a tie wrap and the other end is connected to the center fitting on
the power block.
Electric Cable
A seven conductor control cable is used on the Cobra
®
MX gun. The gun end
of the control cable is secured to the gun with a boot clamp and soldered into
the pot assembly and micro switch connectors. Slack is left in the electric
cable as it exits the back of the gun to prevent cable breakage. The cabinet
end has a seven pin “W” clocked amphenol connector.
Section B Operation
General
The Cobra
®
MX gun maintains a constant, steady, uniform wire feed speed,
regardless of curved or looped wire conduit. The constant push exerted
by the slave motor in the cabinet, combined with the pull of the gun motor,
causes the wire to literally float friction-free through the wire conduit. The
24VDC gun motor is controlled by a three and three-quarter (3 3/4) turn
potentiometer in the gun handle.
Controls and Settings
Potentiometer
The laterally-positioned potentiometer is located in the lower end of the
handle, providing up to 800 ipm with 3 3/4 turns.
Micro Switch
The micro switch assembly consists of the micro switch, and leads.
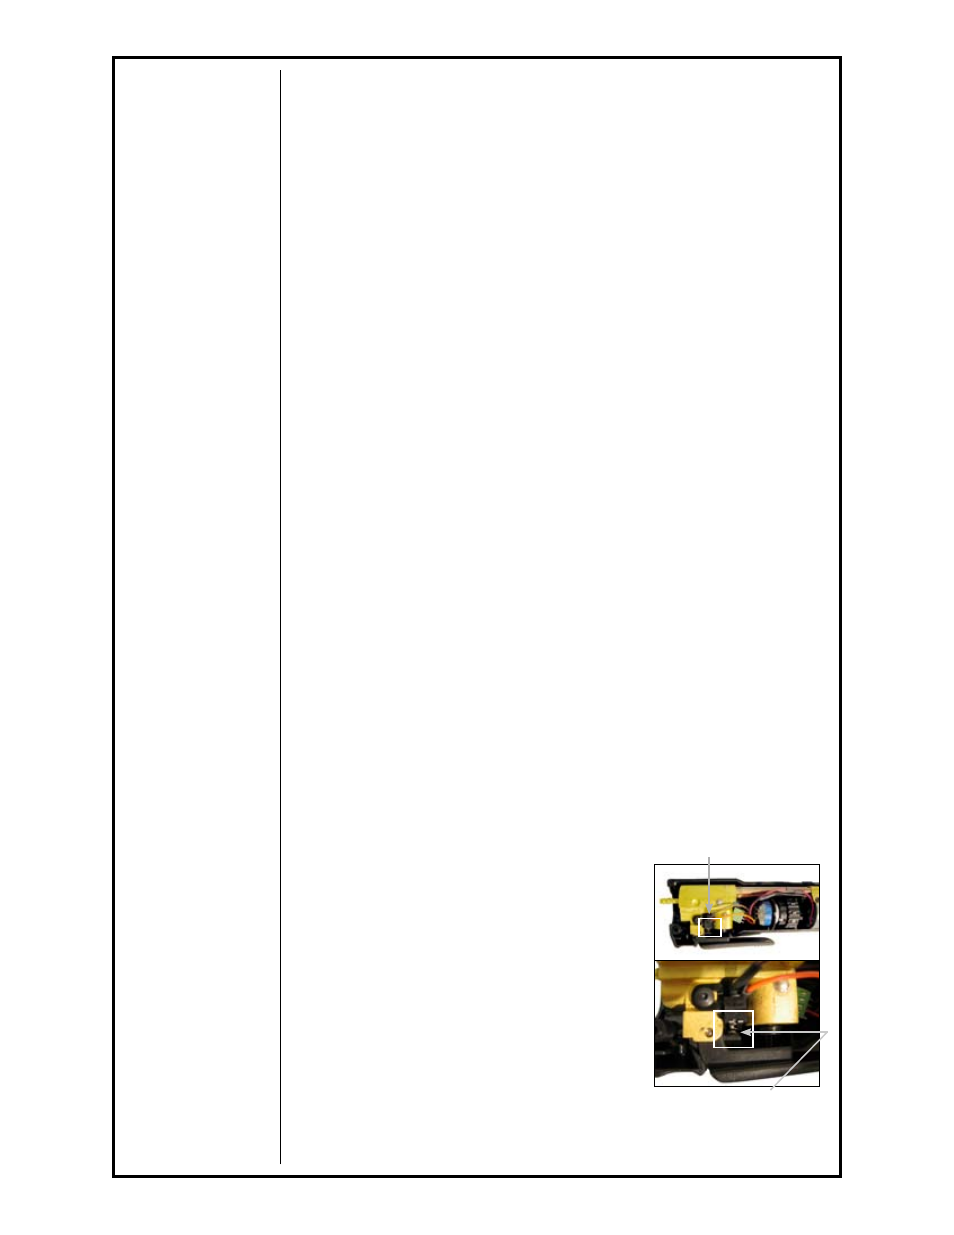
Trigger Sensitivity
The amount of trigger lever travel can be
shortened for a quicker or more responsive action.
A more sensitive trigger lever is produced by
reducing the gap between the trigger lever and
the micro switch lever. By turning-in the trigger
sensitivity adjustment screw, it closed the gap
between the trigger lever and the micro switch
lever.
This will enable the operator to increase the
sensitivity of the trigger lever.
Sensitivity Adjustment
With the wire feeder turned on (with or without
welding wire loaded), turn the screw in until the
micro-switch is activated. Once activated, the gun
and wire feeder motors will begin feeding wire.
Trigger Sensitivity Adjustment
Screw Location
Screw adjusted out of trigger,
pre-setting the micro-switch
lever for shorter motion
sensitivty.