Figure 5: install software confirmation, Figure 6: module software versions – NavCom Install Utility Rev.C User Manual
Page 16
Install Utility User Guide – Rev. C
The receiver must be navigating during upload to accept the software.
Refer to Figure 4 for the steps below:
9
In the User Input section of the window, click the
button to browse to and select the
directory with the module software update files. The path to the directory is displayed.
9
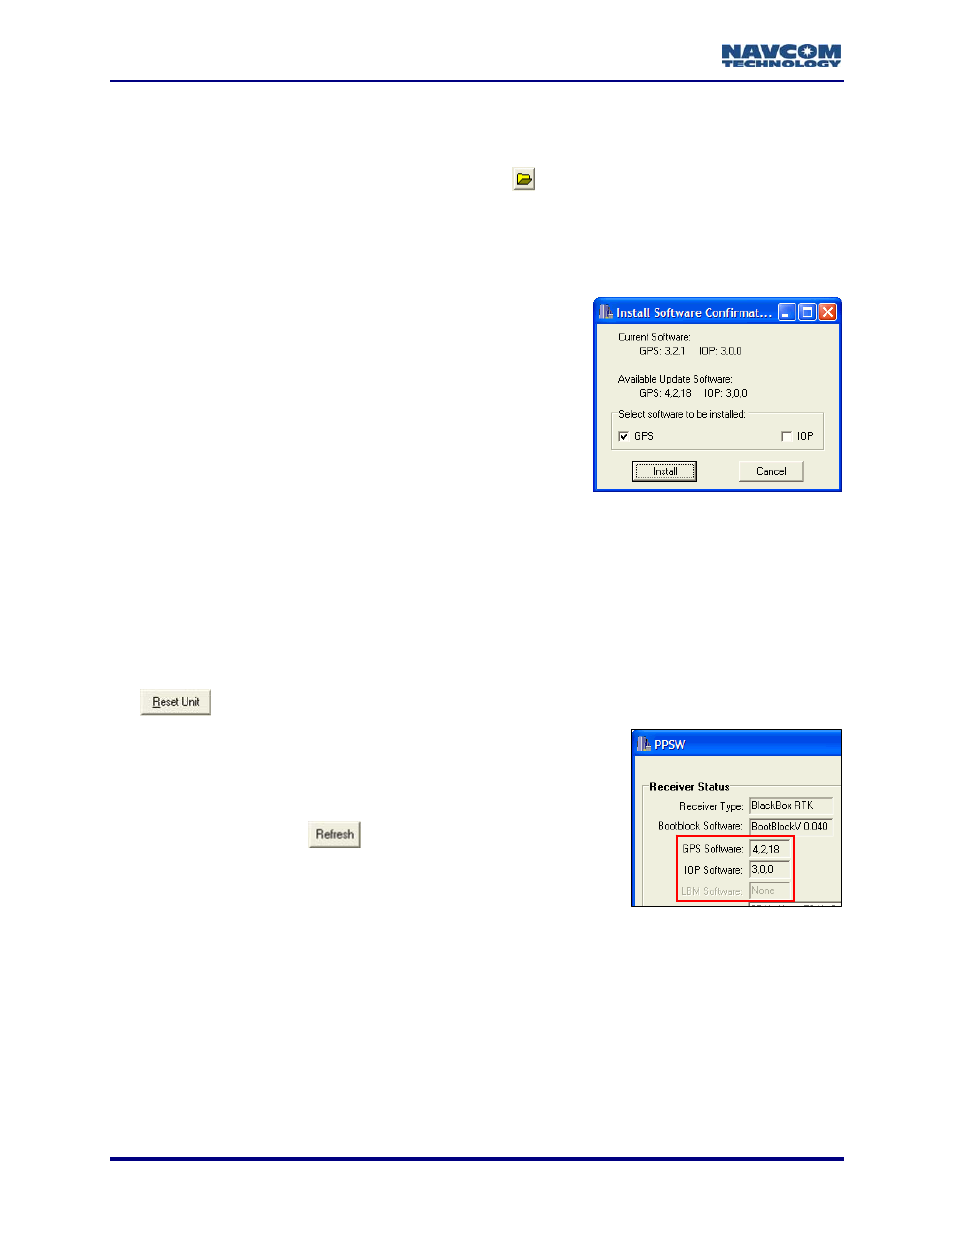
Click the Install Software button. The Install Software Confirmation window opens (see
Figure 5). The window provides the current software versions installed on the computer and
the available updates.
If there is a new version of module software, the
module at the bottom of the window is checked by
default to be installed. If the update software is the
same version as currently installed, the module is not
checked to be installed.
LBM is not displayed in the example to the right
because the StarFire
™ license is not currently
installed on the receiver. As a result, there is no LBM
software to upload.
Figure 5: Install Software Confirmation
9
Accept the default(s) or change the software to be installed (check or uncheck the box next
to a module). If desired, the same version of software can be reinstalled. After the Install
button is clicked, a window will open to confirm the reinstallation.
9
Click the Install button. A bar shows the progress of the installation and the Activities section
of the window shows the upload status. A window notifies the user of a successful upload or
if an error occurred.
9
Manually cycle power to the unit after a successful upload to reset the unit. Do not use the
button to reset the unit.
9
Confirm that the new software is installed. The versions are
displayed in the Receiver Status section of the Install Utility
window (see Figure 6).
If the window does not display the newly loaded software
versions, click the
button.
Figure 6: Module Software Versions
3-14