Part 4: how to use the chopping attachment, Assembling the chopping attachment – Philco PHHB 6603 User Manual
Page 9
7
Revision 06/2014
Copyright © 2014, Fast ČR, a. s.
EN
PART 4: HOW TO USE THE CHOPPING ATTACHMENT
The chopping attachment is suitable for chopping food like meat, hard cheese (e.g. parmesan), vegetables (e.g.
onion, garlic, carrot, etc.), herbs, nuts (e.g. hazelnuts, walnuts, etc.), dried fruit (e.g. plums) and similar types of
foods.
The chopping attachment is not suitable for chopping ice, spices (e.g. nutmeg), coffee beans or similar types
of foods.
It is necessary to cut food into smaller pieces before placing it in the chopping bowl.
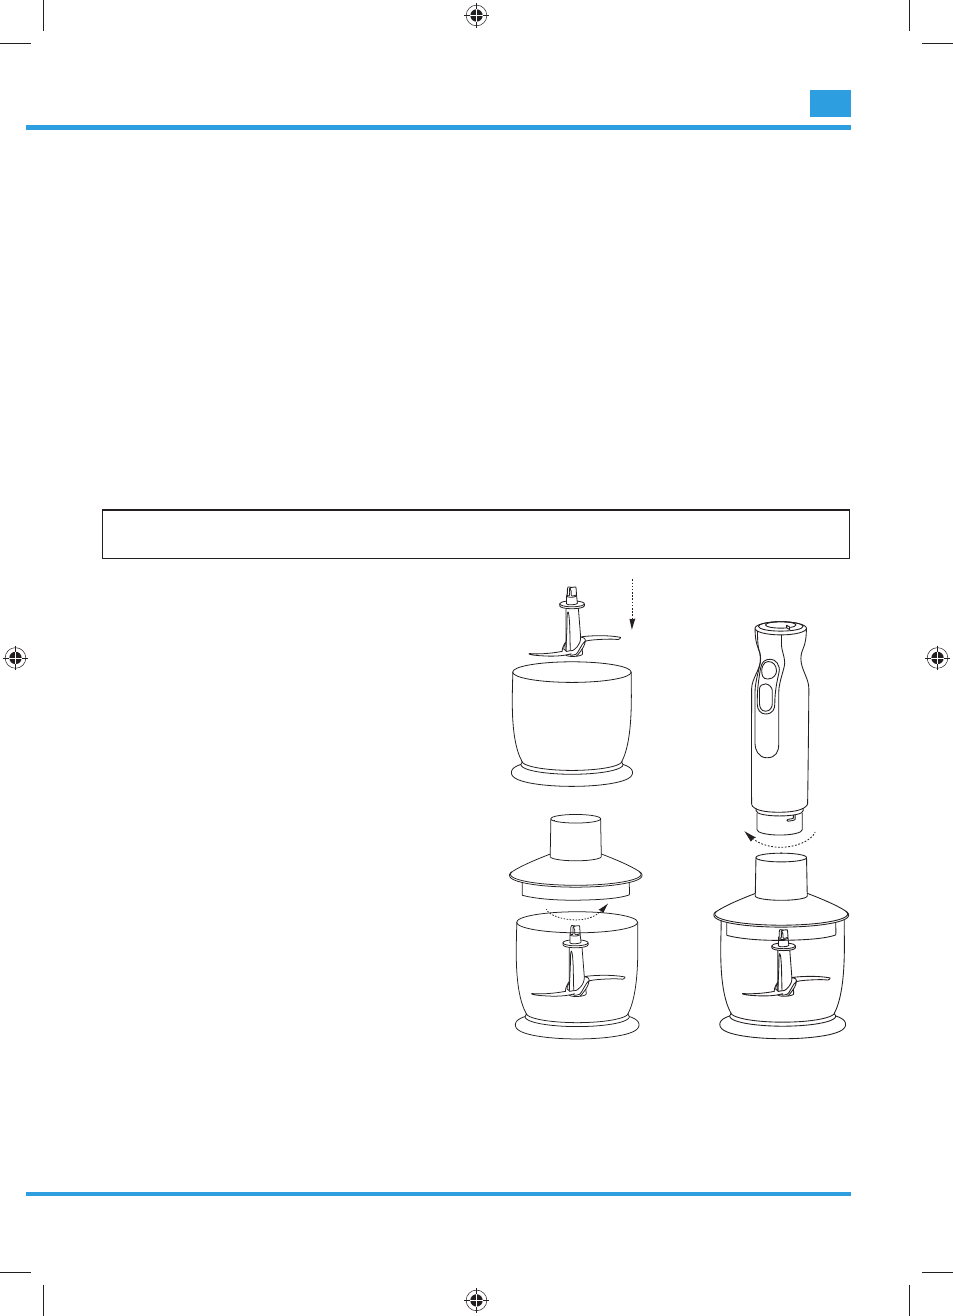
Assembling the chopping attachment:
1.
Place the anti-slip rubber base (12) on the bottom of the chopping bowl. The rubber base prevents acciden-
tal slippage and tipping over of the chopping attachment and possible injury.
2. Carefully place the chopping blade (10) into the chopping bowl (11). Seat the chopping blade on to the cen-
tral shaft of the chopping bowl. Always hold the chopping blade by the top plastic part.
Warning:
The chopping blade is very sharp!
3. Place the food that you wish to chop into the
chopping bowl. The amount of food should
not go past the maximum limit (500 ml),
which is marked on the mixing bowl.
4. Place the lid of the chopping attachment (9)
on to the chopping bowl. The lid needs to be
seated in such a way that the central moulded
piece located on the bottom part of the lid
is seated on the cross of the chopping blade
while the safety locks located on the side of
the lid fit into the safety system of the chop-
ping bowl. As soon as the lid is correctly seat-
ed, turn the lid clockwise until the lid is firmly
secured in place. A click indicates that the lid
is secured.
5. To release the lid, turn the lid anticlockwise.
A click also indicates that the lid is released.
When removing the lid, be especially careful
not to tip over the chopping bowl and prevent
the chopping blade from becoming released
and subsequent injury.
6. Seat the motor unit (4) on to the assembled
chopping attachment.
7. Now the appliance is ready for chopping.
Connect the power plug of the appliance to
a power socket.