Remko rxs h – REMKO RXS xxx H User Manual
Page 12
8. Remove the factory-fitted
protective caps and union nuts
on the stop valve connections.
These should be used during
installation.
9. Before flanging the refrigerant
pipes, ensure that the union nut
is fitted on the pipe.
10.Prepare the laid refrigerant
pipes (Fig 5 and 6).
11. Verify that the shape of the
flange is correct (Fig. 7).
12. First connect and hand-tighten
the refrigerant connections
to ensure they are correctly
seated.
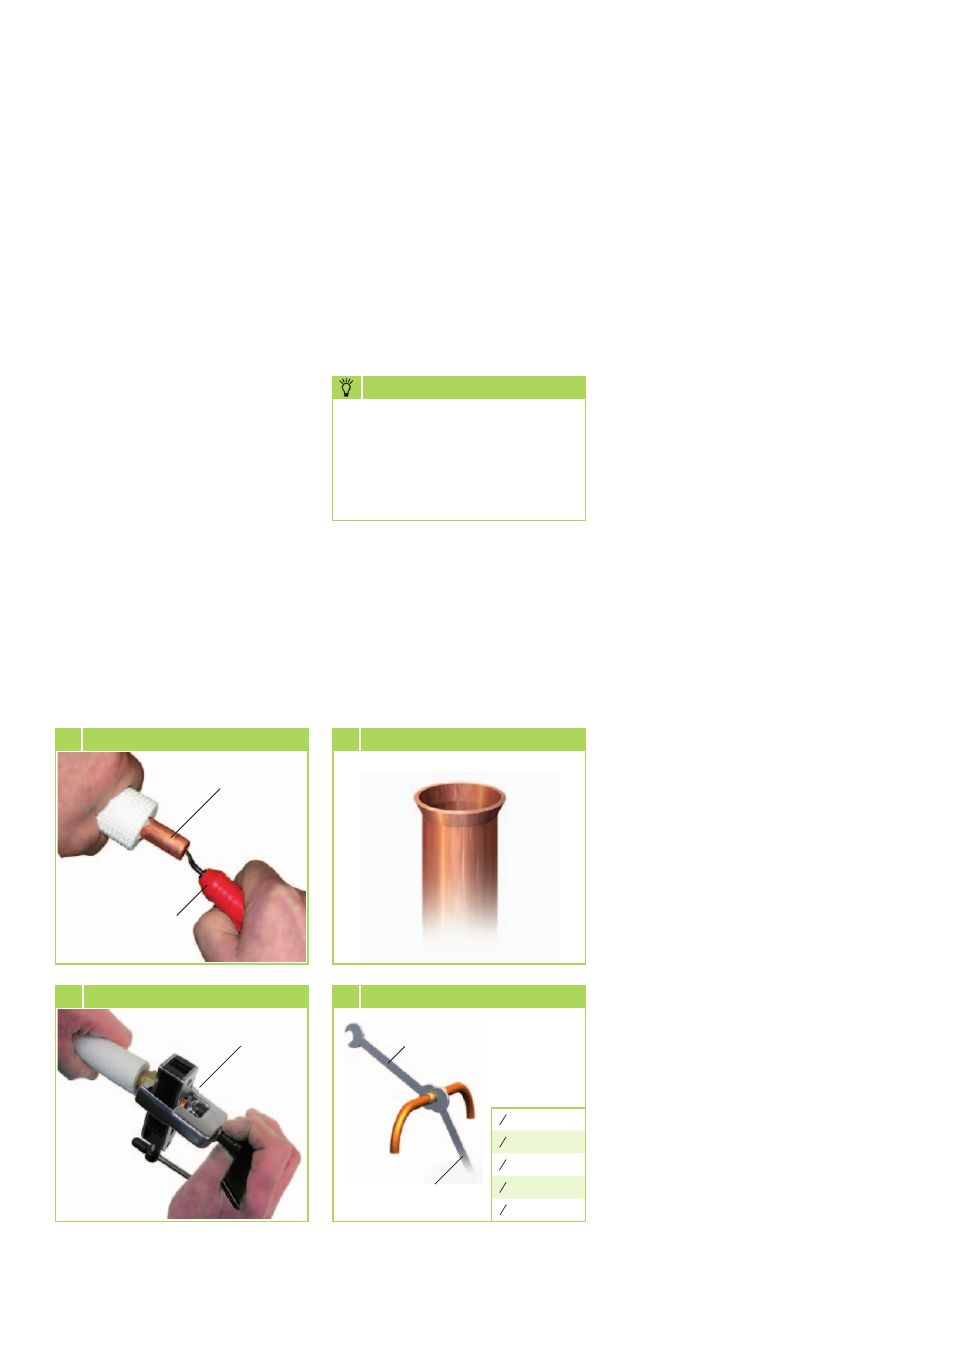
13. Now fully tighten the fittings
using 2 suitably sized open-
ended spanners.
Use one spanner to counter the
force when tightening the
fitting (Figure 8).
Supplementary information
for installation
■
When combining the outdoor
component with some indoor
units, the connection of the
refrigerant pipes may differ.
In that case, install the provided
reducer or expansion fittings to
the indoor unit.
■
If the basic length of the
connection pipe exceeds
5 m, add refrigerant when
commissioning the system for
the first time.
(See chapter „Add
refrigerant“).
Use only tools which are
approved for use in an HVAC
environment. Pipe cutter,
deburrer, bending pliers and
flanging tool.
NOTE
14. Fit appropriate heat insulation
to both installed refrigerant
lines, including the connectors.
15. Only use insulation hoses
which are designed for this
temperature range and
diffusion tight.
Flanging tool
6 Flanging the refrigerant pipe
Refrigerant pipe
Deburrer
5 Deburring the refrigerant pipe
7 Correct flange shape
Tighten 1. spanner
Counter
2. Spanner
8 Tighten the fitting
Tightening
torque:
1 4
“ 15-20 Nm
3 8
“ 32-40 Nm
1 2
“ 50-60 Nm
5 8
“ 65-75 Nm
3 4
“95-105 Nm
REMKO RXS H
12