Observed (fig. 21), Remko hts – REMKO HTS 90 ALU User Manual
Page 40
Condensate drainage connection and safe
drainage
5
7
6
6
8
1
2
3
4
3
8
Fig. 21: Condensate drainage to foundation
1: Outdoor module
2: Reinforced foundation:
ø 700 mm, height 250 mm from ground level
3: Gravel layer
4: Protective pipe condensate outlet:
ø 100 mm
5: Protective pipe for introduction of refrigerant
and electrical wiring connection:
ø 100 mm
6: Frost line
7: Drainage pipe
8: Nominal
2
700
100
4
100
5
80
220
50
350
1
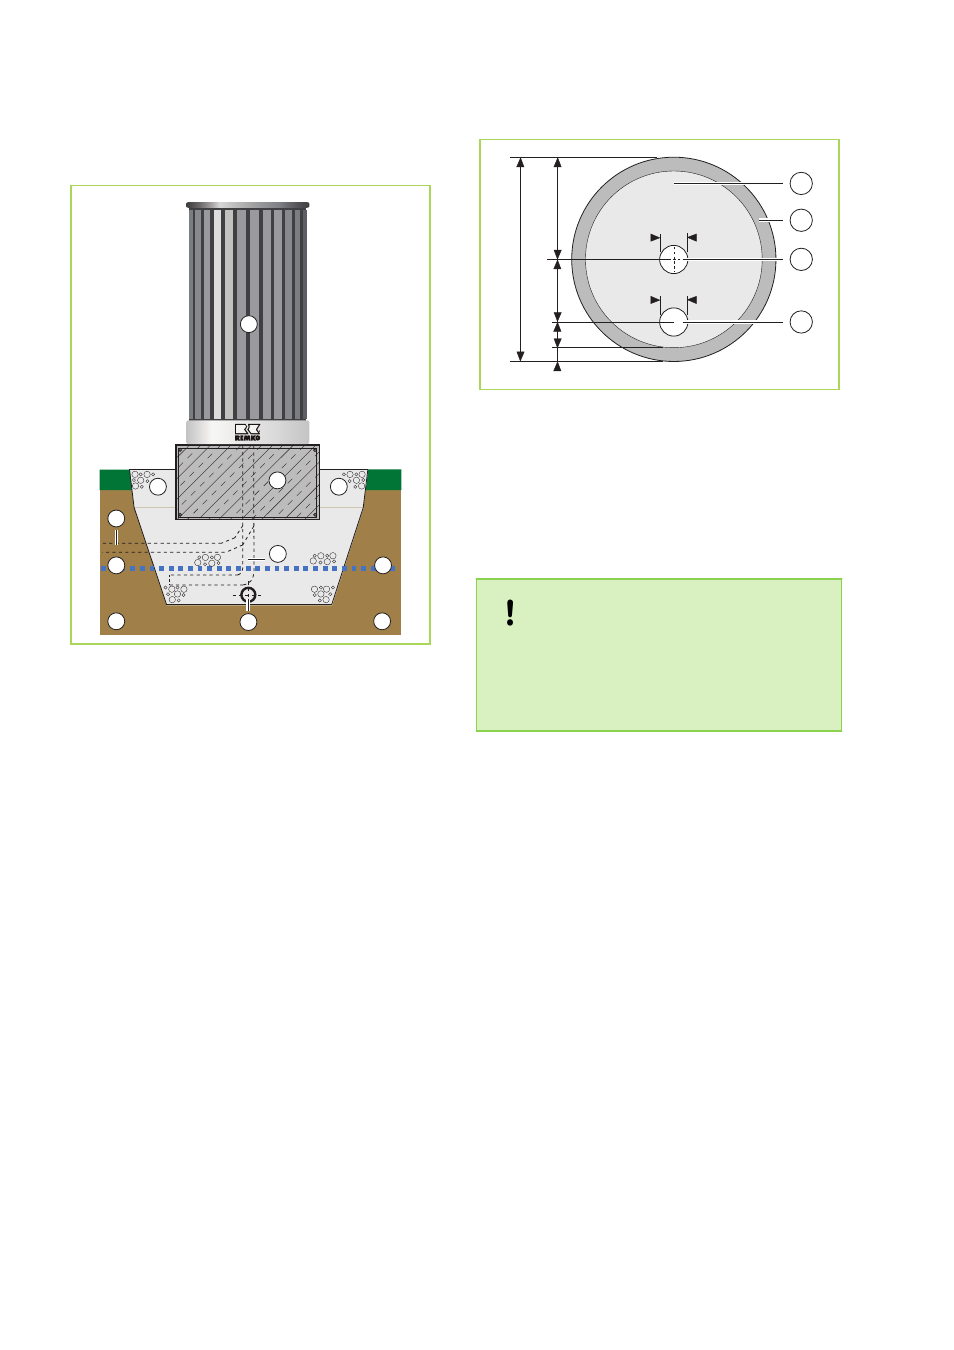
Fig. 22: Dimensions for the strip foundation
1: Outdoor module
2: Reinforced foundation:
ø 700 mm, height 250 mm from ground level
4: Protective pipe condensate outlet:
ø 100 mm
5: Protective pipe for introduction of refrigerant
and electrical wiring connection:
ø 100 mm
NOTICE!
The HT pipe [5] must protrude by approx. 20
mm above the concrete foundation.
After routing and connecting the pipes, seal the
HT pipe with a special sealant material!
Condensate drainage connection
If the temperature falls below the dew point, con-
densation will form on the finned condenser
during heating mode.
Make provision under the device for a soakaway
for any condensate that occurs, to enable it to be
directed away.
n
The condensate drainage line should have an
incline of min. 2%. This is the responsibility of
the customer. If necessary, fit vapour-diffusion-
proof insulation.
n
When operating the unit at outdoor tempera-
tures below 4
℃, care must be taken that the
condensate drain is anti-freeze protected. The
lower part of the housing and condensate tray
is also to be kept frost free in order to ensure
permanent draining of the condensate. If nec-
essary, fit a pipe heater.
n
Following installation, check that the conden-
sate run off is unobstructed and ensure that the
line is durably leak tight.
REMKO HTS
40