RLE LD5000 Quick Start User Manual
Seahawk quick start guide, Seahawk, Step 1
RLE Technologies
• 208 Commerce Drive, Fort Collins, CO 80524 • 970 484-6510 • 970 484-6650 Fax • www.rletech.com
SEAHAWK QUICK START GUIDE
MO DEL LD5000
SEAHAWK
MO DEL LD5000
110039 Rev 0.0 (01/2007)
STEP 1:
INSTALLATION
The LD5000 is a wall mounted device. To secure the device to the wall, first remove the aluminum back panel and all electronics
from the enclosure. There are knockouts on the top and bottom of the enclosure designed to accommodate 0.5” conduit. Remove
as many as necessary. There are two holes in the top back of the unit spaced 10.5” apart. Use drywall anchors to secure the unit
to the wall. Put two more drywall anchors through the two holes in the bottom back of the unit. Reinstall the back panel and
reconnect the electronics.
STEP 2:
CONNECTIONS AND SETTINGS
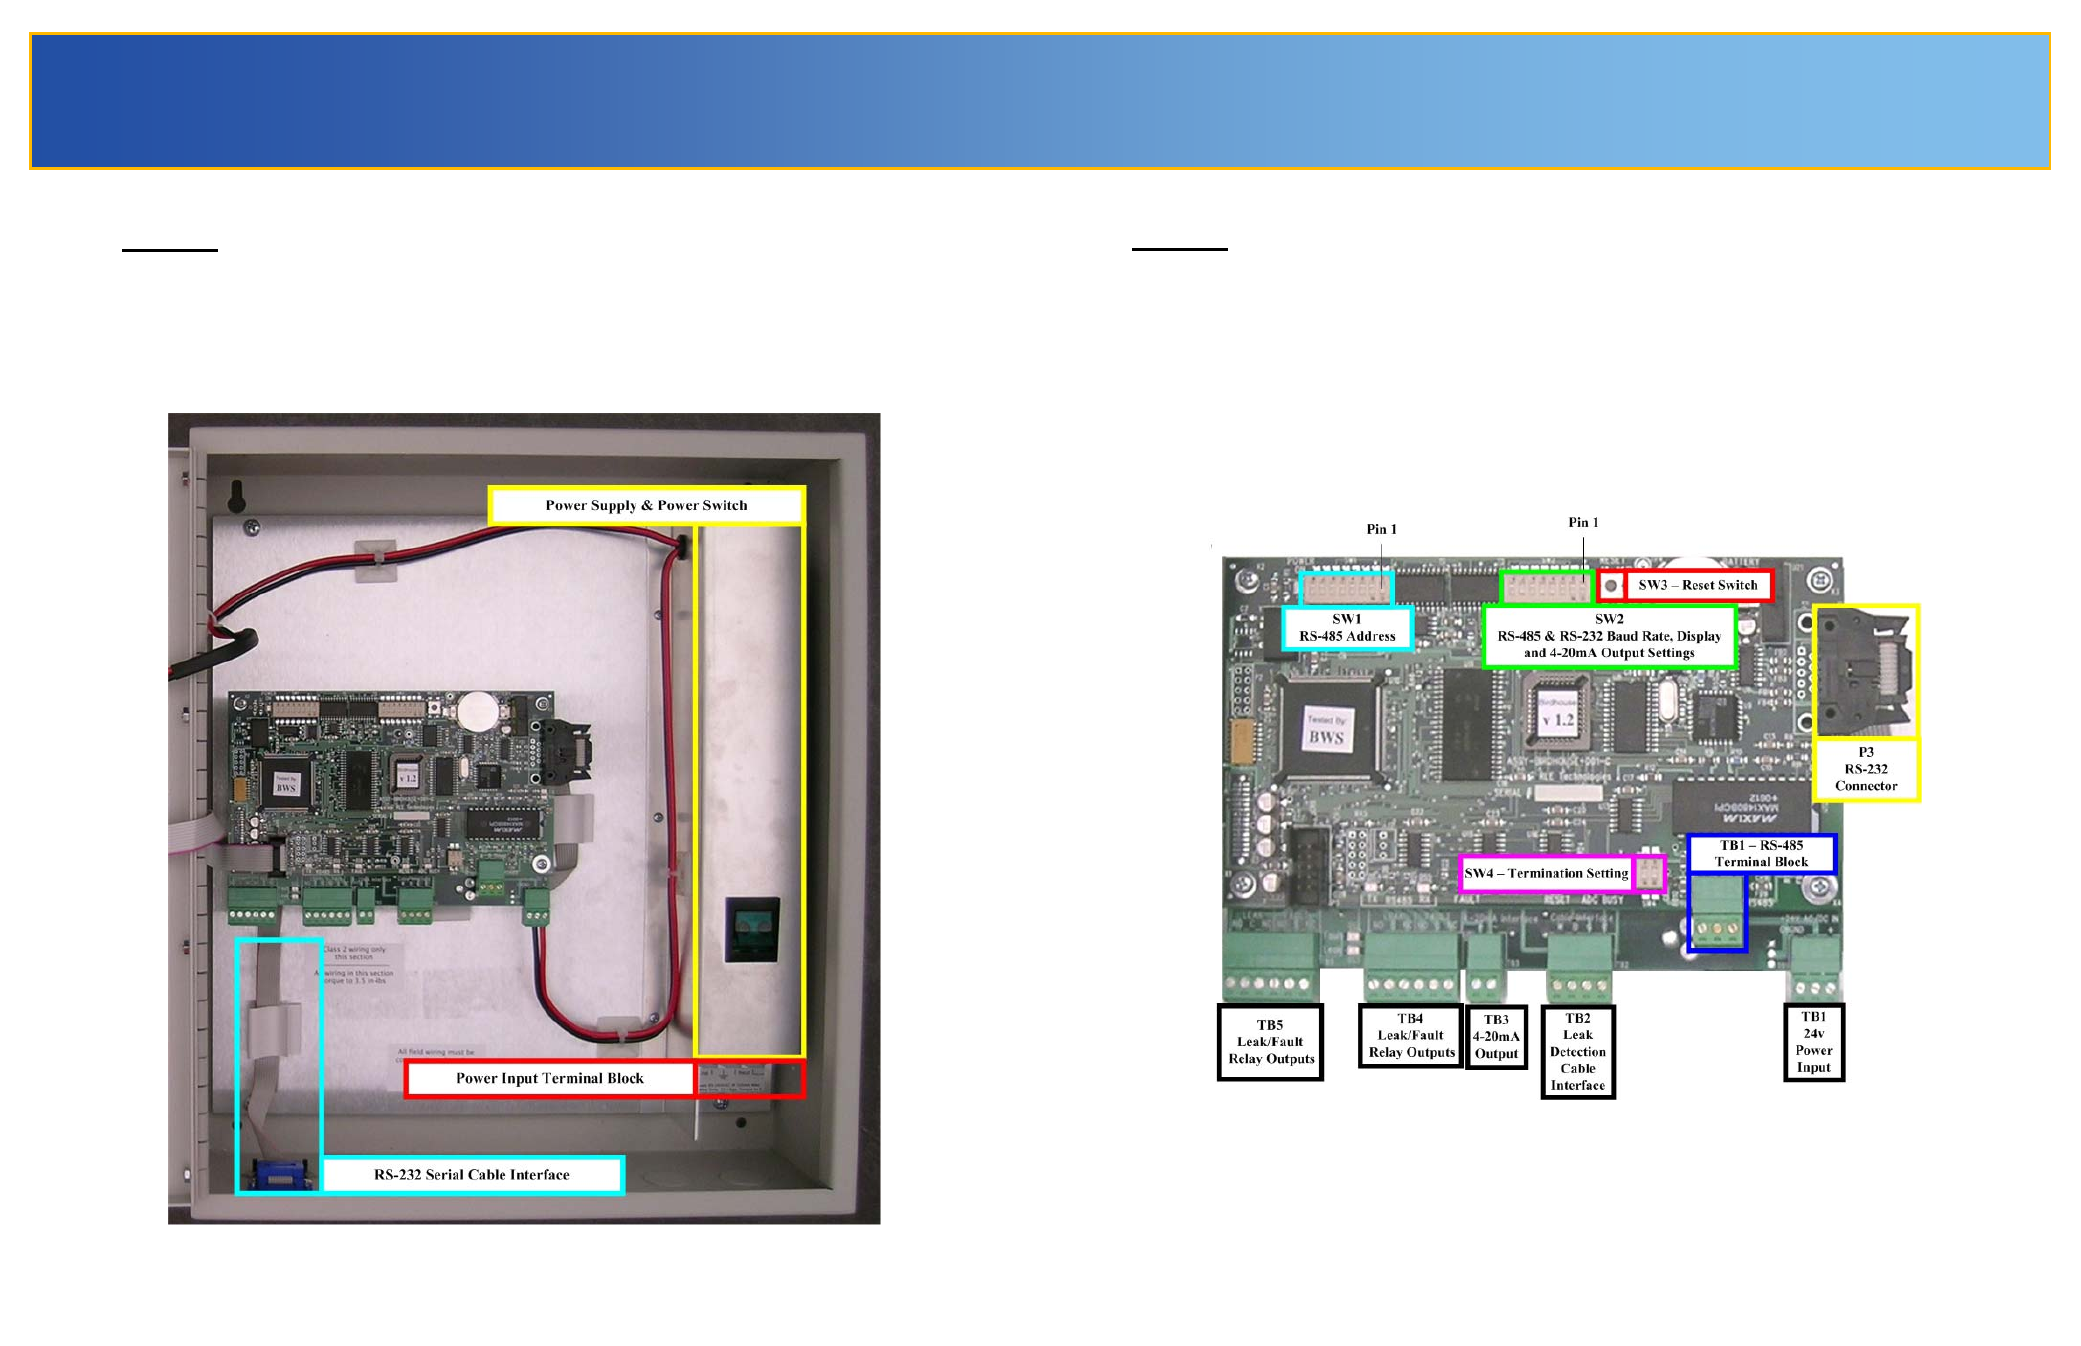
The LD5000 is comprised of three boards. All three boards are accessed when the device’s front cover is opened. The
display board is located on the inside of the door. The microprocessor board is stacked on top of the leak detection board.
Since the leak detection board is longer than the microprocessor board, the connectors on the leak detection board extend
past the end of the microprocessor board. These two boards are secured to the inside of the unit.
The connectors on the leak detection board are labeled TB1 through TB5. The connectors on the microprocessor board are
labeled TB1 and P3. The switches on the microprocessor board are labeled SW1 through SW4. Refer to the manual to set
specific settings for your requirements after the installation is complete.
Leak Detection and Microprocessor Boards