RLE LDRA6 Quick Start User Manual
Ldra6 quick start guide
LDRA6 Quick Start Guide
hank you for purchasing the SeaHawk LDRA6. This guide describes
how to install the LDRA6.
If you need further assistance, contact RLE Technologies on our
website at http://www.rletech.com/ (go to the Support Link) or by
calling 970.484.6510, Option 2.
1
Supplies for Installation
Included with the LDRA6
♦
Wall mounting hardware (included)
Sold Separately
♦
24VDC wall adapter (part #PSWA-DC-24)
♦
Leader Cable Kit (one per zone for leak detection cable; part #LC-KIT)
♦
SeaHawk Leak Detection Cable (sensing cable)
♦
SeaHawk Spot Detectors (SD-Z or SD-Z1 only)
2
Installing the LDRA6
The LDRA6 is a wall mounted device. Perform these steps:
1
Secure the unit to the wall using the provided wall mount anchoring
hardware.
2
Bring 24VDC to the LDRA6’s input power terminal block, or use an RLE
24VDC wall adapter (part #PSWA-DC-24).
The unit should be able to power up and give no alarms upon default,
factory settings (all inputs are normally open dry contact configuration).
3
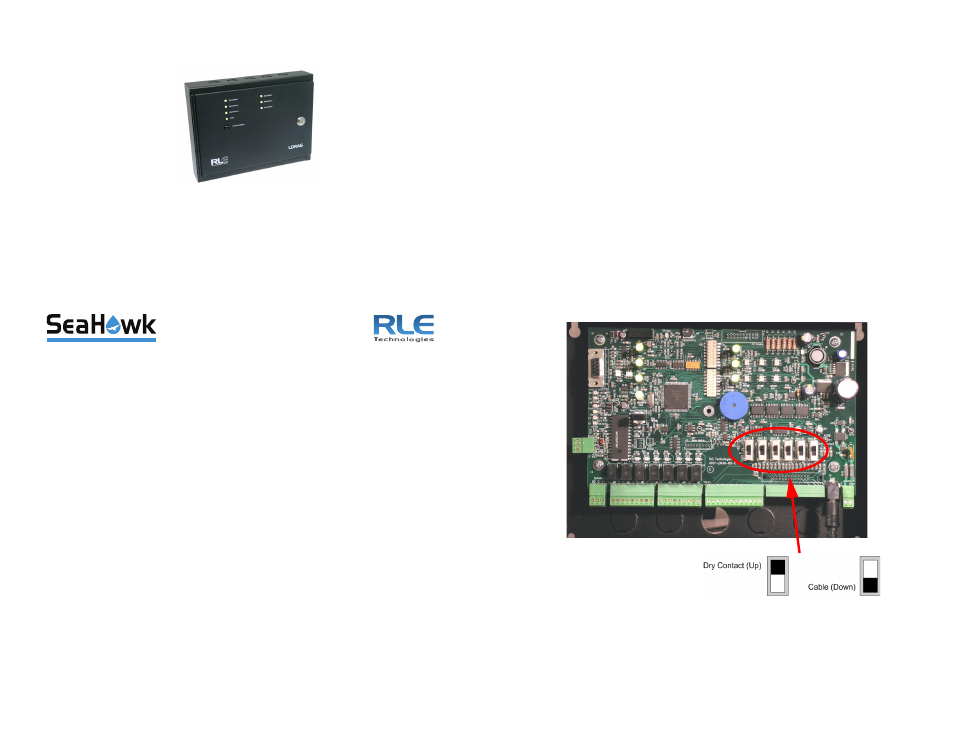
Installing the Dry Contacts
The LDRA6 accepts dry contact inputs. Configure the LDRA6 for dry contact
inputs as follows:
1
Set the desired zone’s switch in the Dry Contact position (default).
2
Attach a normally open input into the appropriate terminal block position.
Each zone is allotted four terminal block positions. The first two positions
for each zone are used for the Dry Contact input; refer to the LDRA6
User Guide for a detailed table/description for input terminal blocks. (The
LDRA6 User Guide is available at http://www.rletech.com.)
3
Wire each desired dry contact input.
4
Test each input or short each to verify correct configuration.
If configured correctly, the LDRA6 will go into alarm for the appropriate
zone.
T