RLE F-Series Quick Start User Manual
Preparing for installation, Accessing the configuration menu, Configuring network communication
F3400/F1000 (F-Series)
Quick Start Guide
hank you for purchasing the Falcon F1000/F3400 (F-Series). This guide
describes how to connect the F-Series to the network, configure inputs
and system settings, and set up email notification. The F-Series User
Guide, located on our website, contains additional installation details.
If you need further assistance, contact RLE Technologies on our website at
http://www.rletech.com/ (go to the Support Link) or by calling 970.484.6510,
Option 2.
1
Preparing for Installation
When connecting the F-Series to the network, have the following information
available. If necessary, ask your IT administrator to provide this information so
you can assign it to the F-Series.
2
Accessing the Configuration Menu
You will select items from the Configuration Menu for all configuration tasks
described in this guide.
1
Plug the crossover cable (included with the F-Series) into the computer that
will be used to configure the F-Series.
Note: This cable is not intended to be connected to a network hub.
2
Connect the other end of the crossover cable to the Ethernet port on the
back of the F-Series.
Note: Alternatively, you could use the F-Series’s EIA-232 interface to
access the F-Series. Refer to the F-Series User Guide (available
at http://www.rletech.com) for instructions.
3
Write down the computer’s current IP address, subnet mask, and default
gateway. Change these items temporarily so that the computer can
communicate with the F-Series.
F-Series default IP address: 10.0.0.186
F-Series default subnet mask: 255.255.255.0
4
Access the F-Series through a Web browser by typing the F-Series’s default
IP address (10.0.0.186) into the location bar and pressing Enter.
Enter the following:
Default User Name: falcon (case sensitive)
Default Password: (No default password. Leave this field blank.)
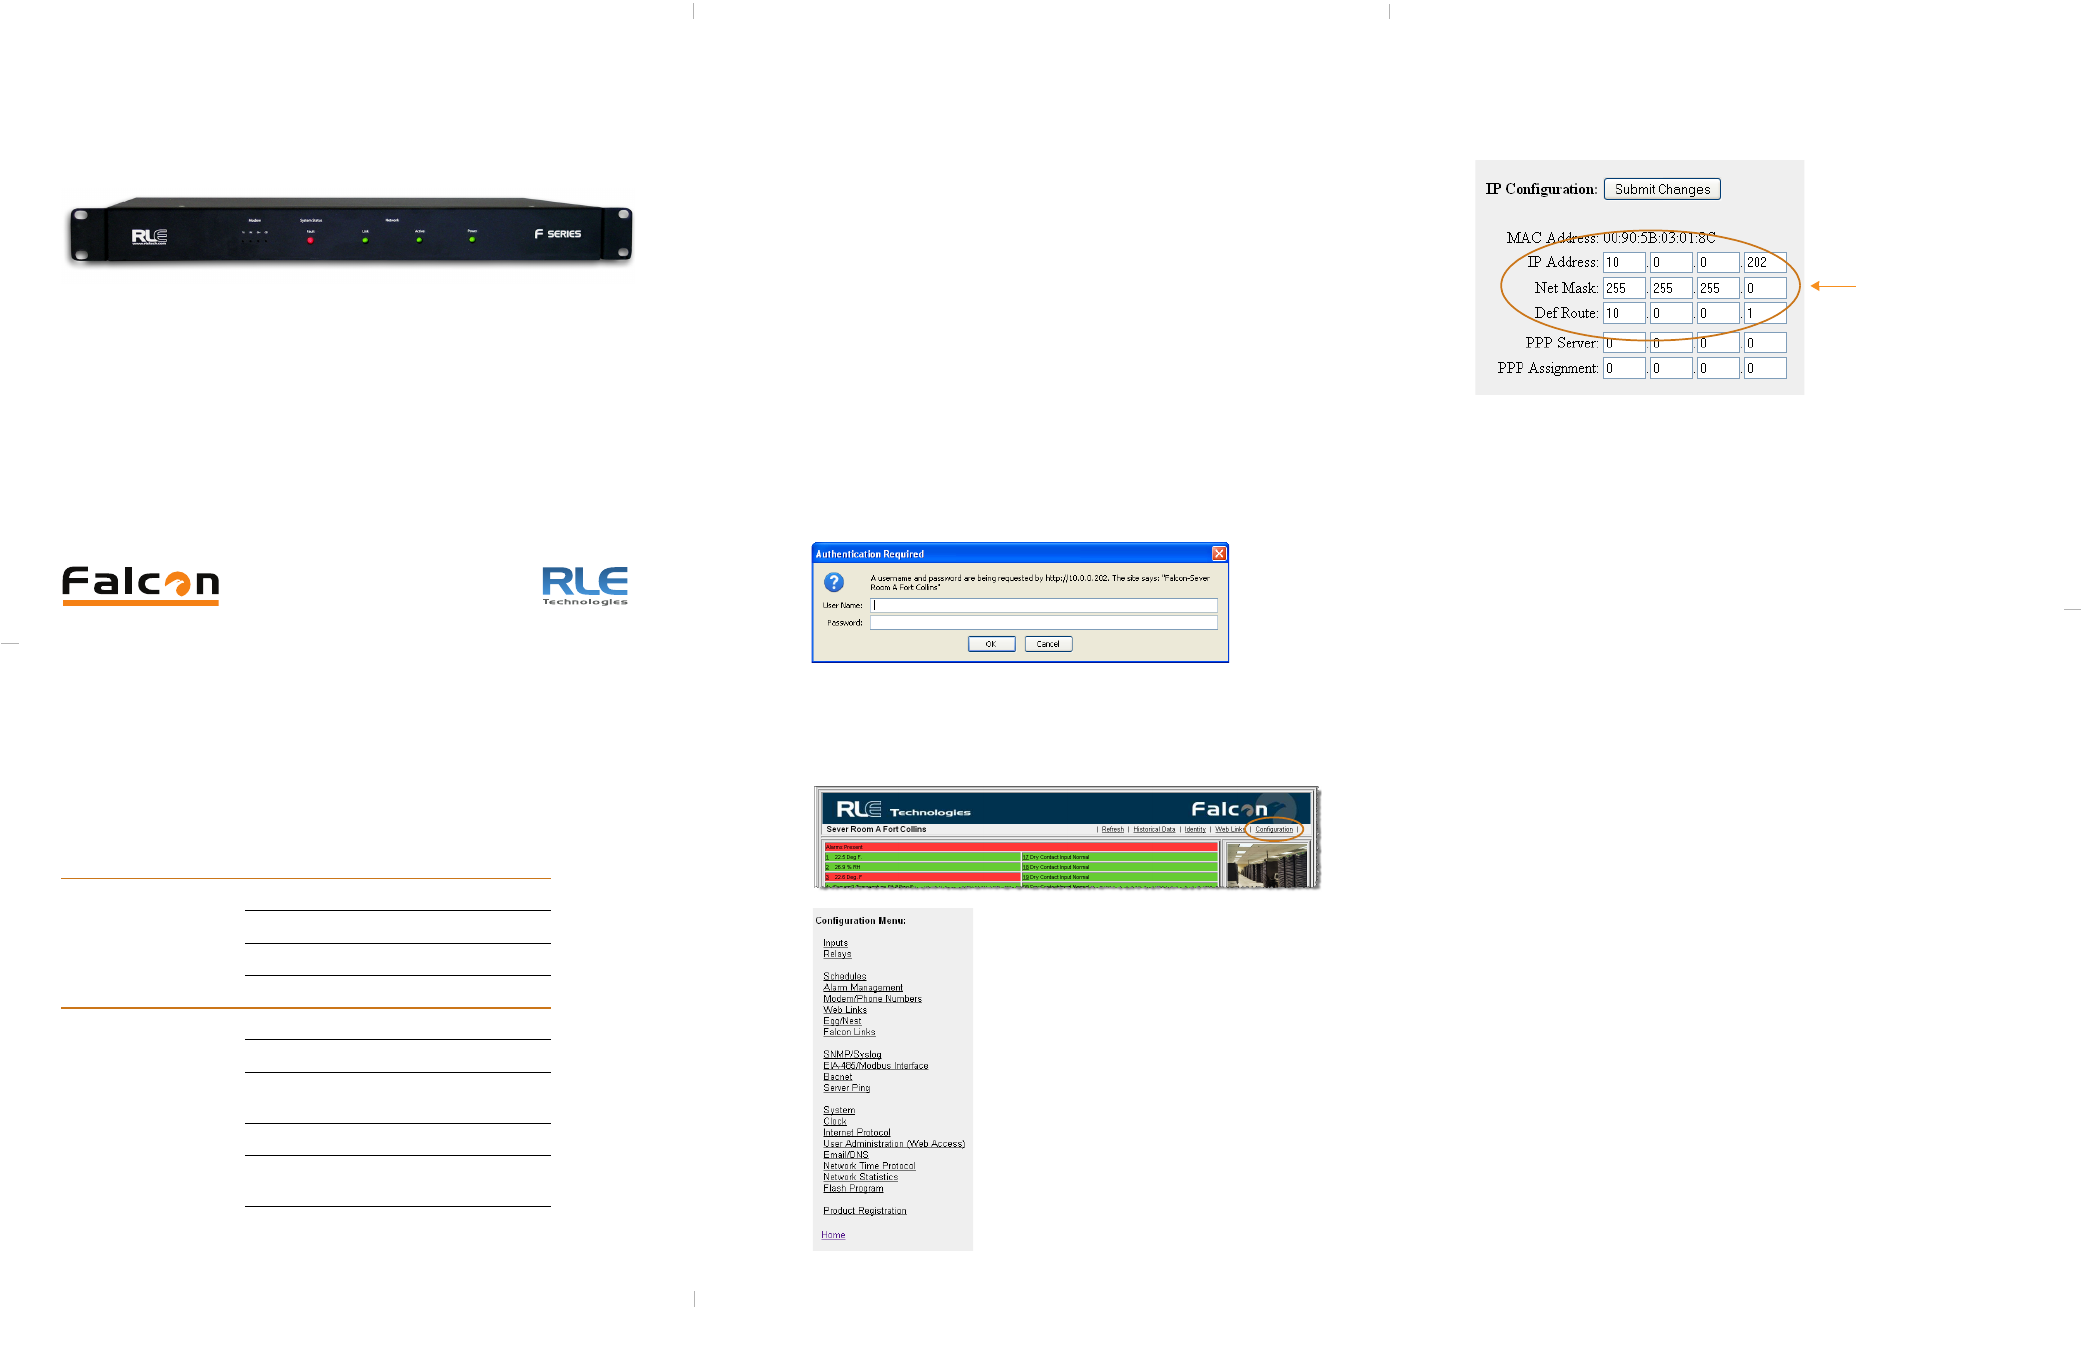
5
From the top bar, select the Configuration Menu link.
3
Configuring Network Communication
IMPORTANT
Consult your IT administrator before performing these steps.
1
Enter the values for IP Address, Net Mask (subnet mask), and Def Route
(default gateway) provided by your IT administrator.
Once you enter the values and click the Submit Changes button, the
F-Series saves the changes and reboots. The system status LED on front of
the F-Series stops flashing.
2
Reset the computer to its original IP address and subnet mask.
Note: This step might require assistance from your IT administrator.
The computer and the F-Series are now both configured to communicate on
the network.
3
Connect the computer and the F-Series to the network.
4
From the computer’s Web browser, go to the new IP address of the
F-Series.
5
When prompted, enter the user name and password to verify network
access to the F-Series (as you did in
step 4
in the previous section).
If the login window for the F-Series does not display:
a
Verify that the cables are firmly attached.
b
Verify that you entered the correct IP address for the F-Series.
c
Check for activity on the Link and Active LEDs on the front of the
F-Series as follows:
If the Link LED is off, the F-Series is not connected to the network.
Check the cable connections.
If the Active LED is on solid, too much data is being sent to the
F-Series for it to process. Consult your IT administrator.
Basic Communications
IP address
Subnet mask
Default gateway
Email Notification
Primary DNS
Secondary DNS
Mail SMTP address
(IP address or host name)
Mail sender address
Mail recipient addresses
(up to 4)
T
*
You will use these items
on the Configuration
Menu to complete the
tasks described in this
quick start guide.
**
*
F-Series Default Values
IP address: 10.0.0.186
Subnet mask: 255.255.255.0
Use values provided
by IT administrator