RLE LDCE User Manual
Page 2
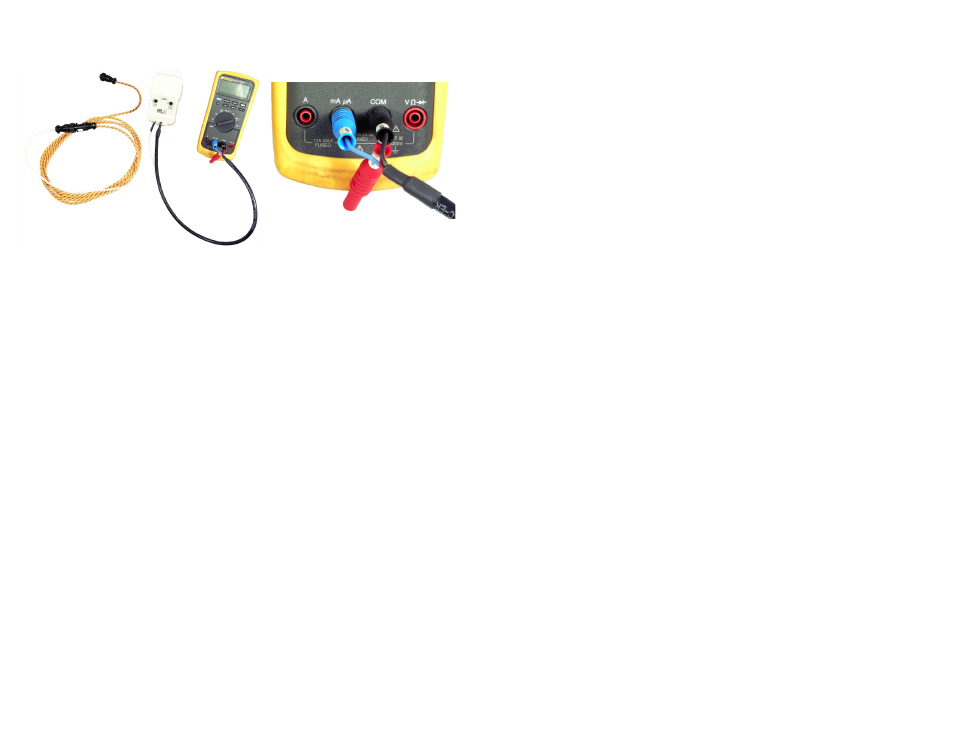
3. Connect the LDCE meter leads to your multimeter.
• Connect the blue lead to the milliamp/microamp input (mA/mA).
• Connect the black lead to the Common (COM) input.
Important!
- Do not connect the leads to the wrong inputs, or you will blow the
multimeter’s internal fuse.
4. Set the multimeter to mA and to ADC. If the multimeter is not auto-ranging,
set it to the 200mA scale.
5. Push the Cable Test button and record the meter reading. A reading of less
than 25mA is acceptable. A reading greater than 25mA indicates the cable is
contaminated or has detected a leak. You may need to separate mated pairs
of cable into individual segments and test each section individually to isolate
the problem cable.
Note:
The LDCE can only test for cable contamination or a leak detected. It
cannot test for a broken cable.
6. If your LDCE has been in service for some time, check the accuracy of the
test current coming from the LDCE by pressing the System Check button.
Ensure that your meter displays a reading of approximately 180mA. If the
reading is not close to 180mA, change the battery in the LDCE and retest.
Connect the LDCE, the sensing cable, and the multimeter as shown.