RLE Relay Replicators User Manual
Relay replicator quick start guide
Relay Replicator Quick Start Guide
hank you for purchasing the Raptor Relay Replicator (RR). This guide
describes how to install the Relay Replicator.
If you need further assistance, contact RLE Technologies on our
website at http://www.rletech.com/ (go to the Support Link) or by calling
970.484.6510, Option 2.
1
Introduction to the Relay Replicator
The Relay Replicator converts single dry contact signals into multiple isolated dry
contact signals. The dry contact signal can then be routed to multiple systems or
devices. Each input causes a relay on the Relay Replicator to either activate or
deactivate depending upon the input contact state. In turn, the Relay Replicator
provides two outputs for each input. The relays provide 1,000V of electrical
isolation. The Relay Replicator is jumper configurable to select inputs with either
a positive or negative common.
The Relay Replicator is available in RR10x20 and RR20x40 configurations.
These products come in a metal enclosure that can be wall mounted. The
RR10x20 contains one circuit board with 10 DPST relays. The RR20x40 uses two
circuit boards.
2
Installation
The Relay Replicator is a wall-mounted device. To secure the device to the wall:
1
Remove the aluminum back panel and all electronics from the enclosure.
2
Remove as many knockouts as necessary from the top and bottom of the
enclosure to accommodate 0.5 inch (12.7mm) conduit.
3
Insert drywall anchors through the four holes in the back of the unit to
secure the unit to the wall.
4
Reinstall the back panel and reconnect the electronics.
3
Power
Use the appropriate power supply for your Relay Replicator configuration:
RR10x20: External 24VDC/VAC (part #PSWA-DC-24-ST or WA-AC-24-ST) or
48VAC/VDC (RR5x10-48 and RR10x20-48) power supply.
RR20x40: External 85-264VAC, 50/60Hz power input. (The RR20x40 is
hardwired.)
4
Connections and Settings
1
Whenever possible, connect the inputs by installing the necessary jumpers.
Using jumpers greatly reduces the number of wires that are terminated on
the boards.
Note: The terminal blocks will only accept two 20AWG wires.
2
Make sure the jumpers for channels 1 through 5 (JP1 through JP11) are all
set for either a positive (POS, P) or negative (NEG, N) common. If the unit is
a 10x20 model, make sure the jumpers for channels 6 through 10 (JP12
through JP22) are all set for either a positive (POS, P) or negative (NEG, N)
common.
Note:
24V is normal operation voltage, with a 48V option. Check the voltage of
your unit before connecting to a power source.
5
Typical Applications
The Relay Replicator contains two isolated dry contact outputs from one
relay. When the dry contact activates or changes state, the Relay
Replicator provides two isolated dry contact outputs.
T
WARNING
A dedicated circuit breaker must be provided in the
building within close proximity to the RR20x40, and be
clearly marked as the disconnecting device for this unit.
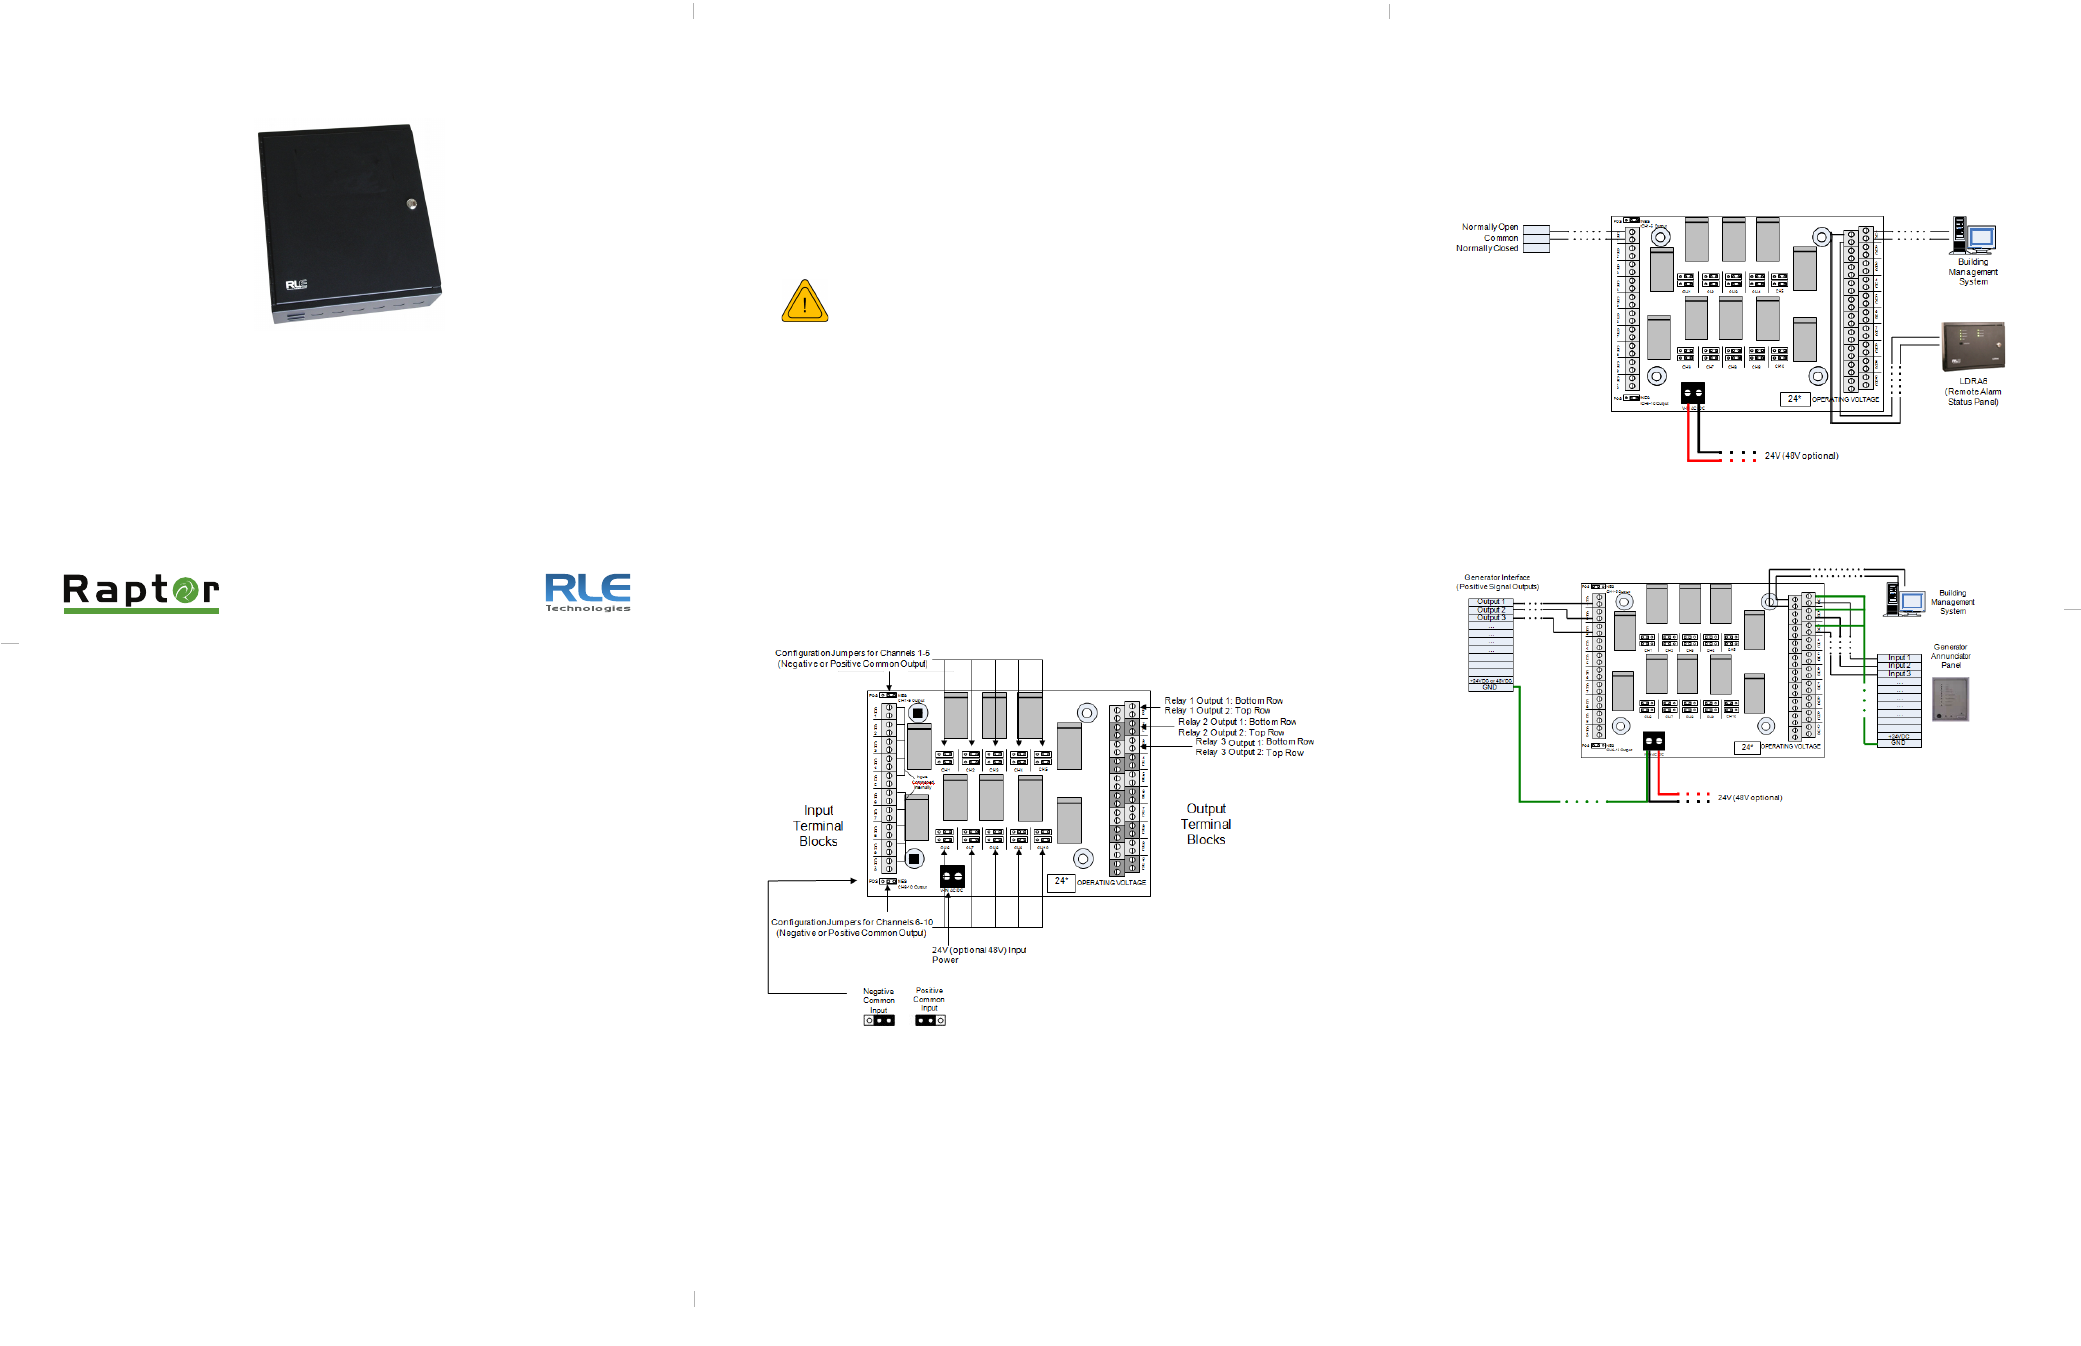
Terminal Block Interconnections
RR10x20 Configured for Negative Common (Using Dry Contact Inputs)
RR10x20 Configured for Positive Common (Using One Wire Interface)