Removal and replacement – Scotsman NDE554 User Manual
Page 28
REMOVAL AND REPLACEMENT
To Replace the Evaporator:
(Assuming all the steps for removal of the thrust
bearing, breaker, auger, and water seal have been
performed.)
1. Discharge the refrigerant from the ice maker.
2. Unsweat the refrigerant connections:
a) At the thermostatic expansion valve outlet.
Heat sink the TXV body when unsweating or
resweating the adjacent tubing.
b) At the suction line at the joint about 3" from the
evaporator.
3. Remove the evaporator.
4. Unsweat the drier from the liquid line.
5. After installing a new water seal in the new
evaporator (see “To Replace the Water Seal”)
sweat in the new evaporator at the old tubing
connections.
6. Install an new drier in the liquid line.
7. Evacuate the system until dehydrated, then
weigh in the nameplate charge. Check for leaks.
8. Install auger, breaker, breaker bearing
assembly, and ice discharge chute in reverse order
of disassembly.
To Reassemble the Evaporator and Auger
1. After the gearmotor has been inspected, fasten
the evaporator to the gear motor, be sure that the
number of shims indicated on the gear case cover
is in place between the gearcase cover and the
drip pan gasket. Torque the bolts to 110 inch
pounds.
2. Lower the auger into the evaporator barrel,
slightly turning it to match up with the drive end. Do
Not Drop Into the Evaporator.
3. Complete the reassembly by reversing the
disassembly for the breaker & thrust bearing
assembly.
NDE554 & NDE654
March 2000
Page 28
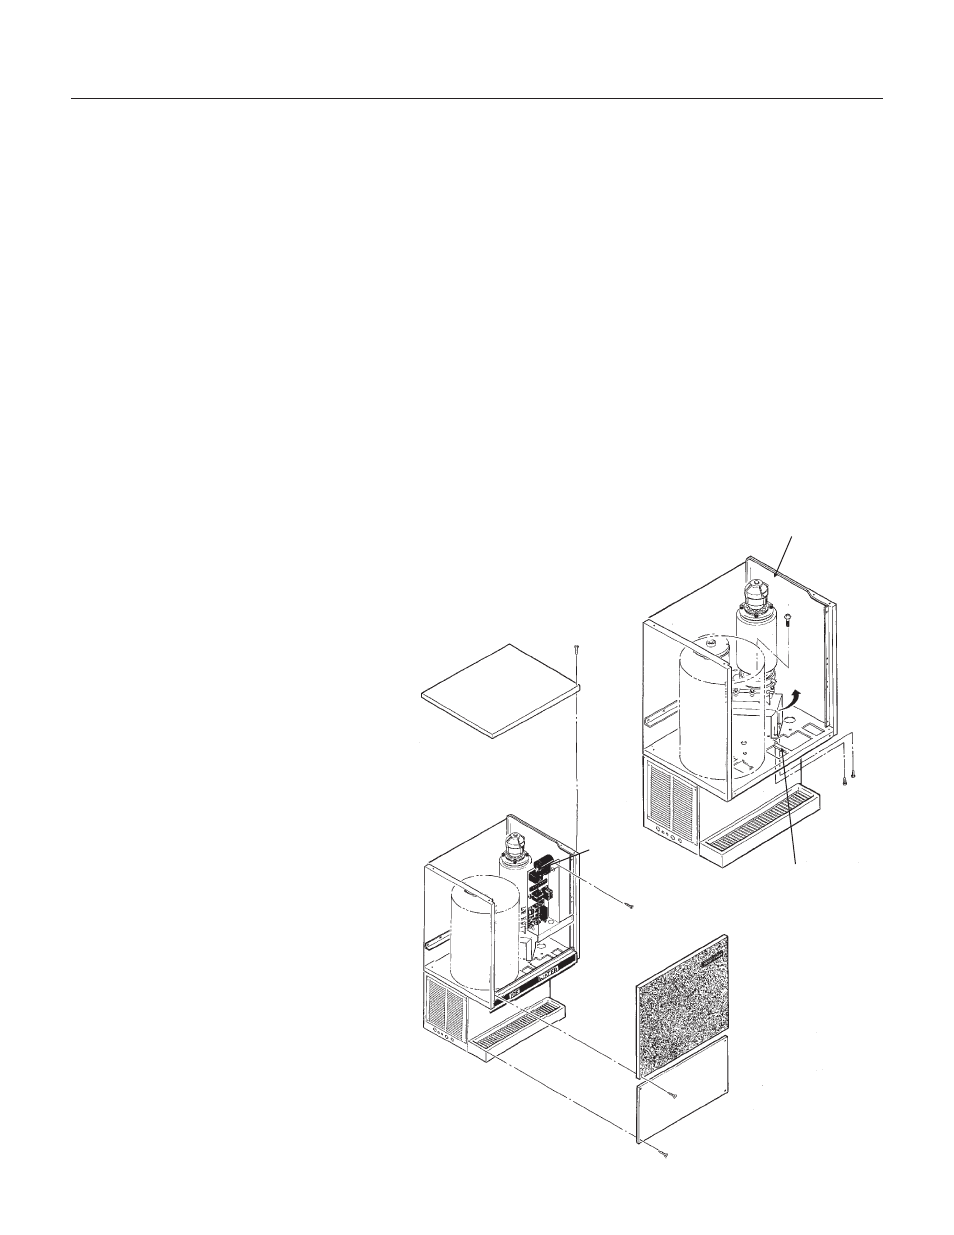
For Access to the Evaporator to
Gearmotor bolts:
1. Remove upper front and top panels.
2. Remove screws holding control box
assembly to the cabinet, move the control
box out of the way, temporarily secure to
cabinet.
3. Remove the upper half of the ice chute.
4. Remove the ice sweep.
5. Remove the lower half of the ice chute.
6. Remove the 2 screws securing the front
portion of the gearmotor support to the
cabinet
7. Move the the gearmotor - evaporator to
the right: space is now available for
removal of the evaporator and gearmotor
bolts. When reassembling, reverse the
above steps.
MOVE THE
GEARMOTOR -
EVAPORATOR
SCREWS
CONTROL
BOX