Product - installation diagram, Introduction, Installation – Smart Avi SMCVG2DVI User Manual
Page 2: Using the smcvg2dvi, Applications, Features
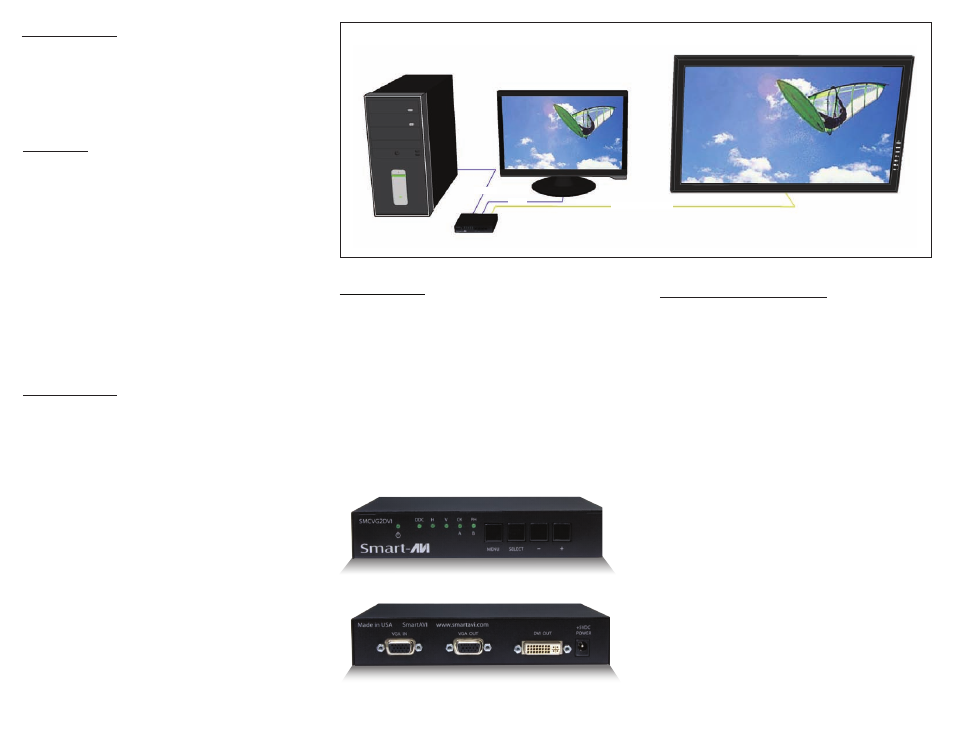
20 ft. over DVI-D
SMCVG2DVI
VGA
VGA
PC
Introduction
The SMCVG2DVIS automatically detects the VGA input
resolution and converts it to the new DVI (Digital Video
Interface) video display format. It also supports a local
VGA display.
Installation
1.
Turn off the computer, displays and the make sure
the SMCVG2DVI is unplugged.
2.
Connect a VGA cable to the computer and to the
VGA IN port on the rear of the SMCVG2DVI.
3.
Connect the local VGA display to the VGA OUT
port on the rear SMCVG2DVI.
4.
Connect the DVI display to the DVI OUT port on
the rear SMCVG2DVI.
5.
Connect the power cord to the SMCVG2DVI.
6.
Power on the computer and the displays.
Using the SMCVG2DVI
To adjust the settings for the output signal, use the buttons on the
front of the SMCVG2DVI.
Product - Installation Diagram
Applications
•
Security Environments
•
Home Theater Integration
•
Restaurants and Bars
•
Information Kiosks/Displays
Features
•
Allows old system to connect to DVI display
•
Converts analog video signals to digital DVI signal
•
Highly precise 8-bit A/D conversion of each color
channel, better image quality
•
Ensures to send high-definition signal without
signal loss
•
Supports Plug-and-play function, no software
installation required
•
Front panel switches for better synchronization
and tuning to the Display
•
Automatic DDC learning
•
Sync Tuning for better signal conversion
SMCVG2DVI Front
SMCV
G
2DVI Rear