I series – Soundtube CM400i User Manual
Page 4
1.435.647.9555
|
800.647.TUBE
|
www.soundtube.com
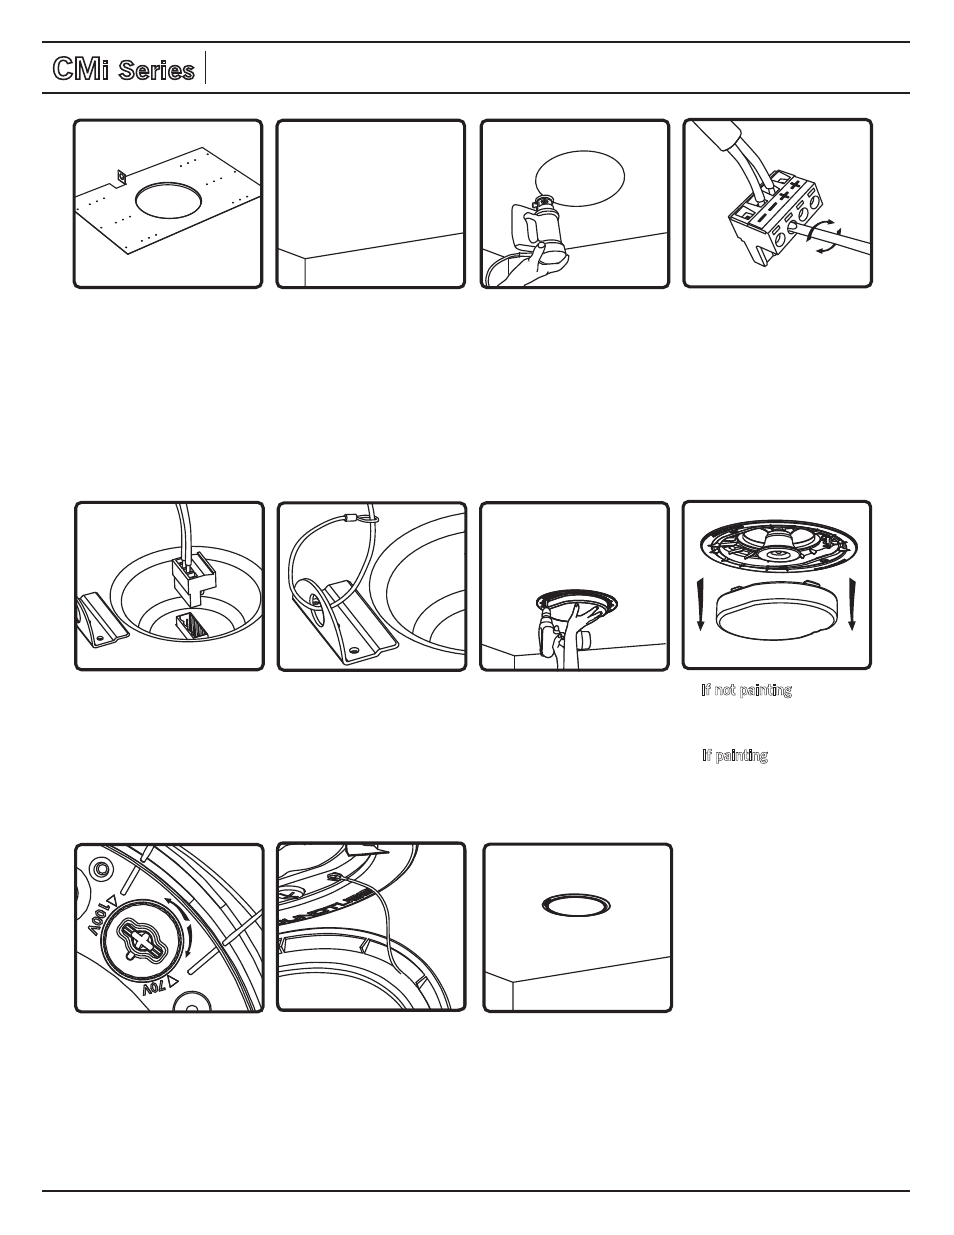
3. Use Rotozip or other tool
to cut hole.
CM
i Series
Pre-Construction Bracket Instructions For:
CM400i, CM500i, CM590i, CM600i, CM690i, CM800i &CM890i speakers
1. Nail or screw bracket to
joists. Secure cover plate
and conduit away from hole
in bracket.
2. Complete Finish work.
5. Insert the Euroblock plug
into the Euroblock jack on
rear panel of speaker and
Attach cover plate and
conduit.
6. If required, attach the
seismic restraint system to
the sheet-metal tab on the
rear panel of the speaker
(safety cable not included).
7. Insert speaker into
mounting hole with
installation aid in place.
Screw down both bolts on
the baffle face to actuate
the mounting wings. Firmly
secure both bolts –
do not
over-tighten.
8. If not painting the ceiling,
remove & discard the paint
mask.
9. If painting the ceiling after
the speaker is installed, leave
the paint mask in place until
paint is dry.
10. Select the tap position
by adjusting rotary switch
to desired high impedance
value or voice coil bypass
mode. Switch is preset to
maximum tap setting in
70.7 V mode (33 W or 66 W).
12. Attach grille – position the
grille over the baffle and allow
magnets to attract grille into
place. Be sure grille is properly
centered over baffle.
11. Attach grille & bezel
seismic restraint to baffle
with provided screw.
4. Thread signal wire through
cover plate. Connect signal
wire to 4-pin Euroblock plug.
Tighten unused terminal
screws. Use inside positive
and negative inputs for either
voice coil or distributed
systems. For daisy chaining,
use outside positive and
negative terminals.