Soundtube SA202-RDT User Manual
Front rear, Install instructions for, Warning
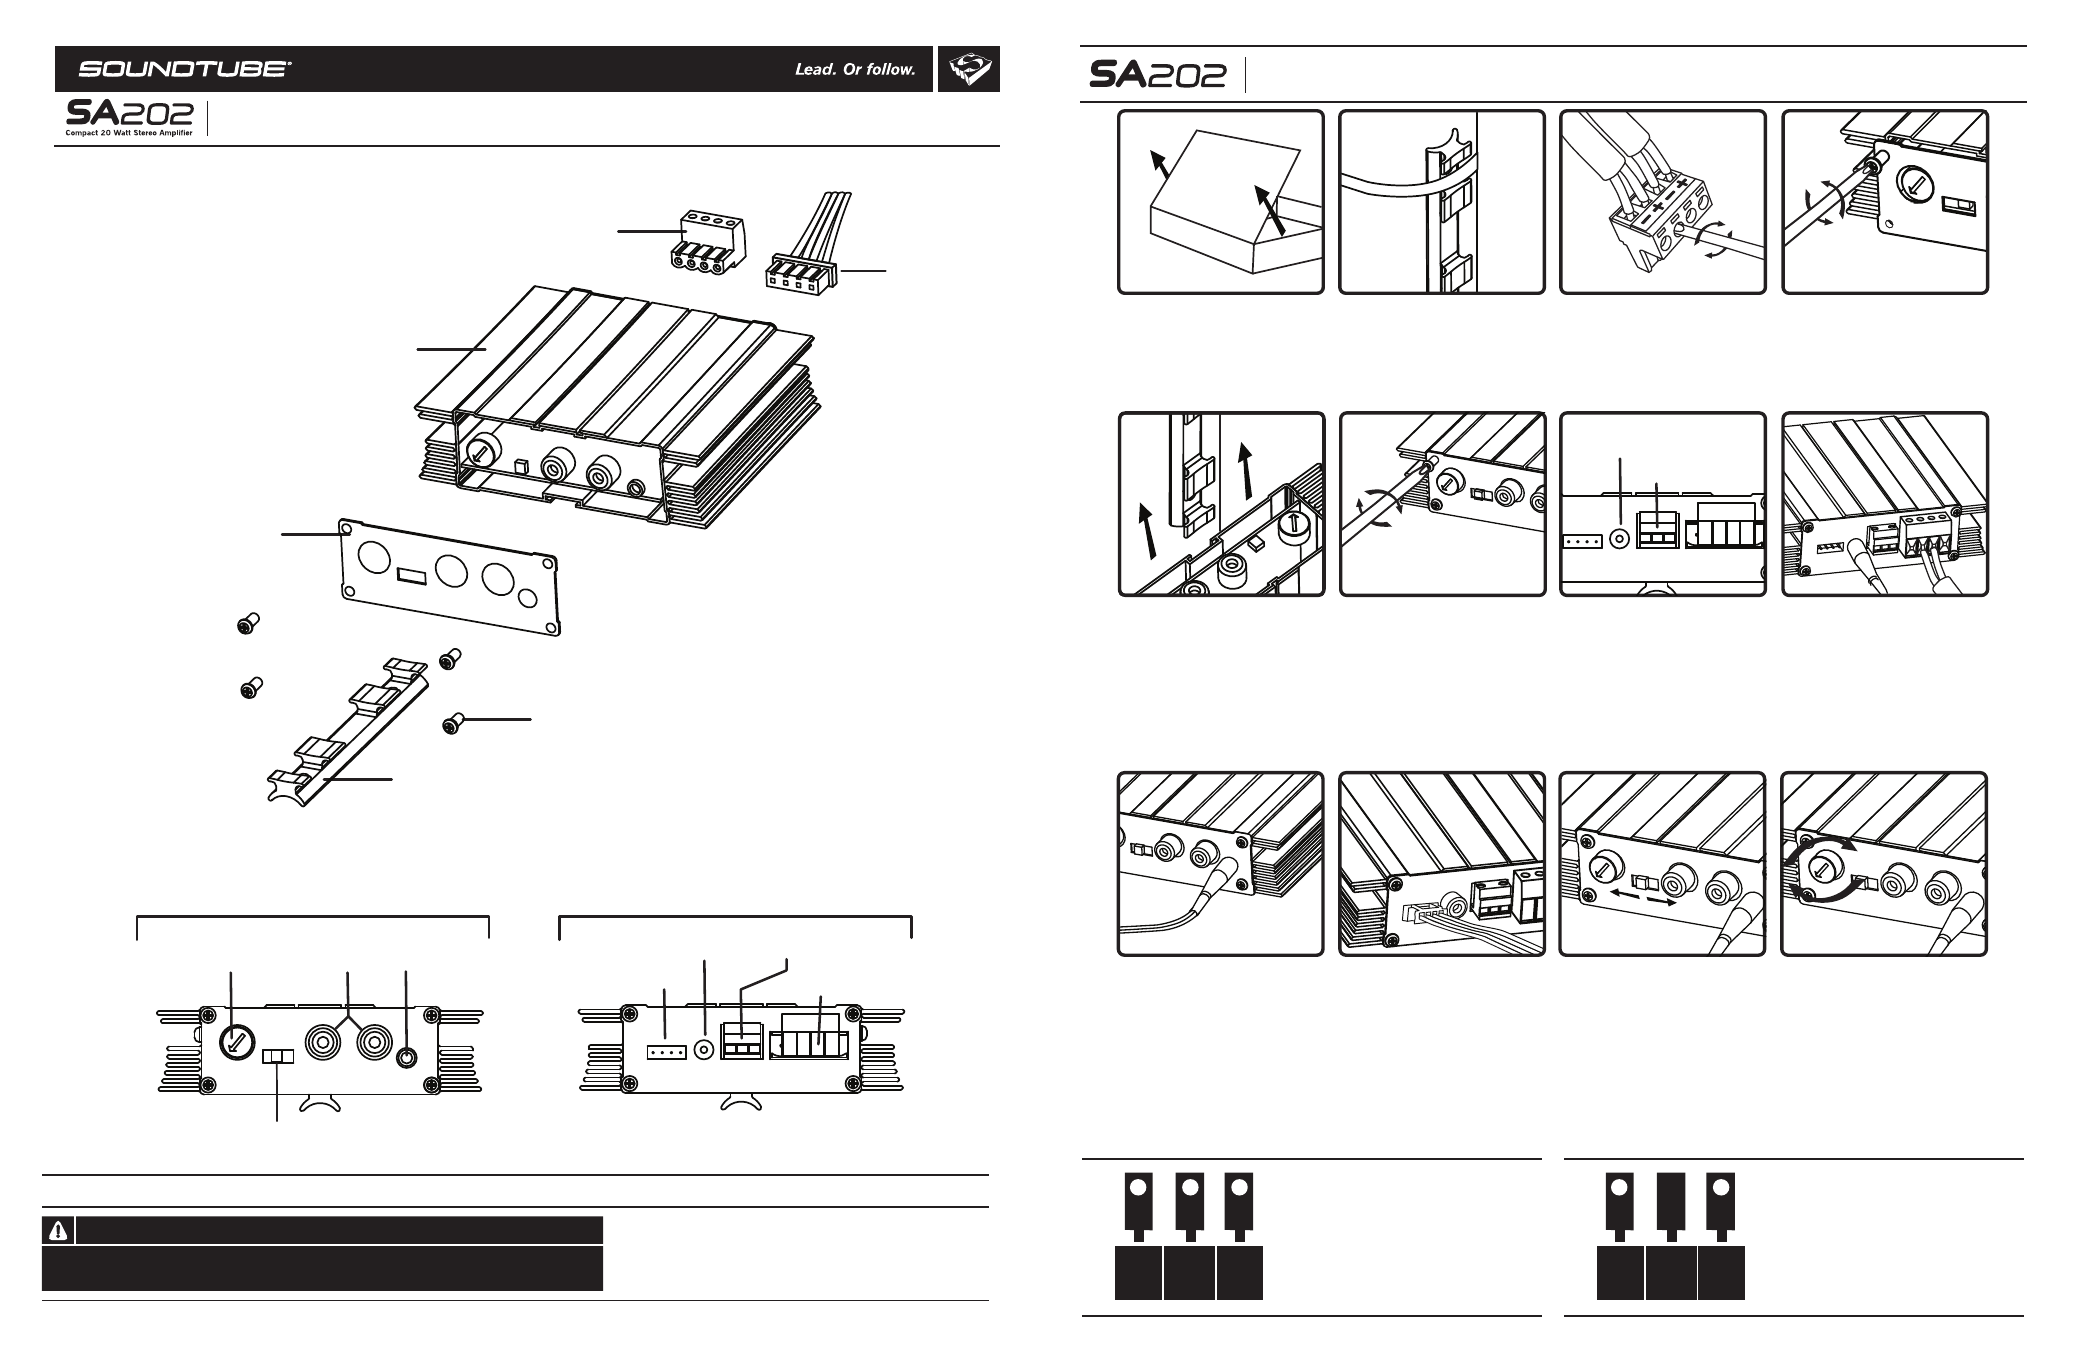
Install Instructions For:
SA202 and SA202-RDT
1. Unpack amplifier.
2. Attach mounting bracket
to secure mount point using
screws or metal strapping.
3. Connect speaker wires
to 4-pin Euroblock
connector using polarity
shown above (or refer to
diagram on amplifier).
9a. The SA202 accepts
audio sources via RCA
jacks, mini jack or the
high-level input located on
the rear of the unit.
Connect audio source to
one of the three inputs
(mini jack shown).
8. Connect power and
speakers.
© 2009 SoundTube Entertainment, Inc. All rights reserved. PN INS-SA202 Rev10.07.09
1.435.647.9555
|
800.647.TUBE
|
www.soundtube.com
Warning
SoundTube products must be installed by a professional audio installer/contractor. For safety and for
optimum audio performance, installer must follow all directions issued by SoundTube Entertainment.
Install Instructions For:
Euroblock power connections
Without external trigger
With external trigger (12-15 V)
SA202 and SA202-RDT
Amplifier enclosure
Euroblock connector
Faceplate
Faceplate screws (4)
Mounting bracket
High-level input
wiring harness
Volume control
High-level
(amplified) audio input
12 - 15 VDC
Euroblock power input
Euroblock speaker output
12 - 15 VDC
Barrel connection
Mini jack
RCA jack
Front
Rear
High-pass filter
7. The SA202 can be
powered either by the
hard-wired Euroblock
connector (see diagram below)
or via barrel connector. The
SA202-RDT includes a power
supply which attaches to the
barrel connector.
12 - 15 VDC
Euroblock power input
12 - 15 VDC
Barrel connection
GND
REM
+ V
If the amp is being run without
using the external trigger, simply
connect the positive lead from the
power supply to
both the + V
input and the remote (REM) input.
If the amp is being run using the
external trigger, connect the
power to the ground and + V
input, and run the trigger wire
from the outside source into the
remote (REM) input.
_
+
+
GND
_
+
4. To attach mounting
bracket, remove all
faceplate screws. Lift
faceplate and set aside.
6. Replace faceplate and
screws.
5. Slide mounting bracket
into groove on bottom of
amplifer enclosure.
11. Adjust volume with dial
on front of amplifier.
12. Done!
10. Use high-pass filter to
remove low-end frequencies
and increase intelligibility
when using small speakers.
REM
+ V
Box Contents
1 Amplifier
1 Four-pin Euroblock connector
1 Three-pin Euroblock connector
1 High-level input wiring harness
1 Mounting bracket
2 Mounting screws
Trigger
9b. If using the high-level
(amplified) inputs, wire the
source leads to the high-level
input wiring harness as
shown and insert the terminal
block into the high-power
input on the back of the
amplifier.