Spohn D03-DFSK1 User Manual
Page 2
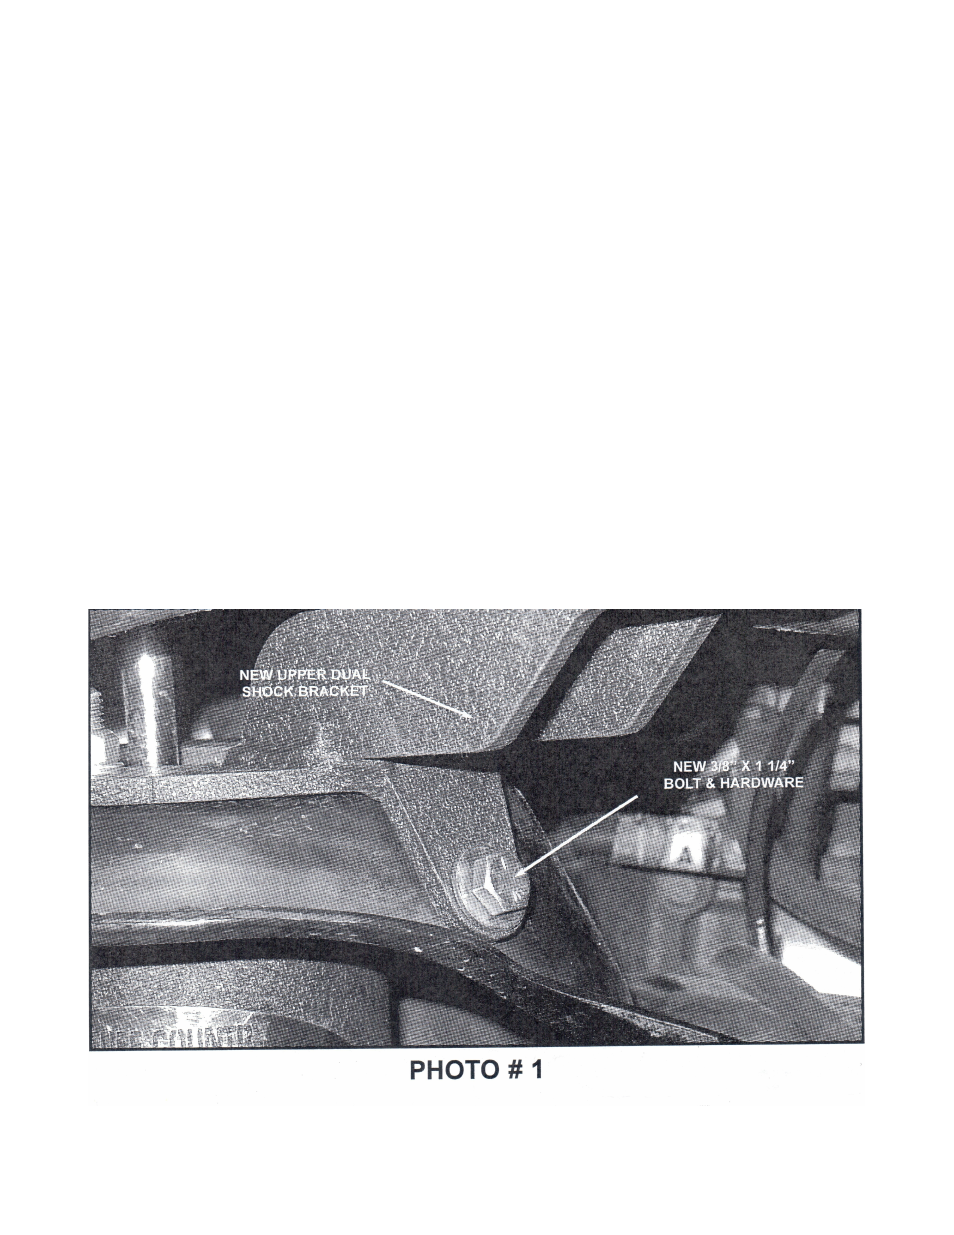
9.
Locate the driver's and passenger's side lower shock mounting brackets. Working on the driver's side,
remove the bolt that is holding the upper control arm into the stock location. Save the hardware for
later re-installation. Install the new driver's side lower shock mounting bracket to the outside of the
stock upper control arm pocket. Secure using the hardware that was removed earlier in this step.
Make sure to use Loctite. Make sure that the new lower shock mounting bracket is flush with the
outside of the stock upper control arm pocket and torque to 95 ft./lbs. Repeat the procedure on the
passenger's side. See Photo 2 Below (Driver's Side Shown).
10.
Working on the driver's side, using the new lower shock mounting bracket as a guide, carefully drill a
1/2” hole into the stock upper control arm pocket. Repeat procedure on the passenger's side.
11. Locate (2) 1/2” x 3” long bolts, (2) 1/2” flat washers and (2) 1/2” flanged head lock nuts from the
hardware bag. Also, locate your new auxiliary shocks. Working on the driver's side, install the new
auxiliary shock to the new upper dual shock mounting bracket that was installed earlier. Secure using
the new 1/2” x 3” long bolts and hardware. Put the flat washer underneath the bolt head. Make sure
to use Loctite. Do not tighten at this point. Repeat procedure on the passenger's side. See Photo 3
Below (Driver's Side Shown).
12. Locate (2) 1/2” x 3.5” long bolts, (2) 1/2” flat washers and (2) 1/2” flanged head lock nuts from the
hardware bag. Secure the lower shock eyelet to the previously installed lower shock mounting
bracket using the 1/2” x 3.5” long bolts and hardware. These are a tight fit and it may be necessary
to grease the outside of the lower shock bushings and the inside of the lower shock mounting
bracket. Place the flat washer underneath the bolt head. Make sure to use Loctite. Repeat
procedure on the passenger's side. Then on both the driver's and passenger's side, torque all of the
new hardware to 85 ft./lbs. See Photo 4 Below (Driver's Side Shown).
13. Carefully remove both hydraulic floor jacks from under the front axle. Install the tires and wheels on
both sides and carefully lower the truck to the ground.
14. Re-install the front sway bar end links and fully tighten. Installation is complete!