Wall mounting brackets, Attaching upper and lower wall mounting brackets, Upper bracket – Stix & Drums STX 6600 User Manual
Page 5: Fig. 1 down-angle adjustment, Lower bracket
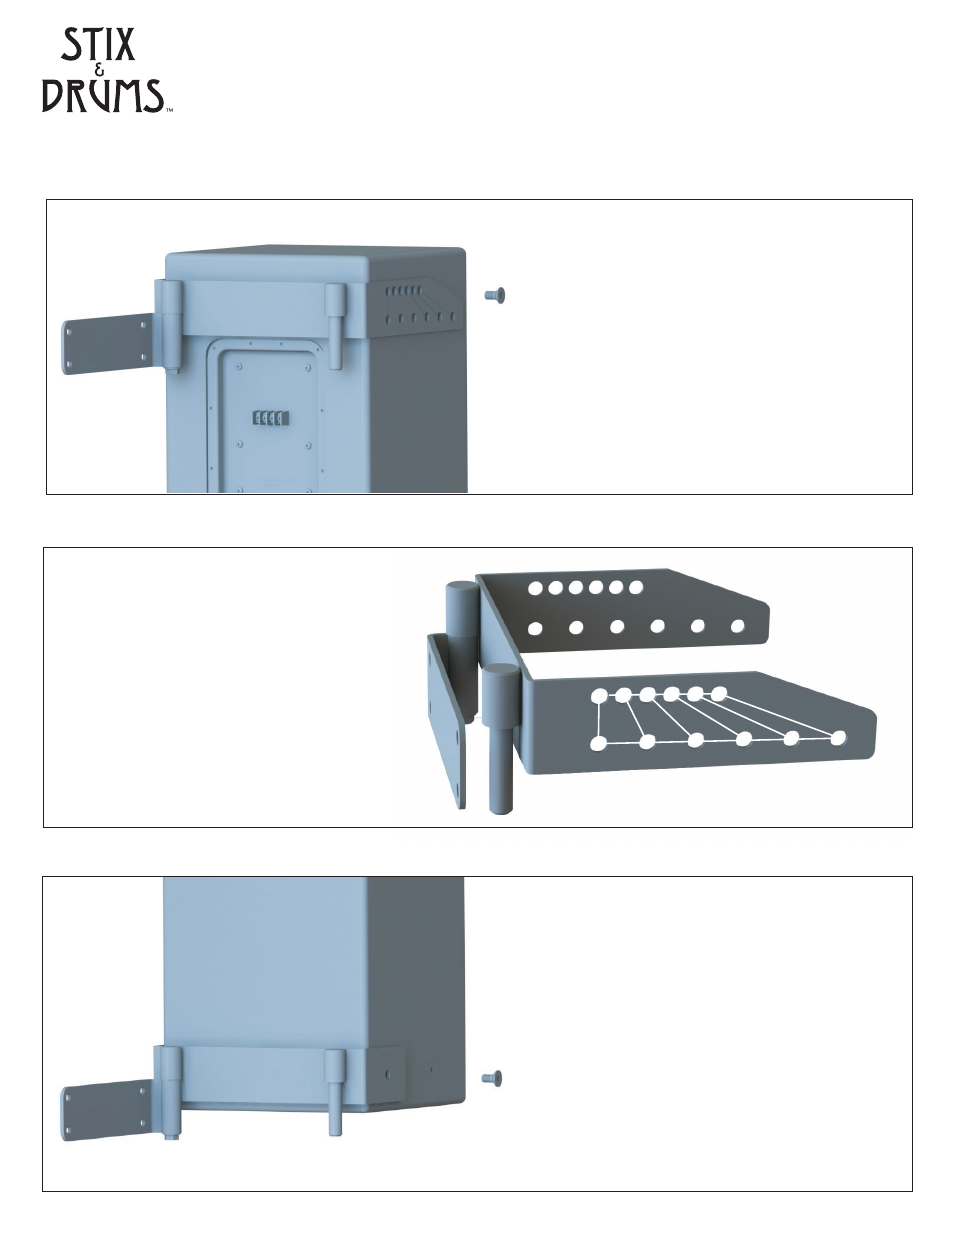
Attaching Upper and Lower Wall Mounting Brackets
Upper Bracket
Install the upper bracket to the STX6600 by first
removing the top rear M10 flathead screws from
the enclosure, then place the upper bracket in the
predetermined down angle position (see Fig.1),
insert the supplied M10 button head screws
through the appropriate hole in the bracket and
secure the screws.
BOX 2
BOX 3
0 0.5 1.0 1.5 2.0 2.5
Fig. 1
Down-angle Adjustment
Upper holes labeled “BOX 2”
are for down-angle adjustment of
0 - 2.5 degrees for a column stack
of two (2) STX6600
Lower holes labeled “BOX 3”
are for down-angle adjustment of
0 - 2.5 degrees for a column stack
of three (3) STX6600
Install the bottom bracket to the STX6600 by
removing the bottom rear M10 flathead screws,
then place the bottom bracket in position as
shown, insert the supplied M10 button head
screws through the bracket and tighten.
If the column will have any down angle, the
screws should not be tightened completely
as they are the pivot point for rotation.
Once the column has been mounted and
adjusted for angle, you can then tighten
the pivot screws.
Lower Bracket